



Contents: Removal 🠛 Installation 🠛
Removal
- Removal and installation are carried out on a two- or four-post lift, without removing:
- front subframe;
- bumpers;
- front body panel;
- a set of cooling system elements.
- Place the vehicle on a two-post lift equipped with wheel chocks.
- Disconnect the wires from the battery terminals and remove the battery.
- Drain the oil from the engine and gearbox, then reinstall the drain plugs using new O-rings.
- Remove:
- protective shields under the doer;
- protective wheel arch shields.
- Remove the oil cooler by disconnecting it from the engine cooling system radiator.
- Disconnect the oil cooler hose mounting bracket near the oil filter (replace sealing gaskets during installation).
- Install a self-made protective screen for the engine cooling system radiator (Fig. 3.39).
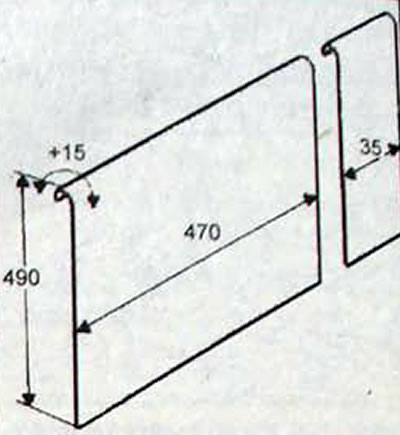
Fig. 3.39. Dimensions of the protective screen of the cooling system radiator
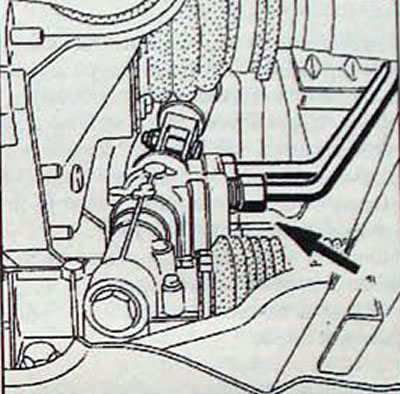
Fig. 3.40. Location of the hose through which the fluid must be drained from the power steering
- Drain the fluid from the engine cooling system by unscrewing the threaded plug on the cylinder block (fig. 3.76).
- Use the charging station to discharge the refrigerant from the air conditioning system circuit.
- Drain the fluid from the power steering system by disconnecting the left hose from the heat exchanger under the vehicle.
- Disconnect the high pressure hose (lower hose) power steering from the steering gear housing (device Dir. 1282-01).
- Remove the thrust rod completely.
- Remove:
- intake pipe of the exhaust gas system;
- rigid plastic inlet pipe of air-to-air heat exchanger;
- clamp for fastening the air intake pipe to the side member
- Disconnect the lower hose from the engine cooling system radiator, while not allowing coolant to come into contact with the ABS unit
- Remove the drive shafts as follows.
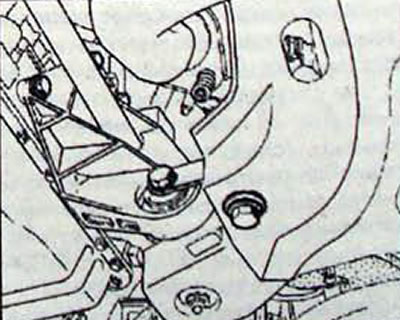
Fig. 3.41. Location of the engine mount thrust
On the right side of the car
- Remove the front right floating brake caliper bracket and secure it to the suspension spring to protect the brake hose from damage (fig. 3.26).
- Remove the two bolts securing the intermediate support of the drive shaft in the support bearing (fig. 3.27).
- Using the Tav. 476 puller, remove the steering rod end (fig. 3.28).
- Disconnect the wire from the brake pad wear sensor.
- Disconnect the wire from the wheel speed sensor.
- Loosen the lower mounting bolts of the shock absorber strut to the steering knuckle.
- Remove the wheel speed sensor if the vehicle is equipped with ABS.
- Loosen the lower ball joint pin nut as much as possible and use a ball joint impact remover to press the joint out of the steering knuckle (fig. 3.29).
- Remove the drive shaft - steering knuckle - brake disc assembly. Do not damage the drive shaft corrugated boots.
On the left side of the car
- Remove the brake caliper floating bracket and secure it to the suspension spring.
- Remove the three bolts securing the drive shaft corrugated boot (fig. 3.34).
- Using the Tav. 476 puller, remove the steering rod end.
- Disconnect the wire from the brake pad wear sensor.
- Remove the wheel speed sensor.
- Remove the bolts that secure the lower shock absorber strut to the steering knuckle.
- Disconnect the steering rod ends and lower ball joints from the steering knuckles.
- Remove the drive shaft - steering knuckle - brake disc assembly.
- Disconnect the ground bus from the gearbox.
- Disconnect the speedometer sensor from the rear of the transmission.
- Disconnect and remove the gear shift control cable in sequence.
- Remove 2 bolts and disconnect the clutch slave cylinder from the gearbox.
- Lower the car.
- Remove:
- air intake pipe fixed to the front panel of the body;
- a rubber tube between the air-to-air heat exchanger and the intake manifold;
- plastic pipe between turbocharger and heat exchanger;
- a rubber tube between the turbocharger and the heat exchanger;
- air filter;
- air filter bracket;
- aluminum air filter bracket supports.
- Remove the intermediate air intake pipe from the side member.
- Disconnect the brake booster vacuum hose.
- Disconnect the tubes from the EGR solenoid valve.
- Remove the gear shift control cable.
- Disconnect the interior heating system radiator hoses.
- Open the engine compartment junction box cover, disconnect the relay and engine compartment wiring harness connectors.
- Disconnect the upper radiator hose from the engine cooling system.
On the right side of the car
- Disconnect the injection system control unit from the right wing.
- To enable removal of the injection system control unit, remove the air conditioning system hose fastening on the fuel filter.
- Cut the 2 plastic cable ties securing the wiring harness to the shock absorber support cup.
- Disconnect the fuel heater.
- Disconnect the fuel line from the injection pump
- Disconnect the fuel return line from the reservoir on the shock absorber support cup.
- Pass the injection system control unit under the air conditioning hoses and secure it to the engine.
- Raise the car
- Install a universal support and lift the engine up until it is free (do it together).
- Remove the right engine swingarm mount bracket (4 bolts) together with the swingarm mount travel limiter.
- Unscrew the lower nut of the left pendulum suspension (1 bolt).
- Lower the power unit (do it together).
- The engine is removed through the bottom of the engine compartment.
- When removing the power unit, pay attention to the following:
- power steering pump, which runs close to the engine cooling system radiator;
- a crankcase gas sump that can come into contact with the engine subframe;
- remove the exhaust pipe and simultaneously move the power unit slightly to the left in the direction of the vehicle.
Installation
- Installation is carried out in the reverse order of removal.
- Using tool Mot 1289-02, adjust the position of the right engine pendulum mount travel limiter
- Do it
- pouring oil into the gearbox,
- filling the engine with oil;
- filling the power steering system,
- filling and removing air from the engine cooling system;
- filling the air conditioning system.
- Adjust the accelerator cable.
- Tighten the spring-loaded bolts of the exhaust system intake pipe flange clamps. Tighten the bolts until they stop.
- Press the brake pedal several times until the pistons of the working brake cylinders come into contact with the brake pads.
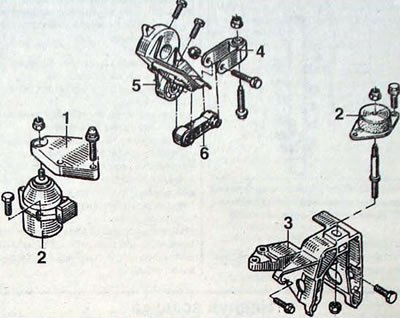
Fig. 3.42. Engine/gearbox suspension elements: 1 - bracket of elastic cushion of front right pendulum suspension; 2 - elastic cushion of the front right pendulum suspension; 3 - left pendulum suspension bracket of the gearbox; 4 - thrust bracket; 5 - rear engine mount bracket; 6 - jet thrust
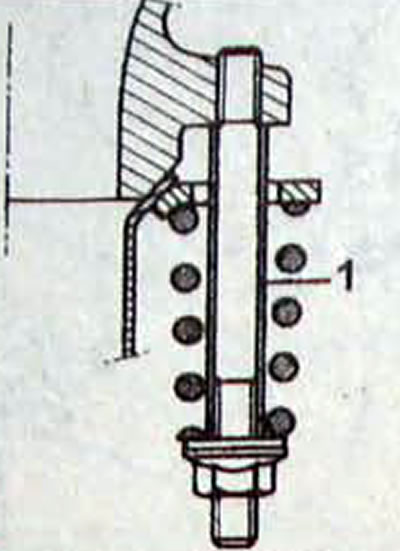
Fig. 3.43. Bolt (1) of the clamp for fastening the flanges of the exhaust system inlet pipe
[Article reprinted from the website: renaultbook.ru]