



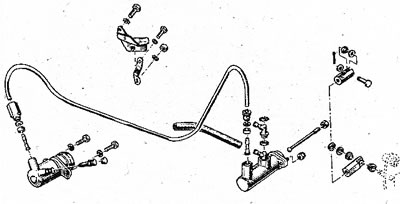
6.1 Hydraulic Clutch Components for V6 Engine Models
2. The clutch pedal drives the master cylinder, which in turn drives the slave cylinder through the pressure device.
Clutch master cylinder
3. To access the master cylinder, remove the right front wheel.
4. Partially empty the reservoir of fluid using a rubber bulb or open one of the bleed nipples of the disc brake caliper. Put the hose on the bleed nipple (place the other end of the hose in a container), have your assistant press the brake pedal and remove the bolt while the pedal is pressed to the floor. Before releasing the pedal, tighten the bolt again. This will prevent air from entering the hydraulic system.
5. Disconnect the push rod from the clutch pedal, remove both cylinder bolts and pull the cylinder out towards the wheel well. The hose and connections can remain connected for now, but be careful not to bend the metal connections. Remember to install the two O-rings on the cylinder mounting flange.
Warning: Brake fluid is poisonous and will corrode paintwork if it comes into contact with it.
6. Loosen the hose clamp and remove the hose from the cylinder joint. Collect the leaking fluid. Unscrew the cap nut and remove the pressure tube. Seal the ends of the hose and joints properly.
7. Install in reverse order. Connect the hose before installing the cylinder in the proper position.
8. After installation, bleed the system and adjust the pedal clearance as described below.
Clutch pedal clearance (v6 engine)
9. After installing the cylinder or if there is no gap in the upper part of the clutch pedal, install the clutch release lever connected to the slave cylinder pusher and move it (see illustration). The stroke should be 11 mm.
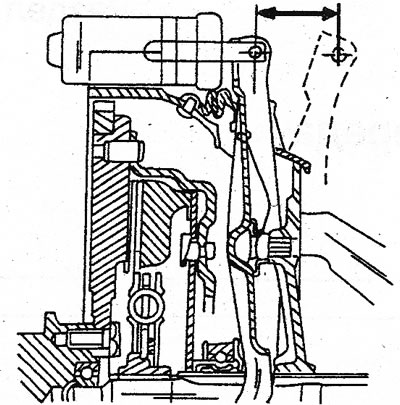
6.9 The free play of the clutch release lever is measured on the section between the arrows
10. The clearance is set by adjusting the length of the master cylinder push rod. At the end of the push rod, the clearance should be 0 - 1 mm (see illustration). It cannot be measured, it must be felt. If the clearance is accurate, the working stroke of the clutch release lever will be established, as shown in Figure 6.9.
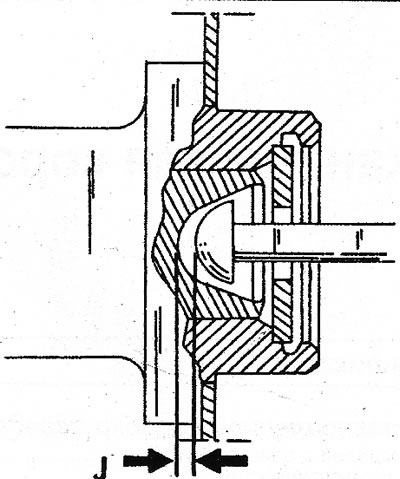
6.10 The gap between the arrows must correspond to the value specified in the text; to check, grasp the push rod with your fingers and move it.
Note: After bleeding the clutch system, add fluid to the reservoir.
Clutch slave cylinder
11. The illustration shows the cylinder in its working position. Two connections to the cylinder are visible, i.e. the hydraulic line (1) and the air bleed hose (2).
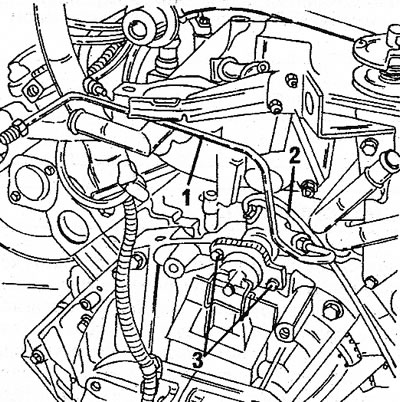
6.11 Clutch slave cylinder 1. Hydraulic pipeline; 2. Air duct; 3. Mounting bolts
To remove the cylinder, partially drain the brake fluid (as described for removing the master cylinder) and remove both connections from the slave cylinder.
Original version on our portal: www.RenaultBook.ru
12. Remove the bolts securing the cylinder to the gearbox and remove the cylinder.
13. Install in the reverse order. Finally, bleed the hydraulic system and check the clearance of the clutch release lever. If necessary, install the master cylinder push rod as described above.