
Release bearing
1. The release bearing can be removed and installed only after removing the gearbox. To do this, remove the clutch release fork and remove the bearing (see illustration).
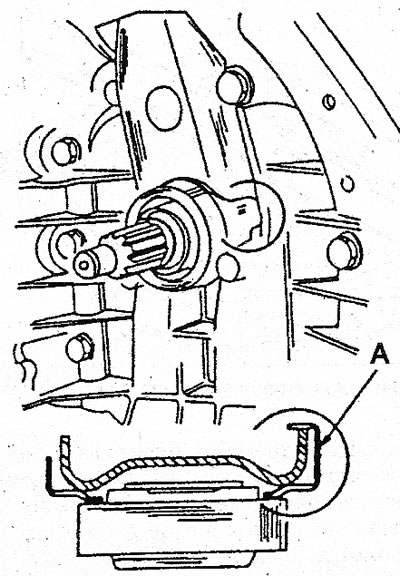
4.1 Clutch release fork in working position; section A shows the correct installation of the fork spring clip
2. Apply a small amount of graphite grease to the clutch release bearing bushing and fork pins. Slide the bearing onto the sleeve and clip clip A onto the yoke (see illustration 4.1).
Clutch release fork
3. To replace the clutch release fork, remove the gearbox. In a 4-cylinder engine gearbox, locking pins are used to fasten the clutch release fork to the shaft. The clutch release fork of the V6 engine is secured with a non-removable ball head bolt.
4. When removing the clutch release fork (4 cylinder engine) drive out both locking pins. It is not so easy to do this. Move the fork as far as possible and knock out the pins. In workshops, a beveled punch is used for this (see illustration). You can use a similar punch. Then remove the clutch release shaft from the transmission.
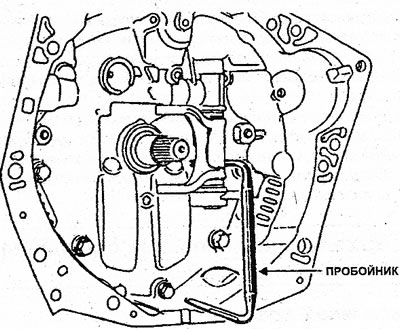
4.4 Remove the clutch release fork (gearbox type «NG»)
5. When installing, lubricate the shaft with graphite grease and slide it into the gearbox together with the rubber seal.
6. Align the holes in the release fork and the release shaft and drive in new locking pins. The lock pin holes are in the right corner of the clutch release fork shaft and vice versa.
7. To remove the clutch release fork on the gearbox with a V6 engine, the gearbox must also be removed. Remove the rubber boot and slide the yoke to the outside of the gearbox to release it from the spherical seat. Apply alignment marks and remove the plug.
8. Lubricate the fork with graphite grease and reinstall. At the same time, pay attention to the position of the spring and the insert (see illustration). Spring 1 is behind cover 2.
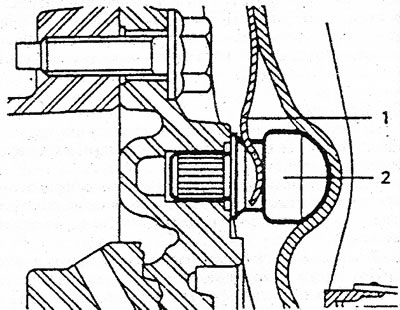
4.8 Clutch release fork on gearbox type «UN»; installation method of spring 1 and cover 2