
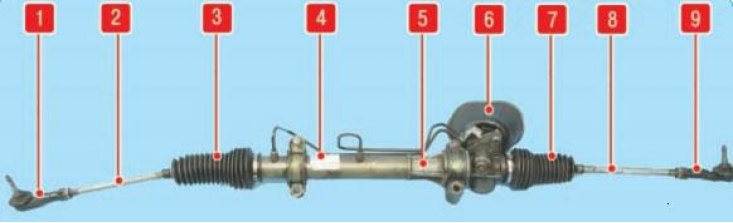
Steering gear: 1 - the tip of the right steering rod; 2 - right steering rod; 3, 7 - protective covers; 4 - extension of the crankcase of the steering mechanism; 5 - steering gear housing; b - gear shaft; 8 - left steering rod; 9 - left tie rod end
Special tool:
- Hose pliers - Mot. 453-01
- Ball joint puller - T.Av. 476
Tightening torques:
- Wheel bolt - 90 Nm
- Ball joint nut - 37 Nm
- Steering gear nut - 50 Nm
- Steering shaft universal joint bolt - 25 Nm
- Tie rod bolt - 65 Nm
Removing the steering gear
On models with airbags, disconnect and connect the steering shaft from the steering gear only when the steering wheel is in the straight ahead position and the steering gear is in the center position. Otherwise, the current collector of the airbag unit may be damaged.
- put the car on a lift;
- Disconnect the lead from the negative terminal of the battery;
- set the steering wheel to the straight ahead position and lock it;
- remove the front wheels;
- install clips (or special pliers Mot. 453-01) to all hoses coming from the reserve tank of the amplifier with working fluid to reduce fluid loss;
Attention! Never pinch high pressure lines.
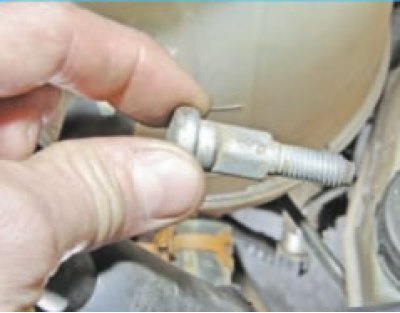
- Turn away nuts of fastening of spherical support of tips of steering draughts. Disconnect the rods from the steering knuckles using a universal puller by pressing out the pins of the ball joints of the steering rods from the steering knuckles;
 | 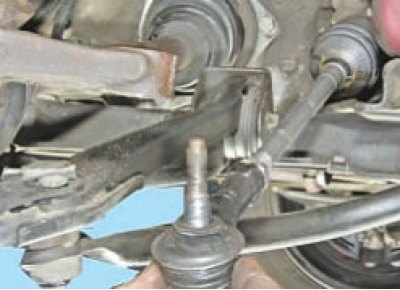 |
Note. In the absence of a special puller, the ball joint pin can be knocked out with sharp hammer blows on the end face of the pivot arm boss, striking along the axis of the lever.
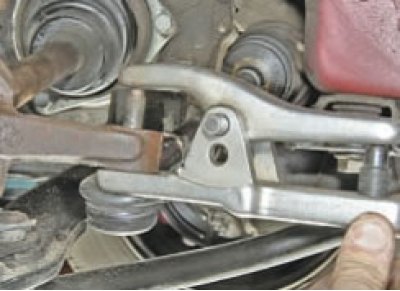
- under the car, bend the cover that covers the steering shaft lower cardan joint assembly, and unscrew the eccentric bolt of the clamp of the universal joint cross;
 |  |
- mark in an accessible way the relative position of the clamp and the shaft;
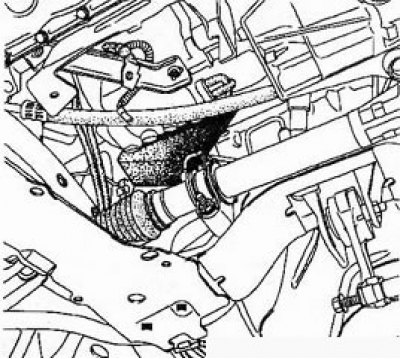
- disconnect the connector of the oxygen concentration sensor in the exhaust gases;
- remove a reception pipe of system of release of the fulfilled gases;
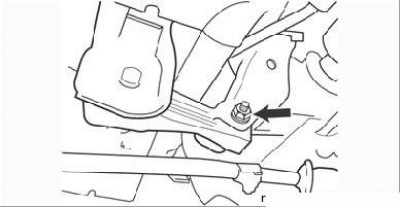
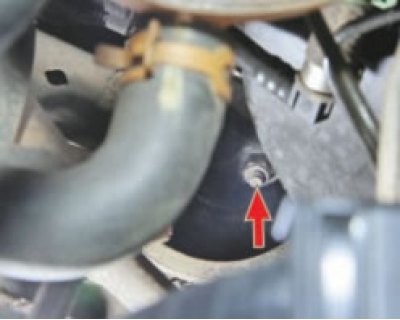
Figure 6.4. Engine tie rod bolt
- remove the engine mount tie rod bolt (Figure 6.4) and tilt the power unit forward by inserting a wooden block between the engine and the motor shield;
- Disconnect the low and high pressure lines from the steering box (taking measures to collect the flowing working fluid) and unscrew the nut securing the pipe bracket. Plug the openings to prevent dirt from entering the system;
 | 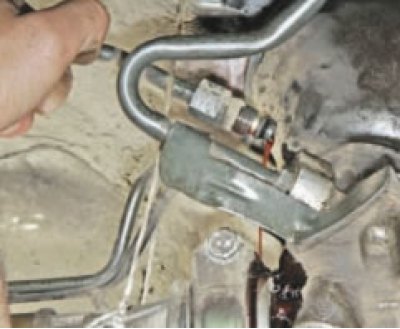 |
Attention! Do not remove the pipelines connecting the distributor to the power cylinder.
Note:
- Do not remove the steering tube between the valve and cylinder.
- Install plugs on open fittings.
- unscrew the two nuts securing the heat shield of the right steering gear housing support;
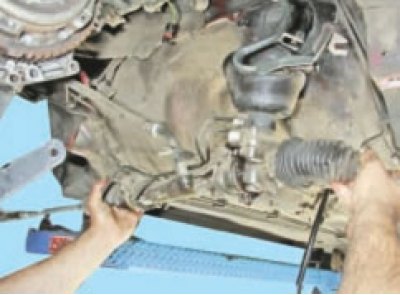
- unscrew the four nuts and remove the bolts securing the steering gear to the rear of the subframe. Remove the clamps and mounting brackets on both sides of the steering mechanism;
- remove the steering mechanism from under the car;
- check the condition of the steering mechanism by visual inspection. Replace damaged and worn mechanism bearings as necessary. The rail should move freely, without jamming, in the body throughout its entire course; if there is such damage, replace the entire mechanism. Covers should not have cracks and ruptures, leakage of the working fluid is not allowed.
Installation is carried out in the reverse order of removal, observing the specified tightening torques.
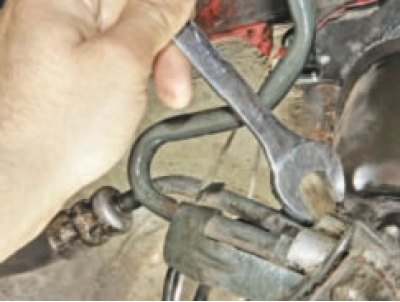
Fill the power steering system with working fluid. Turn the wheels left and right (with the engine off), to disperse the working fluid throughout the system. Repeat the operation with the engine running, and then add fluid to the reservoir to the normal level. When installing a new steering gear, the ball joints of the tie rod ends are set to the position marked during removal. To do this, remove the toe-in bolt and tie rod end while holding the tie rod inner ball joint with a flat wrench. Mark the position of the tie-rod end ball joint or count the number of threads in engagement to pre-adjust the wheel alignment. Check and adjust wheel alignment if necessary.