
Note. Before removing any unit, disconnect the ground cable from the battery, and connect the wire after installing the unit.
Farah
1. Remove the bumper as described in Chapter Body.
2. Remove the front turn signal as described below in this Section.
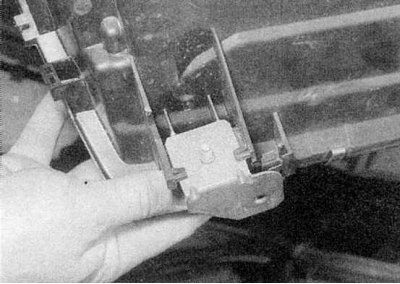
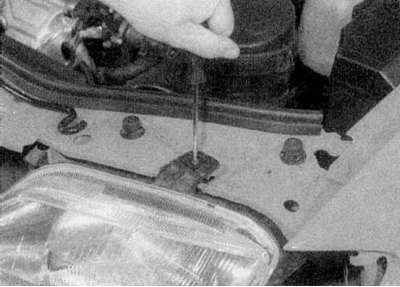
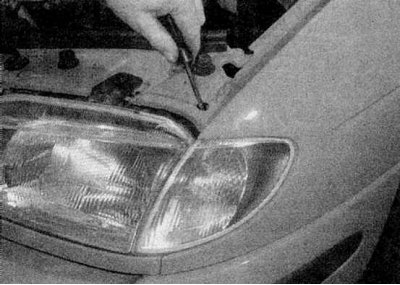
3. Open the hood, unscrew the fastening screw in the center of the grille and remove the fixing plate.
4. Loosen the mounting screws, then using a flathead screwdriver, release the lower mounting brackets and remove the corresponding grille half from the vehicle (refer to accompanying illustration).
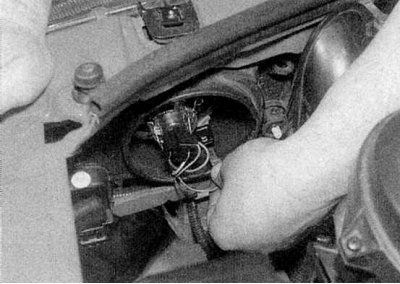
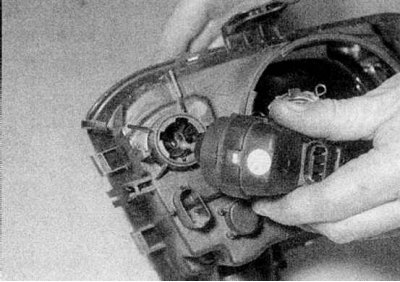
5. On headlights with a round cover, turn the cover counterclockwise and remove it from the rear of the lamp assembly. Disconnect the electrical connectors and pull the wiring harness from the lamp unit (refer to accompanying illustration).
6. On headlights with a rectangular cover, press the mounting bracket and disconnect the electrical wiring connector from the back of the headlight assembly.
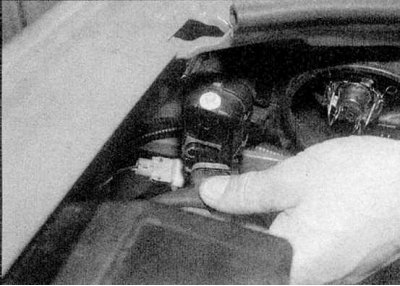
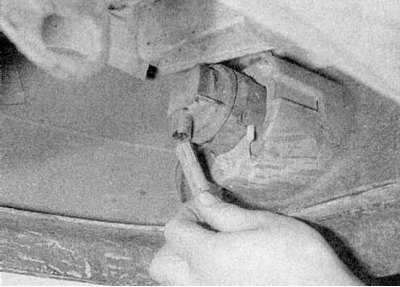
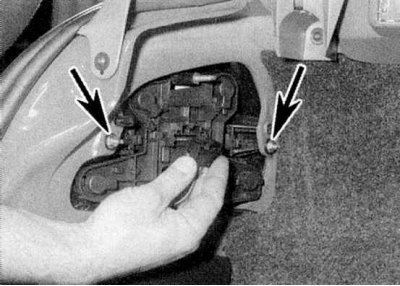
7. On models equipped with a headlight adjustment system, disconnect the electrical wiring connector from the motor (refer to accompanying illustration).

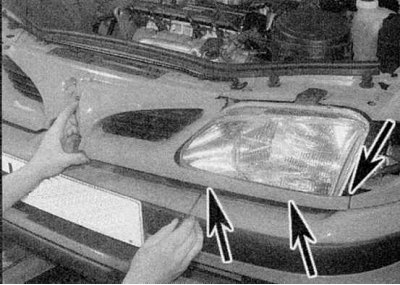
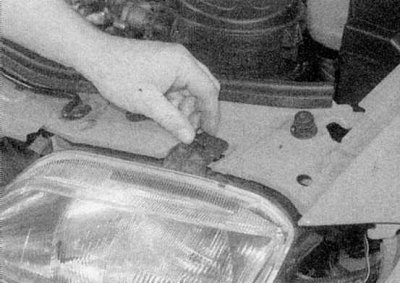
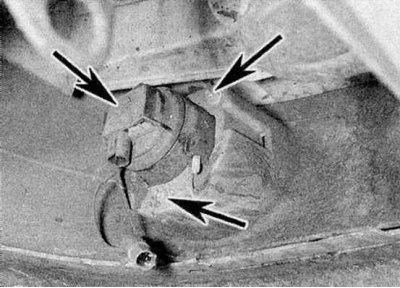
8a. Remove the bolts securing the lower headlamp mounting brackets to the body.
8b. Remove the upper mounting screw and bracket.
8c. Pull the lamp assembly forward.
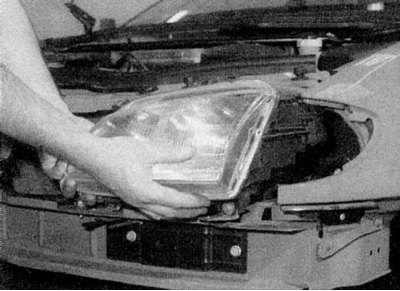
8d. Take it off the car (refer to illustrations).
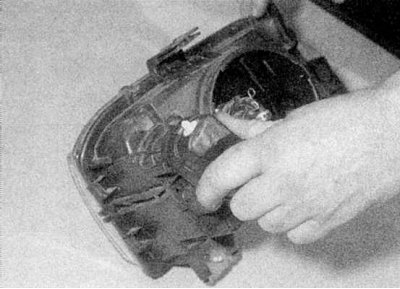
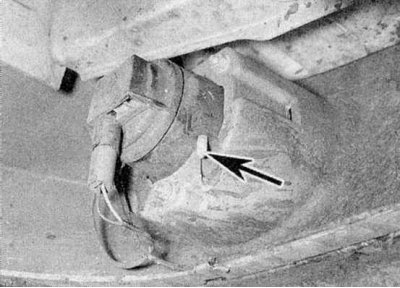
9a. On models equipped with a headlight adjustment system, if necessary, turn the motor counterclockwise (refer to illustrations).
9b. Remove the motor from the back of the block.
10. Installation is carried out in the reverse order. Finally, adjust the direction of the optical axis of the headlights.
Anti-fog headlight
Hatchback, sedan and Scanic models
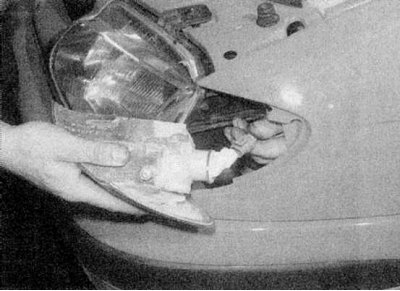
1. Detach the inner cover from the side of the fog lamp to access the mounting screws.
2. Turn away fixing screws of a fog lamp and take the block from a bumper. Disconnect electrical connectors.
3. Install in reverse order.
Coupe models
1. For easier access, apply the handbrake, then jack up the front of the vehicle and place it on axle stands.
2a. Disconnect the electrical connector.
2b. Unscrew the fixing nuts and remove the lamp assembly from the bumper (refer to illustrations).
3. Install in reverse order. If necessary, adjust the direction of the optical axis of the fog lamp light by turning the knob on the back of the lamp unit (refer to accompanying illustration).
Front turn signal
1a. Loosen the turn signal screw a few turns.
1b. Pull the lamp unit forward and disconnect the wiring connector (refer to illustrations).
2. Install in reverse order.
Front side turn signal
1. Carefully detach the canopy assembly and remove it from the fender. Release the lamp holder by turning it counterclockwise, then remove the lamp from the vehicle.
2. Install in reverse order.
Rear light unit
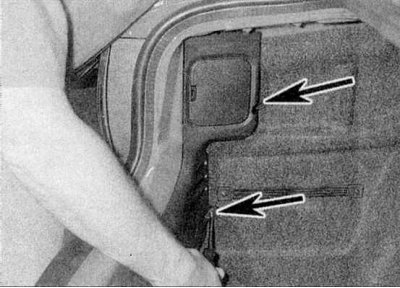
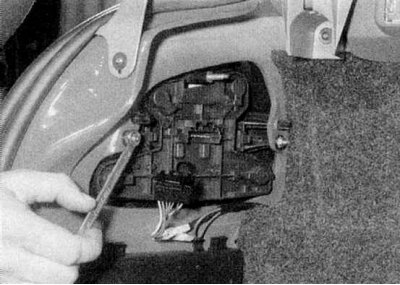
1. On Hatchback and Coupe models, working in the luggage compartment, unscrew the top fixing nut and remove the cover from the back of the lamp unit. On Scenic models, the cover is located inside the wheel arch liner trim panel. To improve access, on Sedan models, unscrew the mounting screws, and detach the trim (refer to accompanying illustration).
2a. Disconnect the electrical connector.
2b. Then unscrew the fixing nuts and remove the lamp unit from the rear of the car (refer to illustrations).
3. Install in reverse order.
Rear light installed in the trunk lid
Coupe and sedan models
1. Open the trunk lid, then detach the lid to access the rear of the light.
2. Disconnect the wiring connector, then unscrew the fixing nuts and remove the lamp unit.
3. Install in reverse order.
Scenic Models
1. Open the rear door and remove the four bolts securing the rear door trim panel. Release the mounting brackets and carefully remove the tailgate trim panel.
2. Remove the two rear fog light bulb holders.
3. Remove the seven nuts securing the light housing to the tailgate.
4. Carefully release the housing mounting brackets, then remove it from the rear door and disconnect the electrical wiring connectors.
5. Install in reverse order.
Additional brake light
Hatchback models
1. Press the mounting brackets and remove the cover from the back of the light assembly.
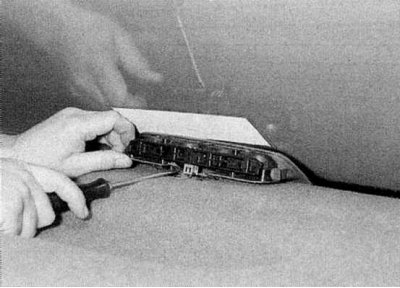
2a. Disconnect the electrical connector.
2b. Release the mounting brackets and slide the lamp off the bracket (refer to illustrations).
3. Install in reverse order.
Coupe models
1. Open the trunk lid and disconnect the wiring connector from the back of the lamp unit.
2. Carefully release the mounting brackets and remove the lamp unit from the trunk lid.
3. Install in reverse order.
Sedan models
1. Press the mounting brackets and remove the cover from the back of the light assembly.
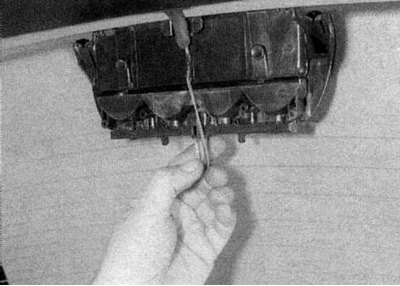
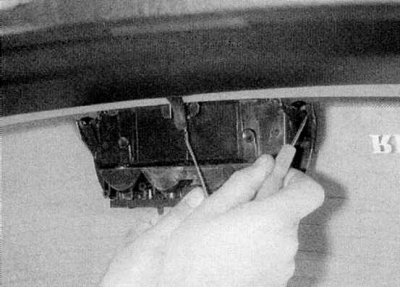
2a. Using a screwdriver, carefully pry up the bottom mounting brackets.
2b. Slide the lamp unit forward and disconnect the electrical wiring connector (refer to illustrations).
3. Install in reverse order.
Scenic Models
1. On Scenic models, open the tailgate and remove the two plugs in the holes behind the light assembly. Insert a screwdriver into each hole, release the lamp unit from the brackets. Remove the light assembly from the outside of the tailgate.
2. Release the mounting brackets and remove the lamp holder from the back of the lamp assembly.
3. Installation is carried out in the reverse order.
License plate light
1. Using a screwdriver, carefully remove the light assembly from the rear door that opens up and disconnect the electrical wiring connector.
2. When installing, connect the electrical connector and press the lamp assembly into place.