



Removal and installation the front left drive shaft
Removal the drive shaft
Attention:
- To avoid permanent damage to the front hub bearing:
- Do not loosen or tighten the drive shaft nut when the vehicle wheels are on the ground.
- Do not place the vehicle body on the ground with the drive shaft in a difficult or removed position.
1. Place the vehicle on a two-post lift.
2. Remove the front left wheel from the vehicle.
3. Loosen the mounting bolts and remove the engine protective pan.
4. Drain the oil from the gearbox.
5. Disconnect the front left brake hose from the shock absorber base.
6. Disconnect the left front wheel speed sensor.
7. Loosen the drive shaft nut.
8. Unscrew the tie rod end nut.
9. Press the front left drive shaft out of the steering knuckle using a universal grip (Tav. 1050-04) (3) and screw puller (Tav.1420, Tav.1050-04, Tar. 1454, Tar. 1850. (Tav. 1420-01)) (4).
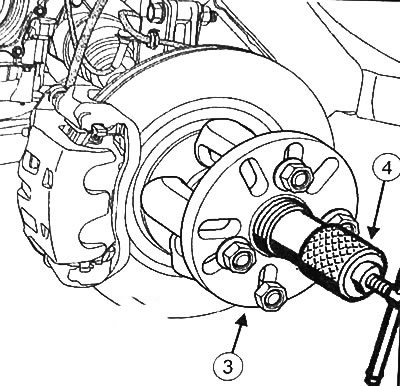
10. Using a ball joint puller (Tav. 476), disconnect the steering rod end.
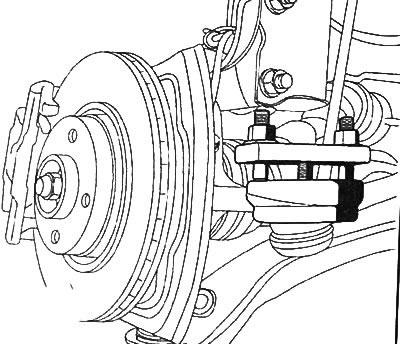
11. Loosen the bolts at the base of the shock absorber.
12. Tilt the steering knuckle (6) and remove the left drive shaft (5) from it.
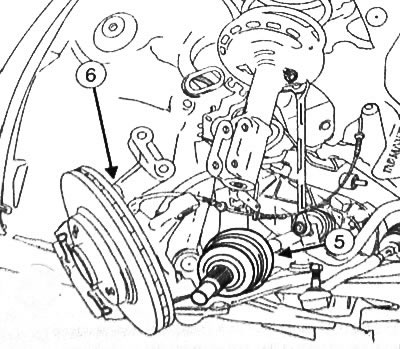
13. Loosen the bolts (8) of the drive shaft boot.
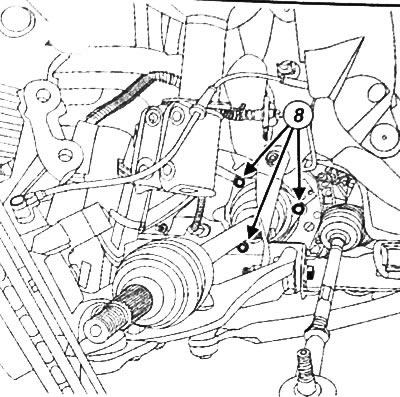
14. Remove the left front drive shaft from the gearbox.
Installing the drive shaft
1. Place and insert the drive shaft into the tripod sun gear.
2. Insert the drive shaft boot bolts into the gearbox.
3. Tighten the drive shaft boot mounting bolts to 21 Nm.
4. Insert the front left drive shaft into the steering knuckle.
5. Install the bolts into the shock absorber base.
6. Install the tie rod end nut.
7. Install the drive shaft nut.
8. Insert the left brake hose into the shock absorber base mount.
9. Install the left front wheel speed sensor.
10. Further installation is carried out in the reverse order of removal.
11. Fill the gearbox with oil.