
Removal and installation of the throttle valve
Removing the throttle
1 Disconnect the negative battery terminal.
2. Remove the air filter unit.
3. Disconnect the throttle connector.
4. Loosen the throttle valve mounting bolts (1).
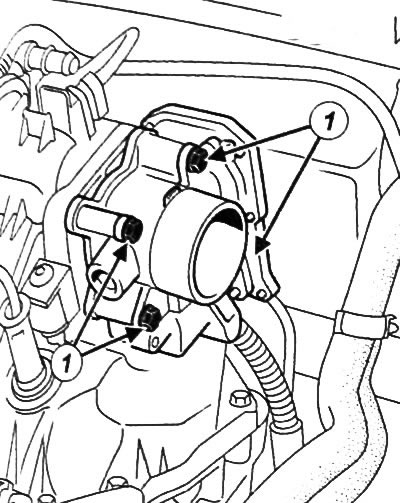
5. Remove throttle valve with gasket.
Throttle cleaning
Attention:
- Wear leak-resistant nitrile gloves.
- Be sure to wear safety goggles and a respirator.
- Keep the workplace clean and prevent dirt from getting into the throttle valve.
1. Remove the throttle from the engine.
2. Remove the seals from the throttle valve.
Note: Cleaners can damage the seals and must be removed from the choke bar.
3. Manually fully open the throttle.
Note: Do not spray cleaning agents on the outside of the cylinders, inside the spring housing or on the connector.
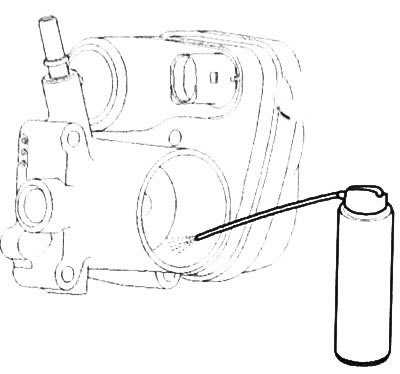
4. Spray carburetor cleaner into the throttle body air hole to dissolve all traces of contaminants.
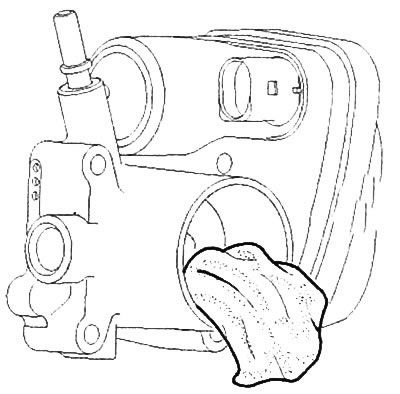
5. Remove cleaning agent residue and dirt with a lint-free cloth.
6. Use compressed air to blow off the edges of the throttle valve and the air hole.
Attention: If the throttle valve has been dropped or hit, it must be replaced with a new one.
7. Install new seals on the throttle valve.
8. Install the throttle valve on the engine.
Throttle valve installation
Note: Replace the throttle body gasket with a new one after each removal.
1. Using a cleaning agent, clean and degrease the gasket mounting surface on the intake manifold as well as on the throttle body (if it is reused).
Attention: To ensure the required tightness, the sealing surfaces must be clean, dry and free from grease (avoid any fingerprints).
2. Install the throttle body with a new gasket.
3. Tighten the throttle valve mounting bolts to 9 Nm
4. Connect the throttle connector.
5. Further installation is carried out in the reverse order of removal.
6. Using a scan tool, perform a Post-Repair Calibration and Initialization of the Fuel Injection Control Processor and Throttle Body.