
Removal and installation of a radiator
Attention:
When working in the engine compartment, precautions must be taken to avoid injury, as the engine cooling fan may start unexpectedly.
To avoid severe burns when the engine is hot, the following rules must be observed:
- do not open the cap of the expansion tank,
- do not drain fluid from the engine cooling system,
- do not open the vent caps.
Note: When working, you must be prepared for the leakage of liquid, so you need to prepare a drip tray to collect liquid and cover the surrounding components.
Removing the radiator
1. Place the vehicle on a two post lift.
2. Disconnect the negative battery terminal.
3. Unscrew the fastening bolts and remove the engine protective tray.
4. Remove the front bumper from the car.
5. Remove the radiator fan assembly.
Attention: To prevent atmospheric moisture from entering the air conditioning circuit, immediately plug any openings of the air conditioning system components. For this purpose, plugs for fuel lines can be used (part numbers 7 701 208 229 or 7 701 476 857). Plugs must be clean. Do not use plugs that have already been used to plug fuel lines.
6. Empty the air conditioning circuit using a refrigerant charging station.
7. Remove the air conditioning condenser.
8. Drain the engine coolant.
9. Using special pliers with remote grip (Mot.1448) Disconnect all hoses from radiator.
10. Remove the radiator of the engine cooling system through the bottom of the car.
Radiator installation
Installation is carried out in the reverse order of removal.
Charge the air conditioning system with refrigerant from a dedicated filling station.
Check the operation of the air conditioning system.
Fill and bleed the cooling system.
Check for leaks.
Removal and installation of an oil cooler (only versions with K9K diesel engines)
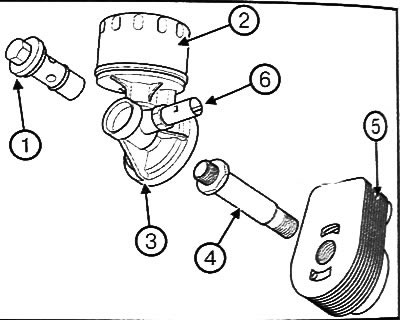
1. Oil filter bracket bolt. 2. Oil filter. 3. Oil filter holder. 4. Oil cooler bolt. 5. Oil cooler. 6. Oil pressure sensor.
Removing the oil cooler
1. Place the vehicle on a two post lift.
2. Loosen the mounting bolts and remove the protective tray.
3. Drain the coolant from the cooling system.
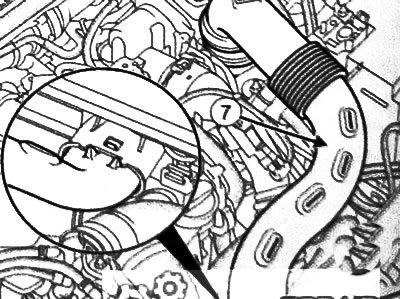
4. Remove intake duct (7) air filter and intercooler outlet pipe.
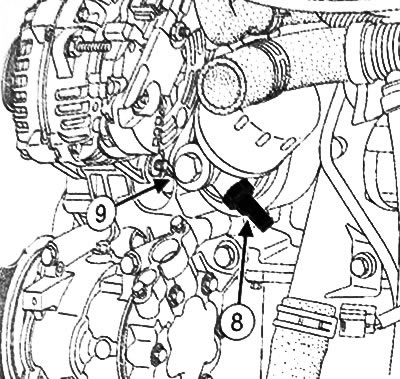
5. Disconnect the oil pressure sensor connector (8).
6. Place a drip pan under the engine on the oil filter side.
7. Loosen the bolt (9) and remove the oil filter support.
8. Remove gasket (10) from the oil filter support.
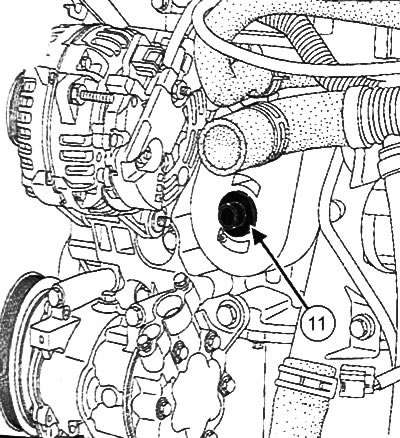
9. Remove the bolt (11) from the oil cooler.
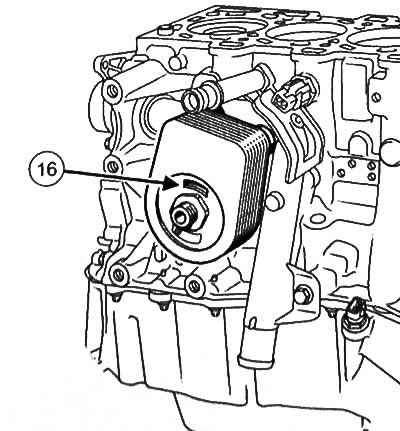
10. Remove the oil cooler from the engine
11. Use a clean cloth to remove oil and coolant from the cylinder block and oil filter support.
Oil cooler installation
Note:
Be sure to replace the gasket between the oil cooler and the cylinder block with a new one, as well as the oil filter seals.
1. Remove seals (12) oil cooler.
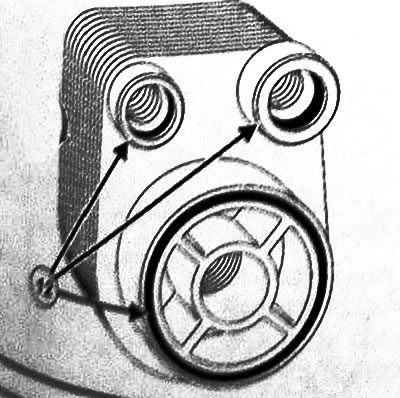
2. Clean and degrease the seal seats in the oil cooler with a cleaning agent (if it is reused), and all contact surfaces.
3. Install new seals (13) And (14) to the oil cooler.
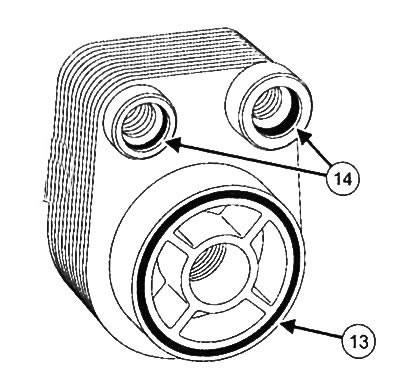
4. Apply soapy water to seals (14) where they come in contact with the water pump inlet.
5. Install the oil cooler.
6. Tighten the oil cooler bolt to 39 Nm.
7. Install a new gasket in the oil filter support housing.
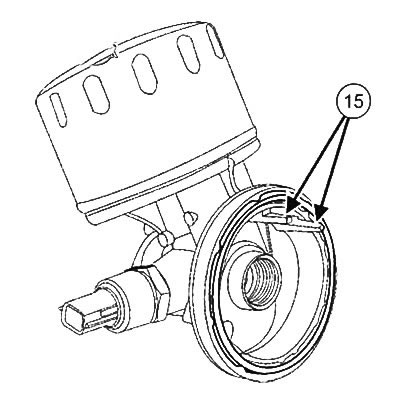
8. Install the oil filter support by placing the tabs (15) in holes (16) oil cooler.
9. Install the oil filter holder bolt and tighten to 28 Nm.
10.Connect the oil pressure sensor connector.
11. Install the intercooler outlet and air inlet.
12. Install the engine protection tray.
13. Fill and bleed the cooling system.
14. Check and adjust the engine oil level.