
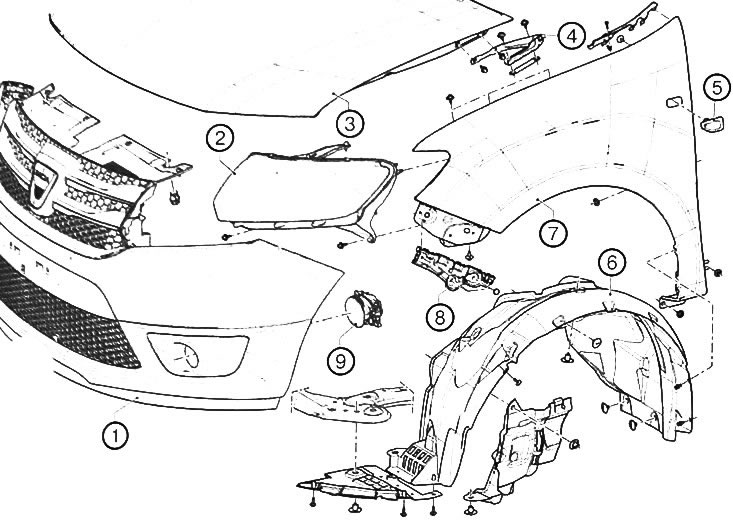
1. Front bumper assembly. 2. Head lamp. 3. Hood. 4. Canopy of the hood. 5. Side direction indicator. 6. Front fender liner. 7. Front fender. 8. Side bracket of the front bumper. 9. Fog lamp.
Removal and installation of a forward wing
Removing the front fender
1. Place the vehicle on a two post lift.
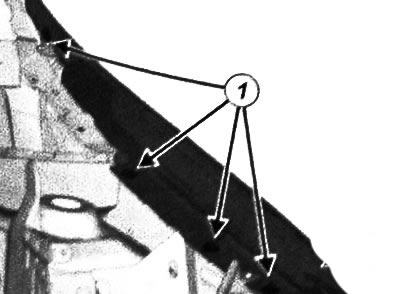
2. Remove the front fender liner.
3. Remove the front bumper.
4. Remove the headlamp.
5. Remove the lower side trim of the game glass (see section below "Removal and installation of a lattice of the top part of a cowl").
6. Remove the front bumper side bracket.
7. Remove the side turn signal.
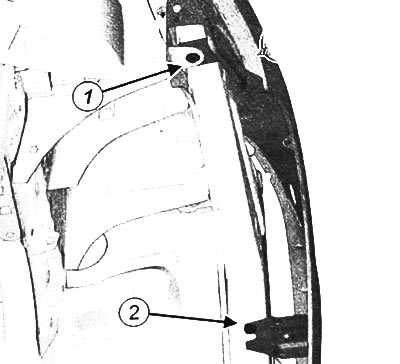
8. Loosen the bolts (1) and nuts (2).
9. Remove the front fender from the car.
Installing the front fender
Installation is made in an order, the return to removal.
Adjust gaps between body panels (see section "Body clearance adjustment values").
Removal and installation of a cowl
Removing the hood
1. Remove the sound insulation of the hood (depending on equipment level).
2. Remove the hood pillar.
3. Disconnect the windshield washer hoses.
4. Unhook the windshield washer hoses.
Method A
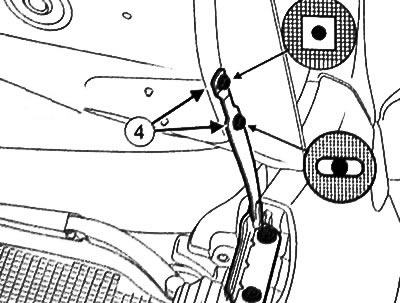
5. Loosen the bolts (1) attaching canopies to the hood on both sides of the car.
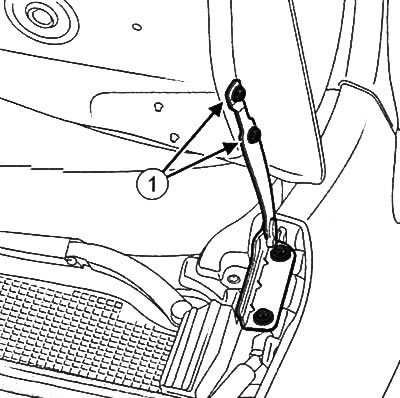
6. Remove the hood from the car (this will require two people).
Method B
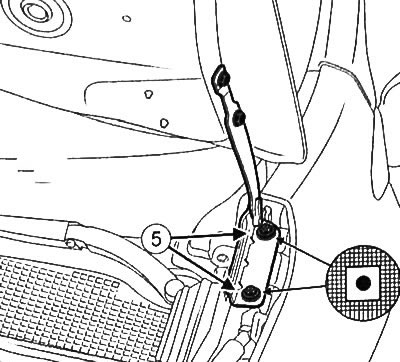
7. Loosen the bolts (3) attaching canopies to the body on both sides of the car.
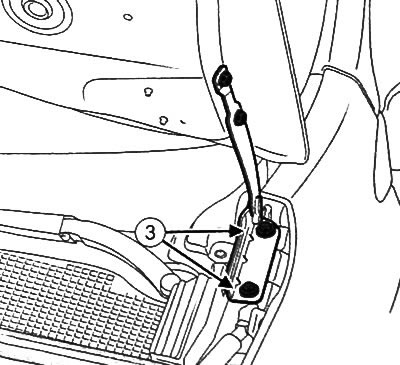
8. Remove the hood from the car (this will require two people).
Hood installation
Installation is made in an order, the return to removal.
Adjust the gaps around the perimeter of the hood and the coincidence of the surfaces of the hood and adjacent body surfaces.
Hood adjustment
Note: Body clearance values are given in section "Body repair and dimensions" below.
There are two ways to adjust the hood:
- by means of bolts of fastening of canopies to a cowl;
- by means of bolts of fastening of canopies to a body.
Note: The symbols A, B, C and D indicate the adjustment method. The black dot in the center corresponds to the bolt shank. The gray areas correspond to the controlled component. The white areas correspond to the adjustment area.
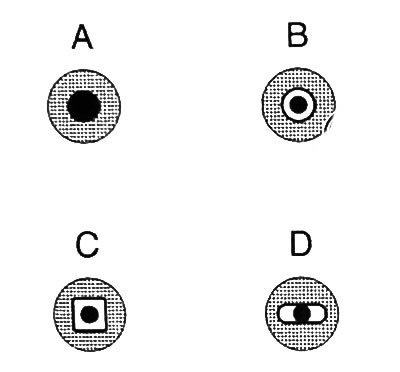
Note: Observe the sequence of adjustment zones shown in the figure.
Adjustment by means of bolts of fastening of canopies to a cowl
1. Loosen the bolts (4) fastening canopies to the hood.
2. Adjust the gaps and match the surface of the hood with adjacent body surfaces.
3. Tighten the hood bolts.
Adjustment by means of bolts of fastening of canopies to a body
1. Loosen the bolts (5) fastening canopies to the body.
2. Adjust the gaps and match the surface of the hood with adjacent body surfaces.
3. Tighten the hood bolts.
Removal and installation of the lock of a cowl
Removing the hood lock
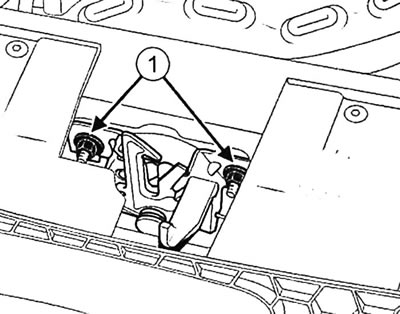
1. Loosen the nuts (1).
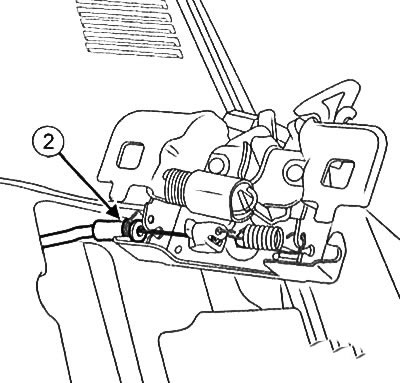
2. Remove the hood release cable (2).
3. Remove the hood latch.
Installing the hood lock
Installation is made in an order, the return to removal.
Note: Tightening torque for the bonnet lock nuts: 21 Nm.
Check the operation of the hood latch.
Removal and installation of a lattice of the top part of a cowl
Removing the grille of the upper part of the hood
1. Remove the wiper arms.
2. Remove seal (1) engine compartment.
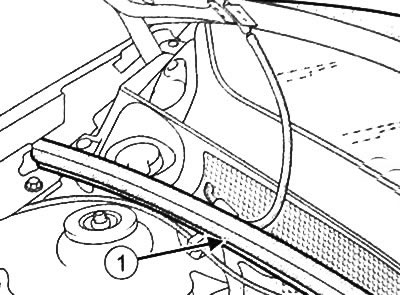
3. Disconnect the windshield washer hose (2).
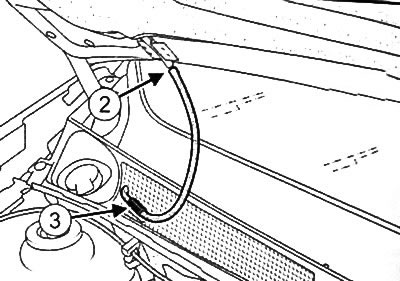
4. Unhook the windshield washer hose (3) from the holder.
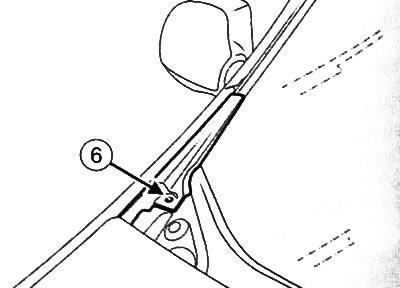
5. Loosen the bolt (6) lower side windshield trim
6. Remove the lower side trim of the windshield by sliding it up (7) and pulling to the side (8).
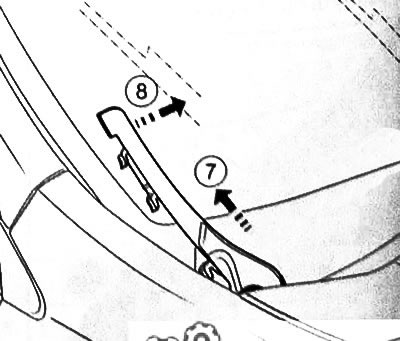
7 Remove clips (9) on both sides of the grille on the top of the hood.

8. Loosen the bolt (10) grilles on the top of the hood.
9. Unhook the grille of the upper part of the hood.
10. Remove the grille of the upper part of the hood in the direction of the arrows (11) And (12).
Installing the Hood Top Grille
Installation is carried out in the reverse order of removal.