
Note:
: replace the part with a new one after each removal.
: special tool/device must be used

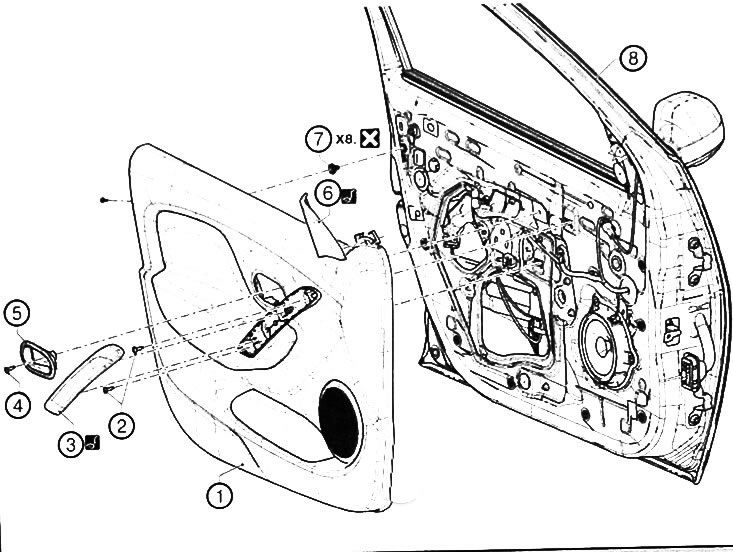
1. Front door canopy. 2. Front door limiter. 3. Internal handle for unlocking the front door. 4. Draft of the internal handle of an unlocking of a forward door. 5. Front door lock. 6. Thrust of the external handle for unlocking the front door. 7. The secret of the front door lock. 8. Front door lock bracket.9. External handle for unlocking the front door. 10. Front door box.
Version with manual windows:1. Front door. 2. Front door trim clip. 3. Door mirror cover. 4. Internal handle for unlocking the front door. 5. A bolt of the internal handle of an unlocking of a forward door 6. The handle of a window regulator.
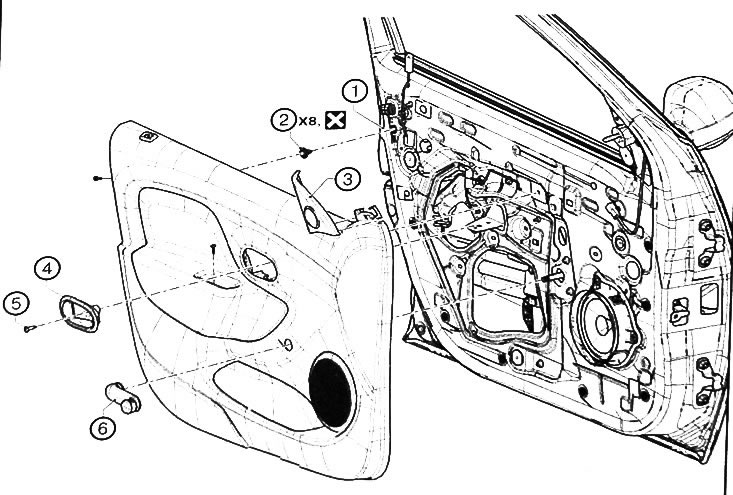
Version with power windows:1. Door trim. 2. Front door handrail bolts. 3. Facing cover of the handrail of the front door. 4. Bolt of the inner handle for unlocking the front door.5. Internal handle for unlocking the front door. 6. Cover of an external rear-view mirror. 7. Front door trim clip. 8. Front door.
Removal and installation of front doors
Note:
This operation can be performed in two ways:
- removal without awnings (used when replacing doors)
- removal from awnings (used to provide initial adjustment)
The front door can be removed without removing the front fender.
Removing the front door
Canopy Removal
1. Place the vehicle on a two post lift.
2. Remove the front wheel from the vehicle.
3. Remove the front fender liner.
Continued for both withdrawal methods
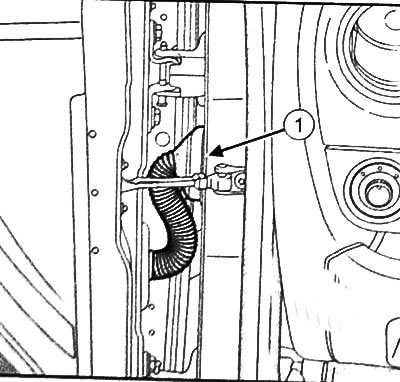
4. Remove the protective boot (1) the front of the door from the A-pillar (depending on equipment level).
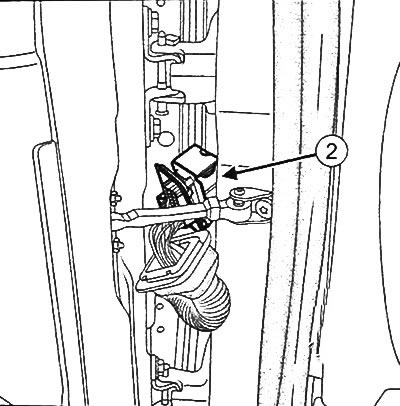
5. Disconnect connector (2) front door wiring harness (depending on equipment level).
6. Loosen the bolt (3) securing the front door stopper to the A-pillar of the body.
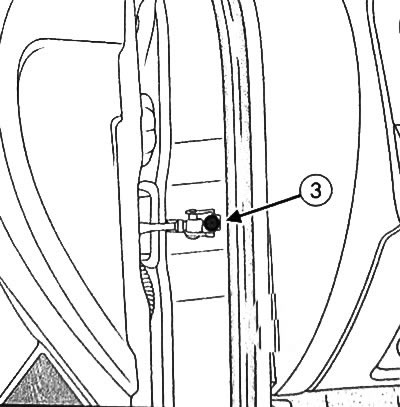
7. Remove the front door stop to the side.
Removal without canopies
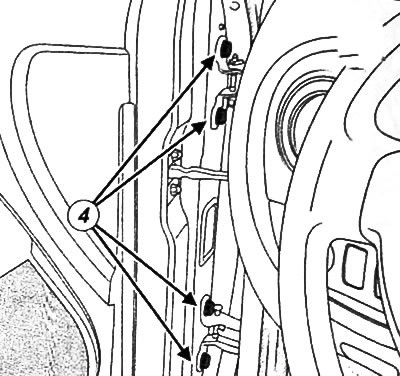
8. Loosen the bolts (4) front side door.
9. Remove the front door from the car (two people are required).
Canopy Removal
10. Loosen the nuts (5) and bolts (6) front door.
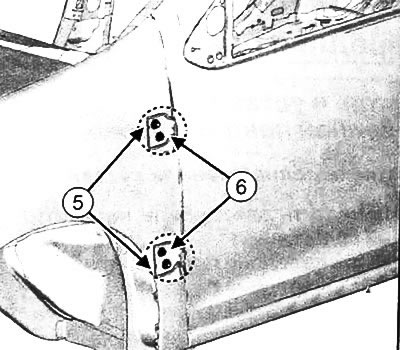
11. Remove the front door from the car (two people are required).
Installing the front door
Installation without canopies
Installation is made in an order, the return to removal.
Adjust the gaps around the perimeter of the front door and match the surfaces of the door and adjacent body surfaces.
Check the function of all elements.
Installation with awnings
Note: Apply a bead of sealant to the door hinges.
Installation is made in an order, the return to removal.
Adjust the gaps around the perimeter of the front door and match the surfaces of the door and adjacent body surfaces.
Check the function of all elements.
Front door adjustment
Note: Body clearance values are given in section " Body repair and dimensions " below
There are two ways to adjust the front doors:
- through the fasteners of the front door;
- through the front door latch panel.
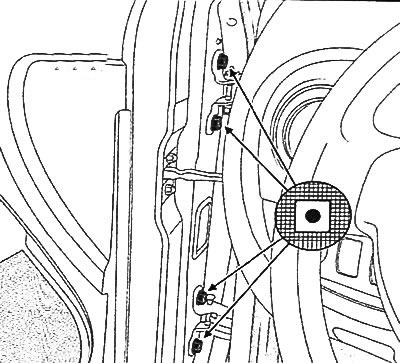
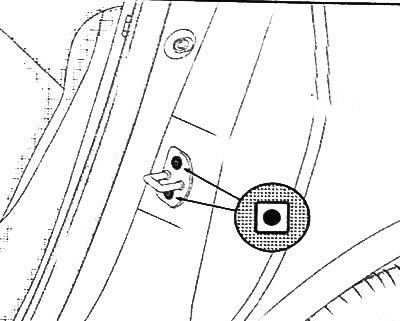
Note: Observe the sequence of adjustment zones shown in the figure. Zone adjustment (3) and /4) only possible if the tailgate is properly adjusted.
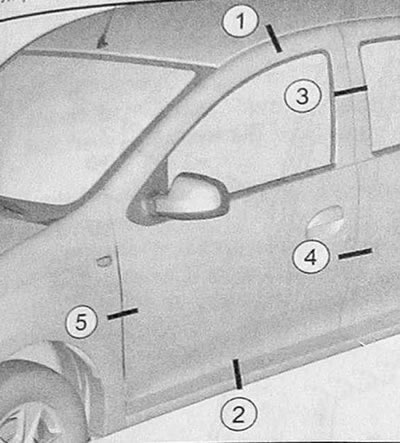
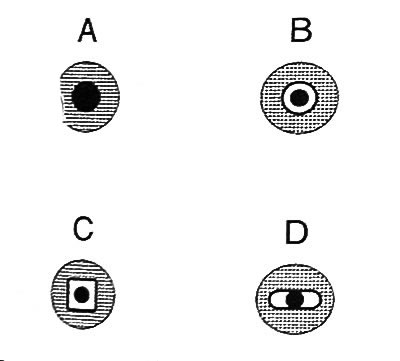
Note: The symbols A, B, C and D indicate the adjustment method. The black dot in the center corresponds to the bolt shank. The gray areas correspond to the controlled component. Beche plots correspond to the adjustment area.
Height and length adjustment
1. Put the car on a two-foot lift.
2. Remove the front wheel from the car.
3. Remove the front fender liner.
4. Loosen the inner bolts and nuts securing the front door awnings to the body.
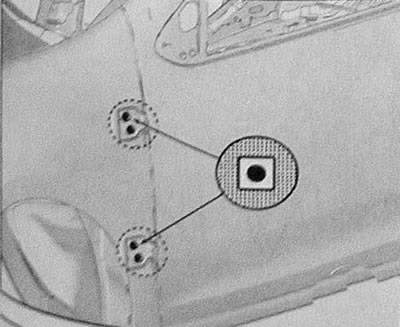
5. Consistently adjust the zones (1) And (2) (see illustration of adjustment sequence above).
6. Adjust zones (3), (4) And (5) (see illustration of adjustment sequence above).
Note: Zone adjustment (3) And (4) only possible if the tailgate is properly adjusted.
7. Tighten the inner bolts and nuts securing the front door awnings to the body.
Door depth adjustment
1. Loosen the bolts securing the canopies to the front door.
Note: The original canopy mounting plates are glued to the door frame. To make the adjustment, remove the plate with a block of wood and a hammer.
2. Adjust depth in zones (1), (2) And (5) (see illustration of adjustment sequence above).
3. Tighten the bolts securing the canopies to the front door.
4. Loosen the bolts of the lock bracket panel.
Note: Zone adjustment (3) And (4) only possible if the tailgate is properly adjusted.
5. Adjust in the following sequence:
- adjust the height of the bracket panel relative to the door lock to prevent their contact;
- adjust depth in zones (3) And (4).
6. Tighten the lock bracket panel bolts.