
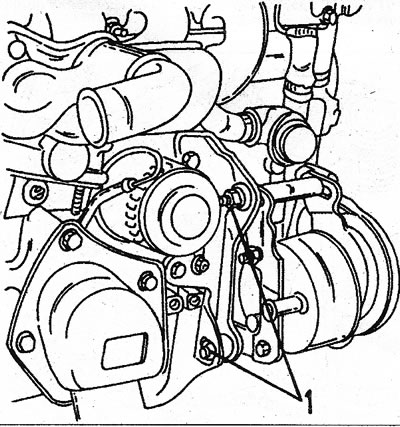
1.8 Specified bolts (1) power steering pump attached to engine
1.12 Four nuts (1) fastening the exhaust pipe flange to the manifold
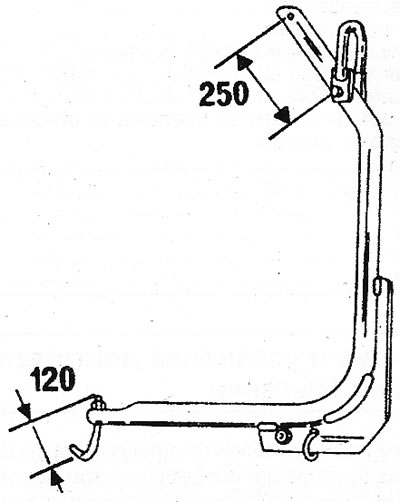
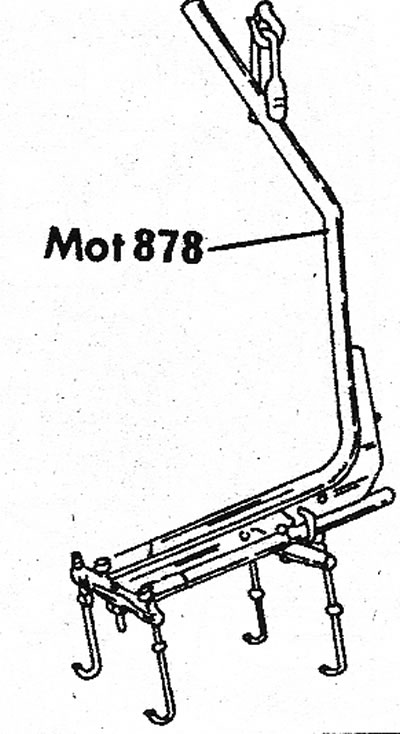
1.15 A special bracket is used to lift the engine
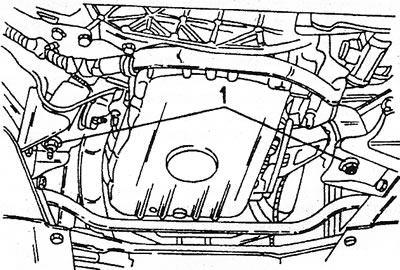
1.16 Nuts (1) hold the engine mount brackets to the bottom surface
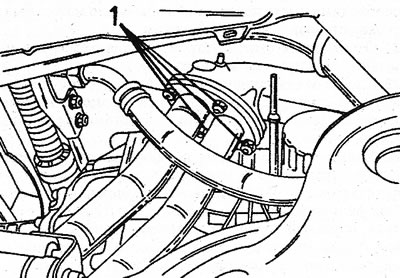
1.21 Diesel heater cables (1) when removing the engine, disconnect
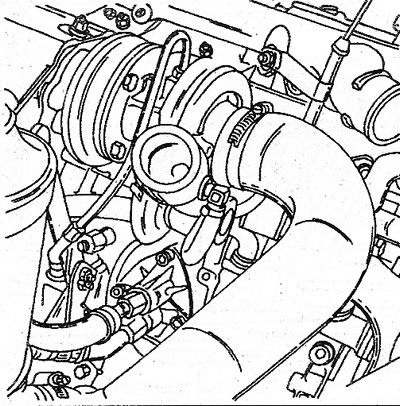
1.23 Disconnect the oil hoses (bottom left) from the cylinder block. Also shown is the turbocharger connection
1.28 Method of connecting hoses to the cylinder block
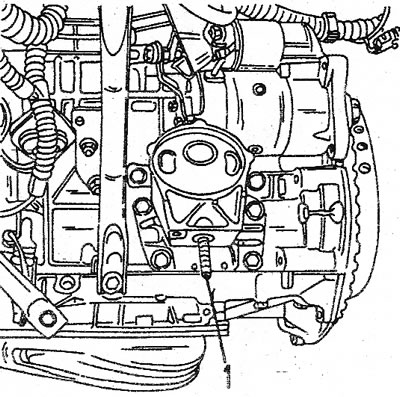
1.32 Remove nuts (1) from the studs of the engine mount brackets
1.35 Location of the coolant beer plug (1) from the side of the engine. The second plug is on the opposite side

1.45 Catalyst (1) connected by a pipe to the exhaust manifold. After the nuts are removed, remove the springs and gaskets
1.48 Fixing the left shock absorber of the engine mount. The common part is dismantled after both fastening bolts are unscrewed
1.49 Used in Renault workshops to lift a V6 engine. Hooks on the bottom grip the engine mounting lugs
1. This chapter describes the process of removing and installing an engine without a gearbox, taking into account the differences between models and engines installed on them.
Gasoline engines - model J11
2. Disconnect the cables from the battery. If the vehicle is fitted with a radio with a security code, the code must be available when the battery is disconnected so that the radio can be set back into operation.
3. Drain the coolant. The drain hole is located on the side of the cylinder block. The radiator can be freed from fluid by disconnecting the bottom hose. The coolant can be drained into the reservoir for further use, provided that it has recently been changed.
4. Remove the hood cover. Mark the contours of the hinges with a pencil. Thanks to this, the hood can be installed again without any adjustments.
5. Remove the upper cross member of the frame.
6. Remove a radiator with the left guard.
7. Remove the radiator grille, front end and lower cross member of the frame.
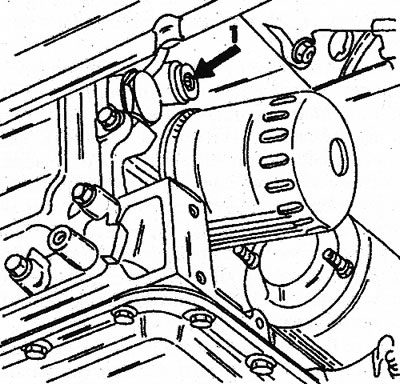
8. If the car has power steering, unscrew both screws (1) (see illustration). Remove the drive belt. Take the pump with hoses to the side and hang it up.
9. Disconnect the intake pipe with the air intake sleeve from the carburetor. The latter is attached with a plate to the cylinder head cover.
10. Remove the air filter. On a carbureted engine, close the carburetor opening properly.
11. Disconnect all wiring and fuel lines. Label the cables in a convenient way for you. Make sure there is no fuel left in the hoses. For carbureted engines, disconnect the hoses from the fuel pump. Also disconnect the vacuum hose from the brake booster.
12. Disconnect the exhaust pipe from the manifold (see illustration). For this, a wrench with an elongated socket head is better suited.
13. Jack up the gearbox (place a piece of wood between the jack head and gearbox).
14. Turn off the bolts connecting the engine and a transmission, then remove a starter and disconnect a guard from a flywheel casing. The ignition timing sensor is mounted in one of the gearbox bolts. The bolts used must be marked so as not to mix them up during assembly. The sensor must be placed so as not to damage it.
15. Hook the engine on the mounting eyes and hang it with a winch. For this purpose, use cables or chains. The bracket shown in the illustration gives the engine an additional point of support and keeps it in balance (see illustration).
16. Make sure the gearbox is securely supported by a jack and the engine is hanging securely from cables or chains. Using a socket wrench, loosen the nuts on the back of the engine (see illustration). To do this, slightly raise the engine until the brackets for its fastening are accessible.
Gasoline engines - model J63
Note: Removal of the late model Espace 4-cylinder engine proceeds in the same way as described for the early model engine. However, you should pay attention to the following points.
17. Disconnect plugs of connection of wires of system of injection located under the right headlight.
18. Disconnect in the following sequence: hood, front shield, upper frame cross member, front end, radiator with cooling fans, air filter, heater blower with heat shield.
19. In addition to the wiring and heater hoses, disconnect the fuel lines from the distribution tube, power steering pump hoses and clutch pedal cable.
Diesel models with turbocharging
Note: The turbocharged diesel engine is removed in the same way as a 4-cylinder engine without a gearbox.
20. Disconnect the cables from the battery. If the vehicle is fitted with a radio with a security code, the code must be available when the battery is disconnected so that the radio can be set back into operation.
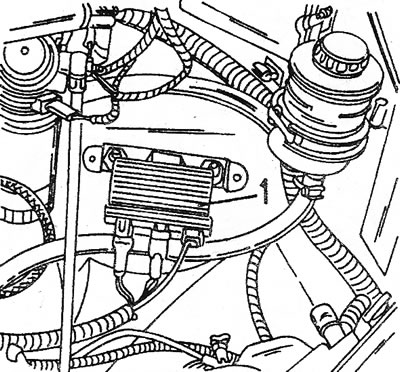
21. Disconnect the diesel heater cable (see illustration).
22. Drain the coolant from the cooling system. If the coolant has been changed recently, drain it into a can and use it again later.
23. Remove in the following order: hood, front shield, upper frame cross member, front end, radiator with cooling fans, air duct (air filter, compressor, charge air cooler, intake manifold), built-in connections (oil may leak out) Disconnect the tube leading to the turbine from the intake manifold.
24. Disconnect the clutch pedal cable and gas pedal cable.
25. Disconnect all electrical wires connecting the engine to the body.
26. Remove the limiters installed on diesel engines to mount the engine. They are located on the cross member of the frame.
27. Disconnect the outlet pipe from the turbocharger.
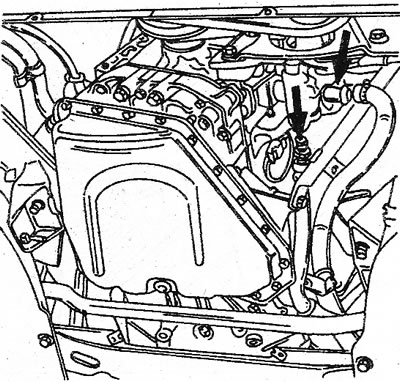
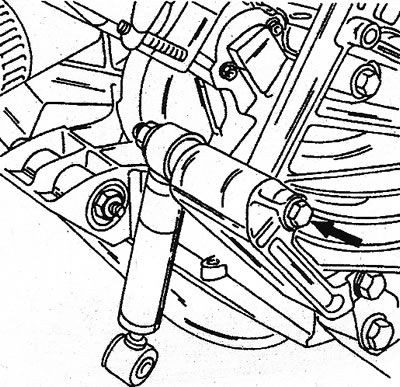
28. Disconnect the following components: supply and discharge fuel hoses (hoses must be pinched to prevent fuel leakage), hose from brake booster vacuum pump, power steering hoses (one hose is fastened with a clamp, the second - with a threaded connector (see illustration)), the supply pipe from the intake manifold.
29. Jack up the gearbox until noticeable tension (place a piece of wood between the jack head and gearbox).
30. Remove the bolts connecting the engine and gearbox, starter, as well as the shield from the flywheel housing.
31. Hook the engine to the mounting eyes and hang it with a winch. For this purpose, use cables or chains. The bracket shown in illustration 1.15 gives the engine an additional point of support and ensures its balance.
32. Make sure the gearbox is securely supported by a jack and the engine is hanging securely from cables or chains. Using a socket wrench, loosen the nuts on the underside of the motor (see illustration). To do this, slightly raise the engine until the engine mounting brackets are accessible.
V-shaped 6-cylinder engine (V6)
Note: The V6 engine is removed in the same way as above without the gearbox.
33. Depending on the weight of the engine, it is necessary to choose a bracket suitable for lifting the engine. Before dismantling the engine, pay attention to the mounting bracket shown in illustration 1.49 to determine whether you will use a similar device to lift the engine or you can use only cables or chains. Removal of the engine must not be carried out if there is a risk that parts and mechanisms in the engine compartment may be damaged or there is a risk of injury.
34. Disconnect the negative cable from the battery terminal (do not forget about the security code if the car has an appropriate radio).
35. Drain the coolant. To do this, place a container of suitable capacity under the vehicle. The lower radiator hose can be blocked. A little coolant will remain in the cylinder block, it also needs to be drained. To do this, remove the two plugs from the drain holes. One of them is above the oil filter (see illustration), the second - on the opposite side near the plug (the plug must also be disconnected). The outlet plugs have a square socket screw, so an appropriate wrench must be used.
36. Remove the hood, front shield, upper cross member, front end, radiator with fans, air filter, heater fan heat shield, headlights and alternator. Wire connectors must be marked before disconnecting them.
37. Remove the holder of fastening of the fuel pump and put on the engine. This part is located next to the corrugated coolant tank under the small connecting hose.
38. Disconnect the high pressure hose from the power steering pump and the low pressure hose from the reservoir.
39. Disconnect all cooling system hoses remaining on the engine.
40. Disconnect the fuel supply hoses from the fuel supply pipe.
41. Disconnect the throttle control lever cable.
42. Disconnect the plug-in block of the Lambda sensor, as well as the plug-in block of the ignition timing sensor, located next to the flywheel housing.
43. Jack up the front of the vehicle and secure it on jack stands.
44. Remove the baffle under the flywheel housing and remove the shield on the right side of the housing.
45. Remove the fastening nuts and disconnect the outlet pipe from the manifold. Remove springs and spacers and disconnect tubes (see illustration).
46. Install a lift under the gearbox and lift it up to a noticeable resistance. Be careful not to damage the gearbox. Now remove the bolts connecting the engine and gearbox.
47. Disconnect the cable and remove the starter.
48. Disconnect the left engine bracket (see illustration) and remove it along with the pillow. On the right bracket, detach the cushion from the underside.
49. Lift the engine with a winch, having previously hooked it on the mounting lugs. Use chains or ropes to lift the engine. A mounting bracket can be used to lift the engine (see illustration). Hooks are inserted into mounting lugs.
50. From the underside of the car, unscrew the engine mounting nuts to the right and left of the oil pan.
51. Lower the car on wheels and check again if all connections are disconnected.
52. Make sure that the jack is securely fastened under the gearbox and begin to carefully lift the engine. When removing the engine, try not to damage other mechanisms and assemblies located in the engine compartment. Do not let the engine hang on the transmission input shaft. As soon as the engine hits something, it is necessary to establish the cause. There may still be a loose connection somewhere.
Engine installation
53. Installation is carried out in the reverse order, guided by the following instructions:
54. All engines have two locating sleeves that are inserted into the cylinder block, one on each side, they guarantee perfect alignment of the engine and gearbox. Sometimes when removing the engine, these bushings remain in the gearbox. If this happens, pull them out with wire cutters and reinsert them into the cylinder block. Replace deformed or damaged mounting sleeves.
55. Lubricate the gearbox input shaft gears with graphite grease.
56. On a four-cylinder engine, the starter rear stop is attached only after the engine is installed. Otherwise, it will be very difficult to install the starter.
57. Check the engine oil level or add oil.
58. Fill in coolant. The cooling system must be purged before this.
59. If necessary, prime and purge the power steering system.
60. Connect the drive cables of the accelerator pedal and clutch pedal.