
Removal - Option 1 - Symbol
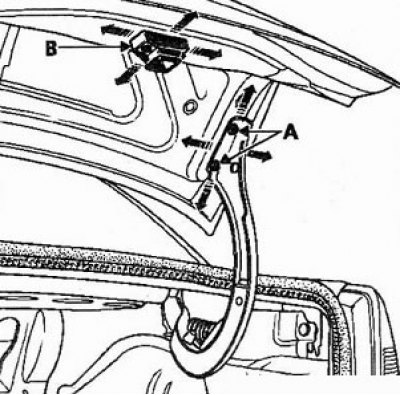
1. Remove the bolts (A) trunk lid fasteners. Remove the cover.
Attention! For safety reasons, work must be carried out by two people.
Adjustment
1. The gap on the periphery of the cover is adjusted by moving in the bolt holes (A).
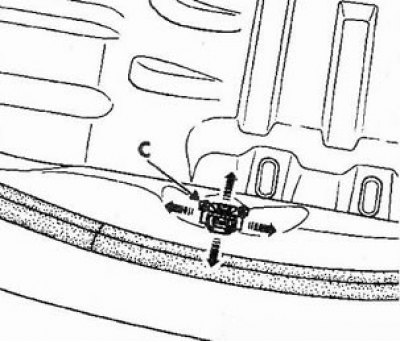
2. Adjustment of the lock and latch is carried out by moving parts in the holes (IN) And (WITH) under the mounting bolts.
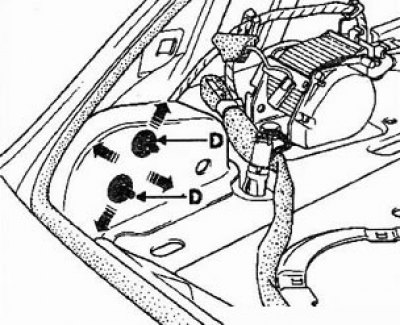
Note. When replacing the trunk lid hinges, start adjusting the position of the lid by adjusting the position of the hinges along the holes (D).
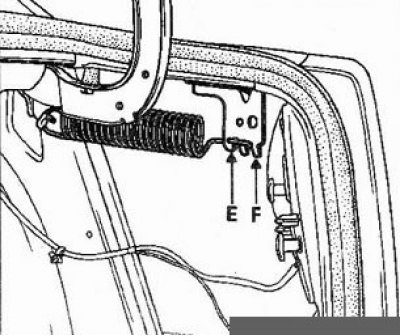
For information: The boot lid spring preload can be changed by moving the end of the springs from the position (E) into position (F).
Removal: Option 2 - Clio
- disconnect the wire from the negative terminal of the battery;
- open the tailgate;
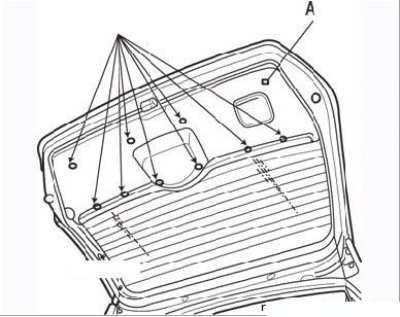
Figure 9.59. Removing the upholstery of the tailgate: A - fastening screw; arrows - upholstery holders
- unscrew the fastening screw on the right side of the door trim, disconnect the plastic trim holders using a fork puller (Figure 9.59);
- remove the top panel from the tailgate (see subsection «Additional brake light»);
- disconnect the wiring from the rear window heating element, the wiper motor and the central locking servo motor (if provided);
- disconnect the upper brake light and windshield washer hose;
- remove the wiring harness from the tailgate box and the fluid supply hose to the glass washer jet. To facilitate subsequent installation, tie a string to the wiring harness and leave it in the door cavity;
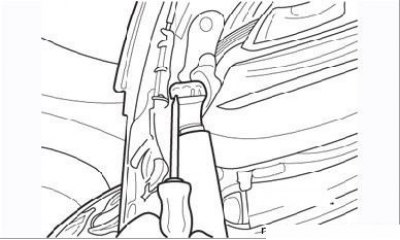
Figure 9.60. Removal of a stopper of a rack of support of a door of a back
- ask an assistant to hold the door. Disconnect the support posts from the door by pressing out the stoppers with a screwdriver (Figure 9.60);
- if the old door will be installed, mark the position of the fastening nuts on the door;
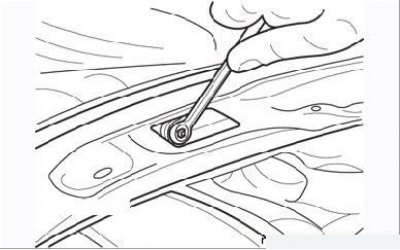
Figure 9.61. Remove the two nuts securing the tailgate
- unscrew the two nuts under the top panel of the door (Figure 9.61) and, together with an assistant, carefully remove the door from the car.
Installation
- install the door by tightening the fastening nuts according to the marks made, without tightening them until the gaps in the door opening are aligned;
- if you want to align the bottom edge of the door, adjust the position of the lock latch on the lower body panel. The position of the lock is changed due to the oval holes for the screws of its fastening.
Carry out the remaining operations in the reverse order of removal.
Removal and installation of the lock of a door of a back
Removing
- remove the door upholstery as described above;
- disconnect the wire from the negative terminal of the battery;
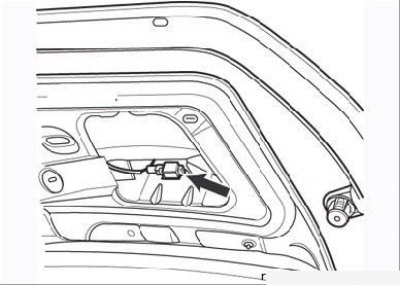
Figure 9.62. Tailgate connector
- disconnect the male part of the contact connector, then remove the female part of the connector from the holder (Figure 9.62);
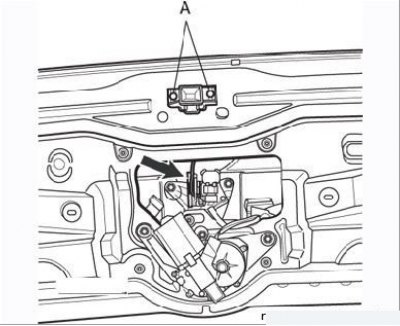
Figure 9.63. screws (A) lock fasteners and traction (arrow) tailgate opening mechanism
- remove the two lock screws (Figure 9.63);
- Disconnect the door release linkage, then remove the lock-rod-wire harness assembly;
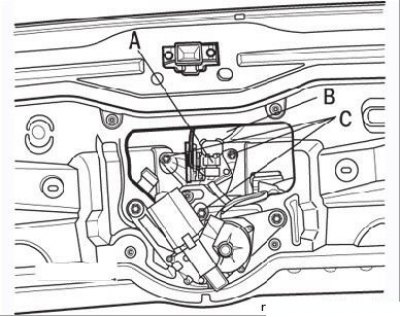
Figure 9.64. Pin connector (A), hose (IN) and three bolts (WITH) tailgate opening mechanism
- Disconnect the door release connector (Figure 9.64);
- remove the washer fluid hose;
- unscrew the three mounting bolts;
- remove the release mechanism bracket and release mechanism (Figure 9.65).
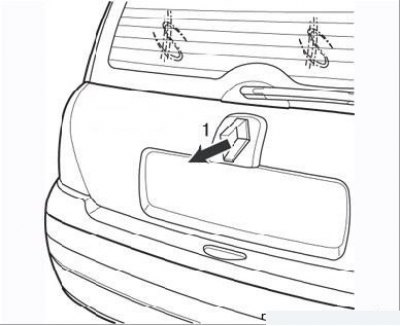
Figure 9.65. Removing the tailgate release mechanism (1)
Installation
Installation is carried out in the reverse order of removal.