
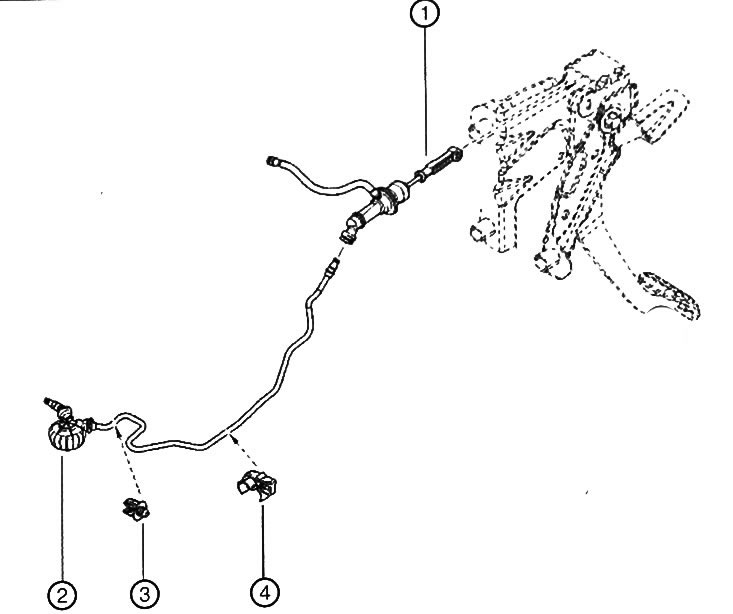
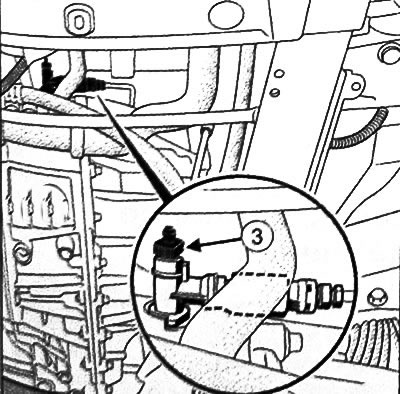
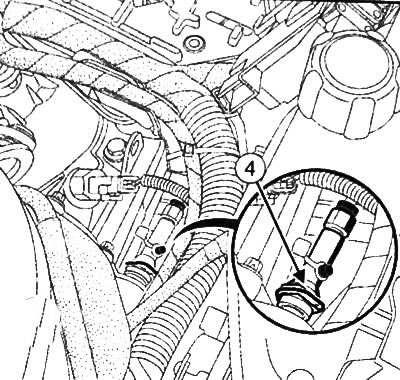
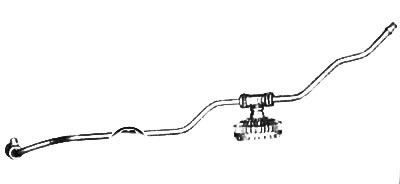
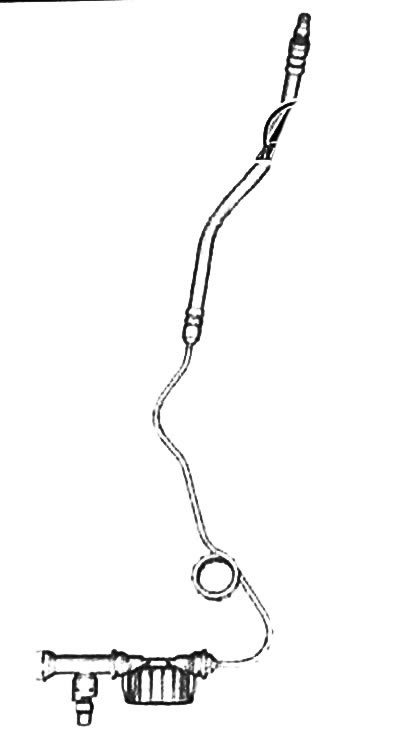
1. Clutch master cylinder. 2. Clutch slave cylinder. 3. Pipe holder. 4. Piping bracket.
Clutch bleeding
The procedure for bleeding the clutch hydraulic drive is carried out after performing any work on the hydraulic clutch drive:
- between the tank and the fitting for removing air;
- between the bleed valve and the clutch thrust bearing.
In addition, the following signs can be indicators of the presence of air in the clutch hydraulic system:
- failure of the clutch pedal;
- position of the clutch pedal at halfway or on the floor;
- poor gear shifting.
Preparatory procedures
The clutch hydraulic system is very sensitive to various contaminants. The entry of contaminants into the hydraulic circuit can lead to:
- inability to shift gears;
- damage or destruction of the clutch mechanism;
- leaks from the hydraulic circuit.
All work on the clutch release hydraulic circuit must be carried out in perfect cleanliness. It must be ensured that no foreign particles enter the hydraulic circuit.
The principle of cleanliness applies to all hydraulic clutch components.
Pollution can be caused by:
- metal or plastic filings;
- fibers;
- cardboard, brushes, paper, cloth, clothes, dust and foreign particles in the air, etc.
Lint-free cleaning wipes must be used. Each wipe should not be used more than once.
Two types of special equipment can be used to bleed air from the clutch hydraulic circuit:
- ARC50 device through the brake fluid reservoir.
- Syringe through the bleed valve located on the clutch release cylinder.
If the hydraulic clutch components have been removed, bleed the system with the ARC50 through the brake fluid reservoir or with a new syringe through the bleed valve located on the clutch release cylinder.
If the clutch hydraulic components have not been removed, it is enough to inject the brake fluid with a new syringe through the bleeder fitting located on the clutch release cylinder to perform bleeding.
Note:
- Even the smallest air bubbles in the hydraulic circuit can cause malfunctions (the pedal will not return to its original position, crackling when shifting gears, etc.)
- Incorrect bleeding of the hydraulic circuit can lead to incorrect determination of the cause of the malfunction and unnecessary replacement of parts.
The recommended type of brake fluid must be used when bleeding the clutch release circuit.
Clutch release air bleeding procedure
1. Place the vehicle on a two post lift.
2. Remove the engine protection tray.
3. Depending on the type of air vent:
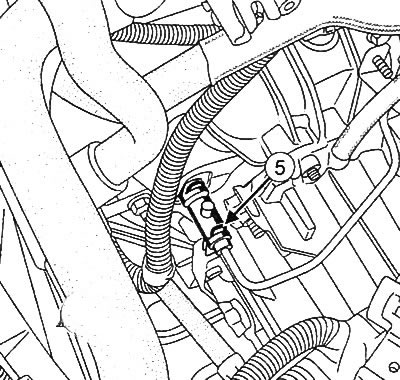
- Screw fitting for air removal: holding the plastic part (1) using a ring wrench, unscrew the fitting (2).
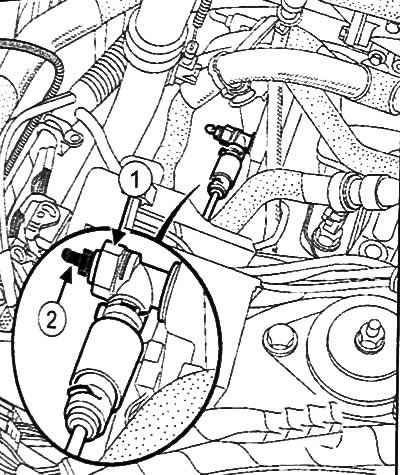
Screw connection for venting
- Half-turn bleed valve: to open the valve (3) turn it by hand until it stops.
Half-turn bleed valve
- Bleeding nipple with clip: to open the nipple, pull it out one notch by pressing and holding the clip (4 or 5).
Bleeding nipple with clamp, type A
Bleeding nipple with clip, type B
- Bleeding nipple with two clamps: to open the nipple, pull it out by one groove by pressing the clamp (6) and lifting the clamp (7).
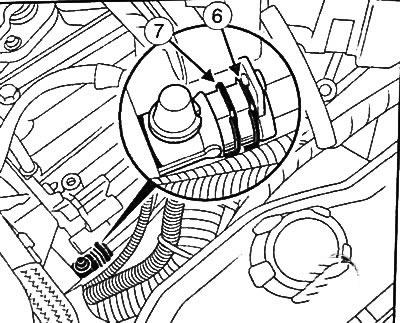
Bleeding nipple with two clamps
If the hydraulic clutch release components have not been removed:
A) Pumping using a special device
- Lock the clutch pedal in the up position with a strap or rope tied to the steering wheel to ensure continuity of the hydraulic circuit during bleeding.
Note: Be careful not to over-adjust the clutch pedal sensor.
- Connect the brake bleeder to the brake fluid reservoir (see the operating instructions supplied with the device).
- Remove the cap from the bleed valve on the clutch release cylinder.
- Connect a transparent hose to the bleed valve, and place the other end of the hose in an empty container located under the valve.
- Open the bleed valve.
- Open the valve between the bleeder and the brake reservoir.
- Let the brake fluid flow out until there are no air bubbles in it.
- Stop the bleeder to relieve pressure in the clutch hydraulic circuit.
- Close the bleed valve.
- Remove the transparent hose from the bleed valve.
- Place the cap on the bleed valve.
- After removing the bleeder, add brake fluid to the reservoir to the correct level.
- Quickly depress and release the clutch pedal about twenty times.
- Make sure the hydraulic clutch release is working properly.
- If necessary, repeat the bleeding procedure.
- Check clutch pedal sensor adjustment.
In) Pumping with a new syringe
- Lock the clutch pedal in the up position with a strap or rope tied to the steering wheel to ensure continuity of the hydraulic circuit during bleeding.
Note: Be careful not to over-adjust the clutch pedal sensor.
- Remove the cap from the bleed valve on the clutch release cylinder.
- Connect a transparent hose of suitable length (at least thirty centimeters) to the bleed valve and place it at the same height as the brake fluid reservoir.
- Open the bleed valve.
- Pour brake fluid into the reservoir until it starts to flow out of the bleed valve.
Note: The transparent hose must remain at the same height as the brake fluid reservoir to prevent air from entering the clutch circuit.
- Connect a new syringe with 60 ml of brake fluid to the end of the transparent hose.
- Slowly inject the entire contents of the syringe into the hydraulic clutch release, avoiding air from the top of the syringe.
- Close the bleed valve.
- Remove the transparent hose from the bleed valve.
- Place the cap on the bleed valve.
- Add brake fluid to the reservoir to the correct level.
- Quickly depress and release the clutch pedal about twenty times.
- Make sure the hydraulic clutch release is working properly.
- If necessary, repeat the bleeding procedure.
- Check clutch pedal sensor adjustment.
If the hydraulic clutch release components have been removed
Caution: When disconnecting the hydraulic clutch components, brake fluid may leak out. Take measures to protect surrounding surfaces.
- The clutch master cylinder piping must be disconnected from the port on the brake fluid reservoir to prevent foreign matter from entering the hydraulic circuit.
- Some hydraulic system lines are equipped with a filter. Place the filter head down to ensure it is filled.
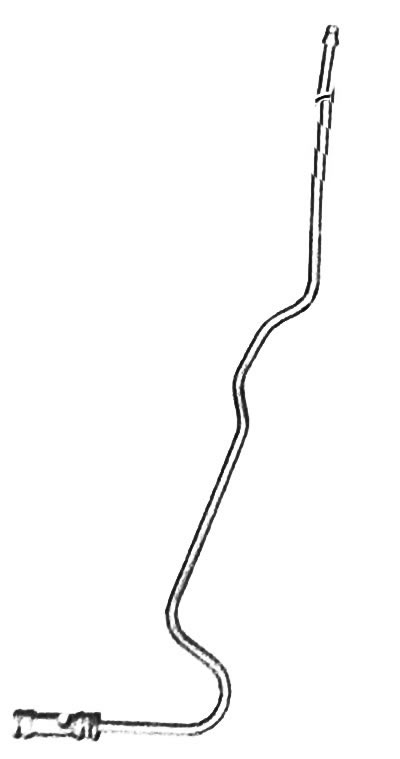
Filling position of hydraulic pipeline without filter
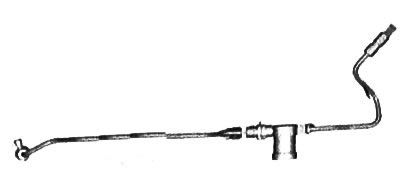
Filling position of pipeline with filter
Filling position of pipeline with filter
Filling position of pipeline with filter
- Using a syringe, pre-fill the hydraulic drive line with brake fluid.
- Plug the pre-charged hydraulic line on the master cylinder side to prevent leakage of brake fluid.
- Using a syringe under the action of gravity, pre-fill the release cylinder of the hydraulic clutch release cylinder.

- Install the appropriate components.
- Lock the clutch pedal in the up position with a strap or rope tied to the steering wheel to ensure continuity of the hydraulic circuit during bleeding.
Note: Be careful not to over-adjust the clutch pedal sensor.
- Remove the cap from the bleed valve on the clutch release cylinder.
- Connect a transparent hose of suitable length (at least thirty centimeters) to the bleed valve and place it at the same height as the brake fluid reservoir.
- Open the bleed valve.
- Pour brake fluid into the reservoir until it starts to flow out of the bleed valve.
Note: The transparent hose must remain at the same height as the brake fluid reservoir to prevent air from entering the clutch circuit.
- Connect a new syringe with 60 ml of brake fluid to the end of the transparent hose.
- Slowly inject the entire contents of the syringe into the hydraulic clutch release, avoiding air from the top of the syringe.
- Close the bleed valve.
- Remove the transparent hose from the bleed valve.
- Place the cap on the bleed valve.
- Add brake fluid to the reservoir to the correct level.
- Quickly depress and release the clutch pedal about twenty times.
- Make sure the hydraulic clutch release is working properly.
- If necessary, repeat the bleeding procedure.
- Check clutch pedal sensor adjustment.