
| Tightening torques | |
| Camshaft stud | 12 Nm |
| Nut of fastening of a gear pulley of a camshaft | 30 Nm + 86°±6° |
Removing
Remove the engine top cover.
Remove:
- right front wheel
- right front fender,
- bolts of fastening of protection of the pallet crankcase of the engine,
- engine undertray protection,
- right pendulum suspension support,
- camshaft position sensor,
- accessory drive belt,
- crankshaft pulley,
- timing belt,
- diagnostic tool (Mot. 1430).
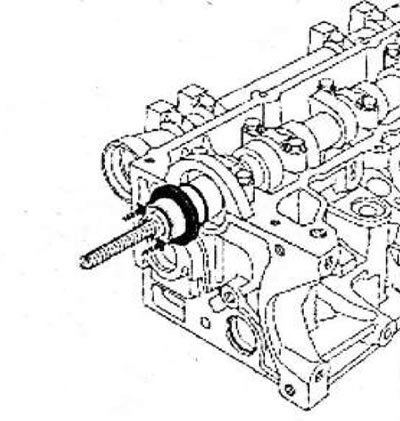
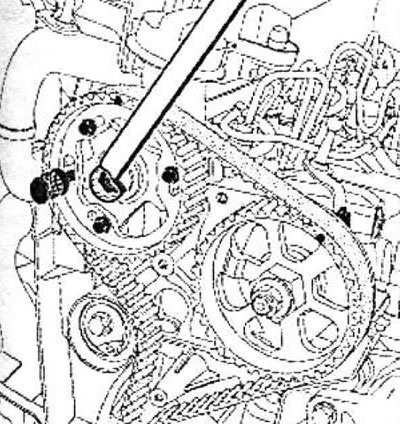
Ream hole (1), using a drill with a diameter of 8.5 mm.
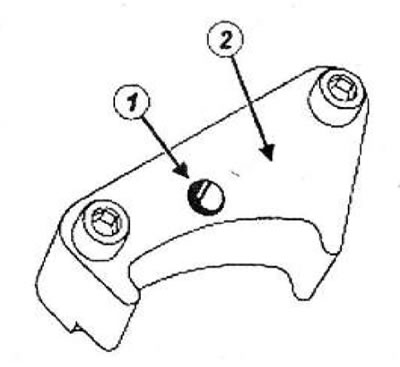
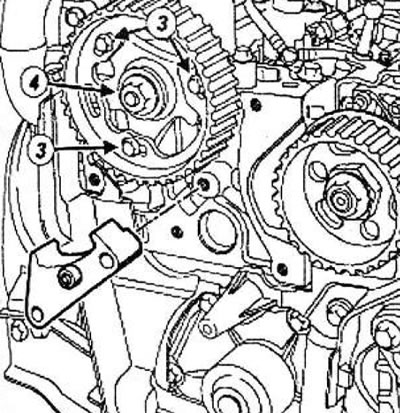
Loosen the hub bolts (3) camshaft pulley.
Install the tool on the cylinder head and block the camshaft pulley ring gear.
Tighten the mounting bolts (3) camshaft pulley hub.
Remove:
- nut (4) fastening the camshaft pulley,
- fixture,
- camshaft gear pulley.
Note: The camshaft oil seal is removed using a tool.
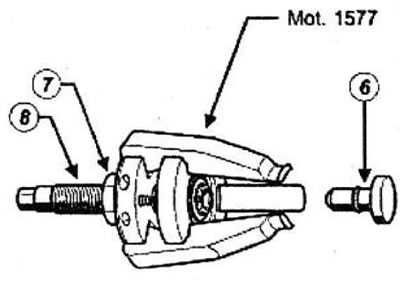
Remove the camshaft seal (5) making sure the tip (6) fixtures removed.

Loosen the screws as far as possible (7) And (8) fixtures.
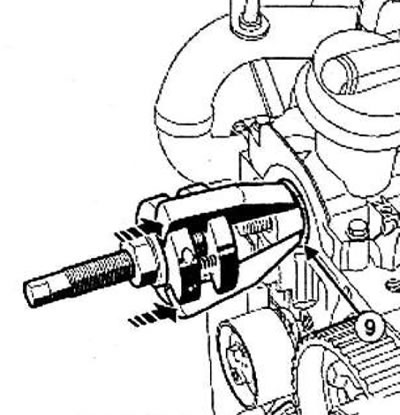
Install tool holders on camshaft.
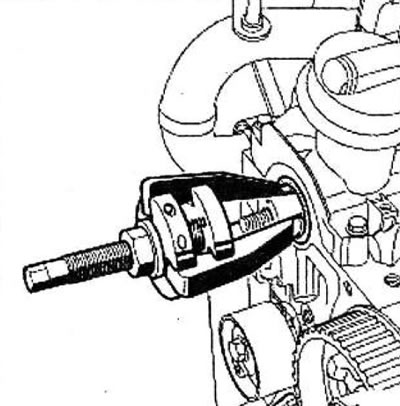
Press the fixture until the grips' shoulders touch (9) with camshaft seal.
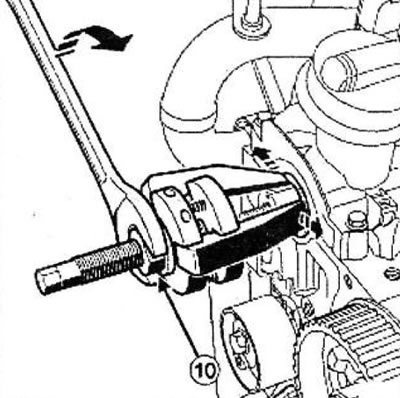
Expand the grips by turning the bolt clockwise (10) flat wrench.
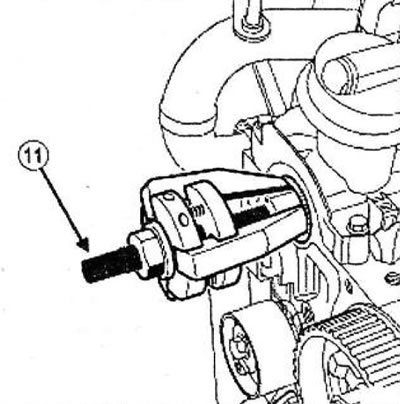
Remove the camshaft seal by removing the bolt (11) clockwise.
Installation
Wipe with surface cleaner:
- camshaft oil seal housing in the cylinder head,
- mating surfaces of the camshaft oil seal.
Attention!
- Do not scrape the mating surfaces of the aluminum parts, as any damage caused by the felling may result in fuel leaks.
- To ensure sealing, mating surfaces must be clean, dry and free of oil (don't touch them with your fingers).
Parts that must be replaced:
- Front camshaft seal.
- Nut of fastening of a gear pulley of a camshaft.
- Hairpin of fastening of a gear pulley of a camshaft (in case of turning).
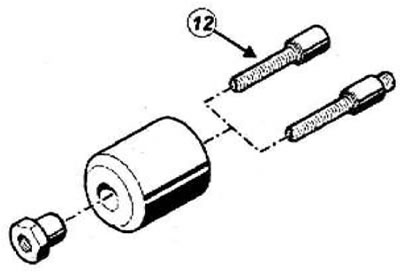
Wrap the hairpin (12) accessories in the camshaft.
Install a new oil seal on the camshaft.
Note: For supplied glands mounted on a protective cover:
- do not remove the camshaft oil seal from the protective cover,
- install the casing together with the oil seal on the camshaft,
- push the protective casing to the cylinder head until the camshaft oil seal and the cylinder head come into contact,
- install the oil seal on the camshaft in accordance with the instructions below.
1 - First installation of the camshaft oil seal
Replace the cap (13) and collar nut (14) fixtures.
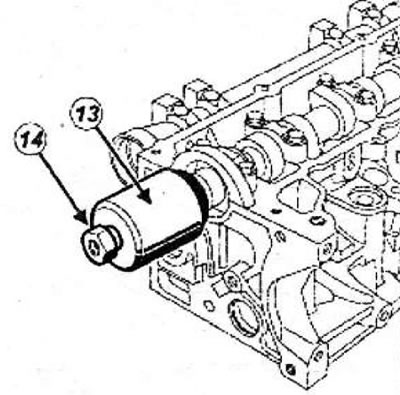
Tighten the collar nut until the cap contacts the cylinder head.
2 - Second installation of the camshaft seal
Depending on the circumstances, oil seals are supplied as spare parts (15) with spacer (16) among other details.
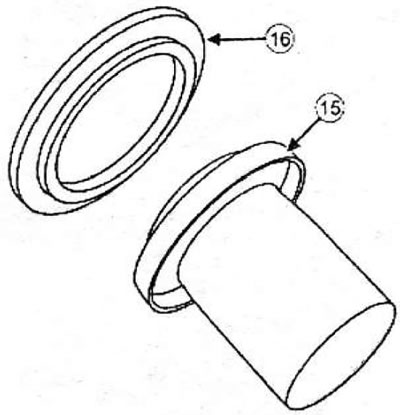
Note: spacer (17) used to install gasket (18) and used with the device (19).
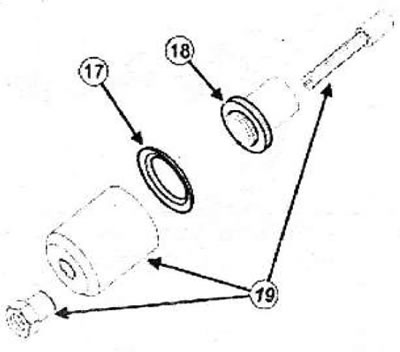
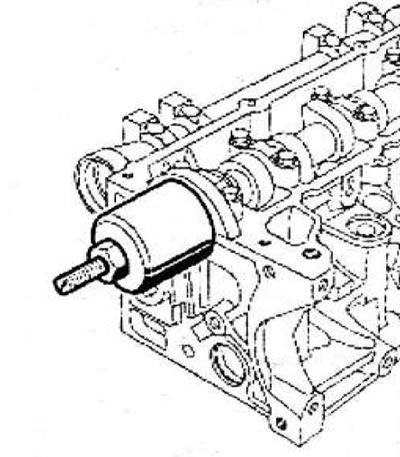
Install the bell (20) with the spacer on the camshaft oil seal side, then install the collar nut (21) fixtures.
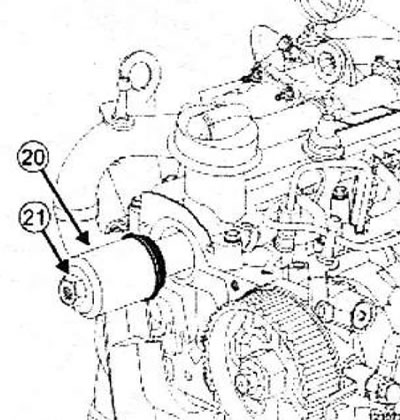
Note: The spacer is installed on the socket of the tool so that the inner edge of the spacer is on the side of the camshaft oil seal.
Tighten the collar nut until the spacer installed on the flare touches the cylinder head.
3 - Continuation of both methods
Remove:
- tool collar nut,
- lid,
- bolt,
- protective cover and spacer (if installed) and dispose of them.
Torque tighten the camshaft stud (12 Nm).
Install:
- camshaft pulley,
- new camshaft pulley nut.
Loosen the hub bolts (22) camshaft pulley.
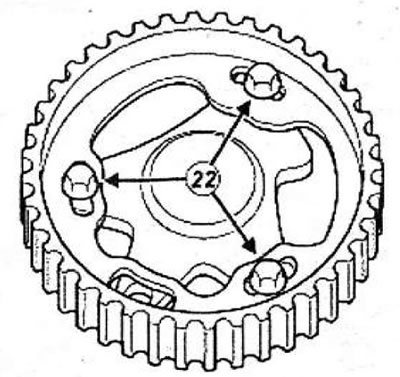
Install the tool on the cylinder head and block the camshaft pulley ring gear.
Tighten:
- camshaft sprocket hub bolts
- the required torque and tighten the camshaft sprocket nut to the specified angle (30 Nm + 86°±6°).
Remove the fixture.
Install the camshaft sprocket hub using the tool (Mot. 1430).
Note: If the latch (Mot. 1430) can not be inserted, turn the camshaft sprocket hub with a 13 mm socket wrench.
Install:
- timing belt.
- accessory drive belt,
- camshaft position sensor,
- right pendulum suspension support,
- engine undertray protection,
- right front fender,
- right front wheel.
Install the engine top cover.