



Contents: Removal 🠛 Installation 🠛
Tightening torques: Tension roller axle mounting bolt - 40 Nm.
Attention!
- Do not run the engine without the accessory drive belt, as this may result in damage to the crankshaft pulley.
- To avoid refrigerant leakage, do not damage (do not deform, bend, etc.) pipeline.
Removal
Place the vehicle on a two-post lift.
Remove:
- right front wheel,
- right front fender liner,
- partially right front fender liner,
- plastic shield under the fuel filter.
Turn the accessory drive belt automatic tensioner roller clockwise with a 16mm offset wrench.
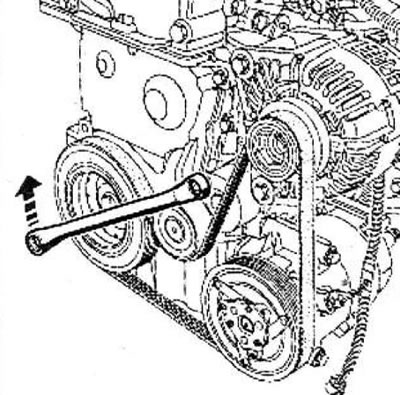
Remove:
- accessory drive belt,
- auxiliary drive belt tensioner roller.
Installation
Parts that must be replaced:
- Auxiliary equipment drive belt,
- Auxiliary drive belt tensioner roller,
- Bolt for fastening the tension roller of the auxiliary drive belt.
Caution: Use only a plastic brush or a soft wire (brass) metal brush.
Brush off any deposits:
- crankshaft pulley,
- air conditioning compressor pulley,
- generator pulley.
Install the new tension roller with a new bolt.
Tighten the tension roller axle mounting bolt to the required torque (40 Nm).
Turn the automatic tensioner roller clockwise with a 16mm offset wrench.
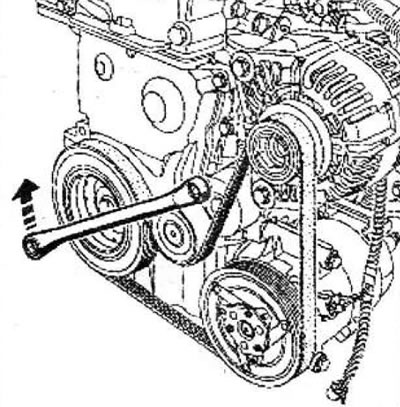
Install a new accessory drive belt.
Turn the engine crankshaft two revolutions clockwise (if you look from the timing drive side) to properly install the accessory drive belt on the pulleys.
Install:
- right front fender liner,
- right front fender liner,
- plastic shield under the fuel filter,
- right front wheel.