



Contents: Removal 🠛 Installation 🠛
(cars without automatic parking brake)
Removal
Place the vehicle on a two-post lift.
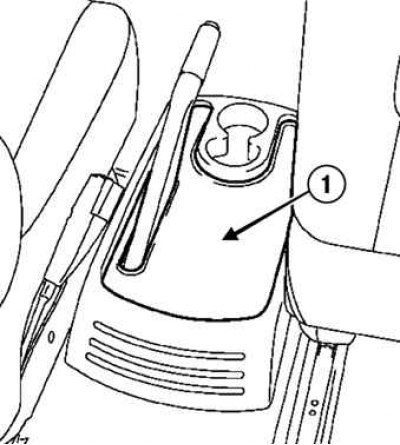
Fig. 6.53. Removing the center console carpet: 1 – rug
Remove the center console carpet (Fig. 6.53).
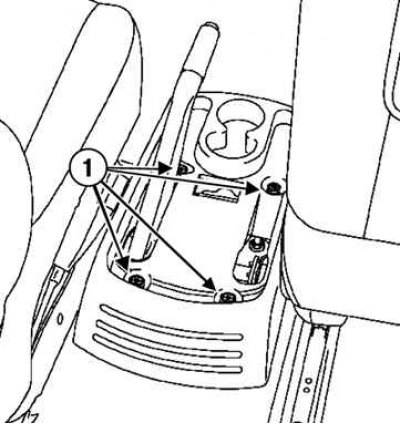
Fig. 6.54. Removing the center console: 1 – mounting screws
Unscrew the screws securing the center console and remove it (Fig. 6.54).
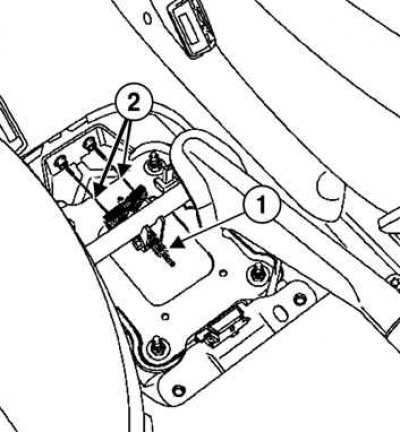
Fig. 6.55. Disconnecting the parking brake drive cables in the drive lever area: 1 – adjusting nut; 2 – drive cables
Loosen the adjusting nut, disconnect the parking brake drive cables in the drive lever area (Fig. 6.55).
Slide the parking brake cables into the housings.
Raise the car.
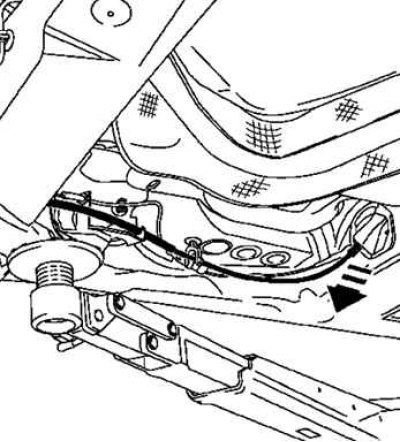
Fig. 6.56. Pulling the cable from underneath the vehicle
Pull the parking brake cables towards you from underneath the vehicle (Fig. 6.56).
(Information is located on the website: www.renaultbook.ru)
Remember the cable route for subsequent installation.
Disconnect the parking brake cables from the brake calipers and from the guides.
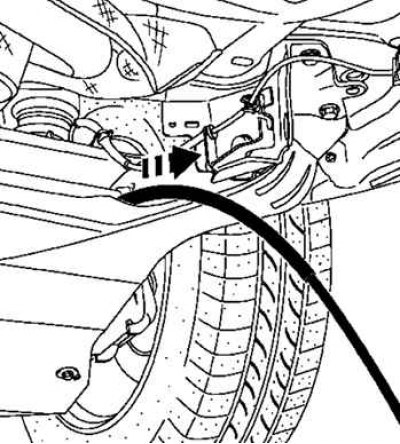
Fig. 6.57. Removing the cable from the rear suspension
Remove the parking brake cables from the rear suspension (Fig. 6.57).
Remove the parking brake cables.
Installation
When installing, route the wiring along the old route.
Installation is carried out in the reverse order of removal.
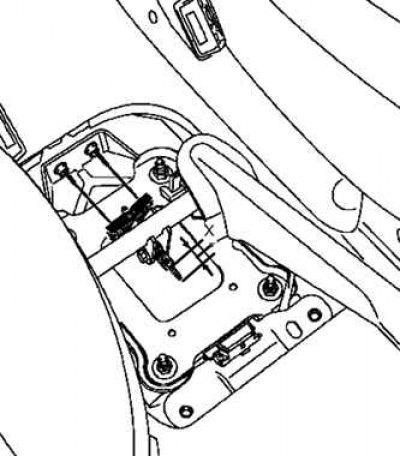
Fig. 6.58. Installing the adjusting nut
Turn the adjusting nut to obtain dimension X equal to 17 mm (Fig. 6.58).
Tighten the adjusting nut until the brake pads lightly touch the brake discs.
Check the travel of the parking brake lever.
Install:
- center console;
- center console mounting screws;
- center console mat.
Tighten to the specified torque:
- parking brake lever mounting bolts (8 Nm);
- central console mounting screws (2 Nm).