



Contents: Removal 🠛 Installation 🠛
Removal
1. Disconnect the ground cable from the battery.
Warning! If the radio in your car is coded, make sure you know the code before disconnecting the battery.
Models with petrol engine
1. Remove the air filter housing as described in Chapter Power and exhaust systems.
2. Set the handbrake, then jack up the front of the car and place it on axle stands. Remove the engine crankcase protective shield.
3. Where fitted, disconnect and remove the bracket from the rear of the starter. On F7R models it will also be necessary to remove the exhaust and fuel line sub-bracket shield.
4. Loosen the nut and disconnect the main cable from the starter solenoid relay.
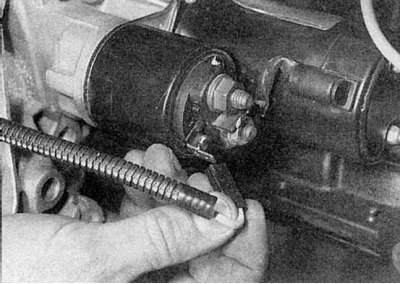
5. Disconnect the control wire of the traction relay from the terminal (refer to the accompanying illustration).
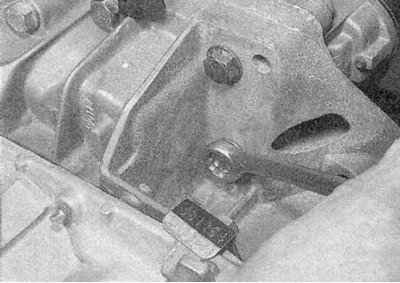
6a. Loosen and remove the three bolts securing the starter to the transmission housing.
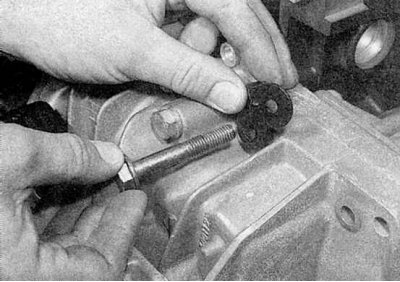
6b. Mark the location of the bracket.
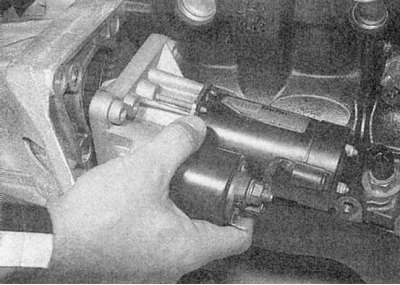
6c. Then remove the starter (refer to the illustrations).
Models with diesel engine (without turbocharger)
1. Remove the air filter housing as described in Chapter Power and exhaust systems.
2. Set the handbrake, then jack up the front of the car and place it on axle stands. Remove the engine crankcase protective shield.
3. Loosen the mounting screws and nut, then remove the protective cover from the starter.
4. Disconnect the wiring connector from the starter solenoid relay, then loosen the mounting nut and disconnect the main supply cable from the solenoid relay.
5. Remove the mounting nuts and bolts, then remove the rear starter mount bracket.
6. Loosen and remove the three bolts securing the starter to the transmission housing and remove it from the engine compartment. Remove the dowel pin that is installed in the rear mount bolt hole.
Models with diesel engine (with turbocharger)
1. Set the handbrake, then jack up the front of the car and place it on axle stands. Remove the right front wheel and engine crankcase guard.
2. Loosen the fastening brackets and remove the air pipe system connecting the intake manifold to the intermediate intercooler.
3. In the same way, remove the pipe system connecting the intake manifold to the intermediate intercooler.
4. Remove the exhaust pipe as described in Chapter Power and exhaust systems.
5. On models equipped with the F9Q engine, remove the two stands at the rear of the starter.
6. Remove the three bolts securing the starter to the gearbox clutch housing.
7. On most models, to remove the starter, you need to do the following:.
8. Working under the right side of the vehicle, use a drift to knock out the roll pin securing the drive shaft to the differential pinion shaft.
9. Loosen the two nuts and bolts securing the right steering knuckle mount to the strut tower. Remove the upper nut and bolt, but do not remove the lower nut and bolt.
10. Pull the top of the steering knuckle mount outward until the inner end of the drive shaft is clear of the differential shaft. Suspend the drive shaft using twine or wire - do not let it hang by its own weight.
11. If necessary, move the drive shaft to gain access to the two nuts securing the turbocharger oil return line to the cylinder block.
12. Remove the two mounting nuts and disconnect the turbocharger oil return line from the cylinder block. Remove the gasket. Plug the holes in the cylinder block to prevent dirt from entering.
13. Remove the nut securing the wiring harness bracket to the base of the starter rear mounting bracket, then disconnect the wiring harness from the starter.
14. Remove the bolt securing the turbocharger bracket to the rear starter bracket (please note that the bolt also secures the insulation shield). Loosen the nut and bolt securing the bracket to the turbocharger.
15. Remove the nuts and bolts securing the rear starter mounting bracket to the engine and starter.
16. Unscrew the remaining bolt securing the heat-insulating shield.
17. Remove the starter, rear mount bracket and heat shield by working underneath the vehicle. Be careful not to drop the starter.
Installation
1. Install in reverse order, but tighten the mounting bolts to the torque specified in the Specifications.