
Models without air conditioning
Heater/ventilation control panel
1. Disconnect the ground cable from the battery (contact the head Engine electrical equipment).
2. Remove the cigarette lighter as described in Chapter Onboard electrical equipment.
3. Unscrew the control unit and remove it from the dashboard.
4. Disconnect the electrical connectors, then separate the cable housing brackets from the block and separate the cables from their levers. Please note that the control cables are color coded. If necessary, disconnect the control unit from the dashboard.
5. Install in reverse order. Make sure the wires are securely attached to each in its original place. The air temperature adjustment cable has a red mark, and the air distributor cable has a blue mark. Check the operation of the control panel before installing the cigarette lighter.
Heater control cables
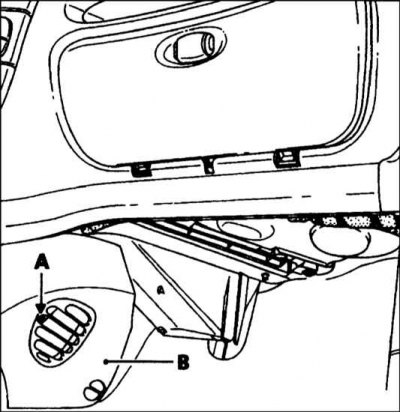
1. Remove the control box as described in the paragraphs above. Access to the cable fasteners on the right side of the air distributor housing can be obtained both from under the dashboard and through the opening under the control box. Unscrew the bolt and remove the cover located under the dashboard on the right (refer to accompanying illustration).
2. Mark the control cables and their mounting brackets on the air distributor housing so as not to mix up the cables during installation.
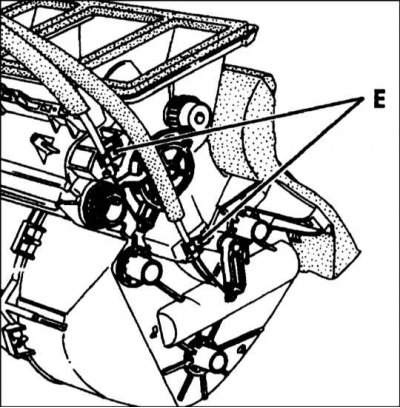
3. Unhook the mounting brackets, then separate the cables from the air distributor housing and levers and remove them from the panel. Please note that the cables are color coded (refer to accompanying illustration).
4. When installing, bring the cables to the working position, guided by the colored marks (red at the temperature control cable and blue at the air distributor cable).
5. Attach the cables to the air distributor housing arms and attach the cable covers. Using the marks made prior to removal, attach both cables with the retaining clips. Install the control box and check the operation of the cables.
Heater blower motor
1. Disconnect the ground cable from the battery.
2. Displace the section of the right door seal and remove the plastic interior trim of the threshold.
3. Release the blower motor harness located under the panel at the level of the glove boxes, moving from the middle of the car to the door.
4. Remove the foam insert from under the supercharger, then disconnect the wiring connector.
5. Turn away three bolts and take assembly of the supercharger motor.
6. Rotate the block 90°counterclockwise and remove it.
7. Install in reverse order.
Heater blower motor control unit
1. The control box is behind the panel on the left side.
2. Disconnect the ground cable from the battery.
3. Disconnect the wiring, then unscrew the bottom mounting bolt of the control box.
4. Loosen the top fixing bolt, tilt the unit back and remove it.
5. Install in reverse order.
Air diffuser cover
1. Drain the liquid from the cooling system. Alternatively, pinch the heater heat exchanger hoses as close to the bulkhead as possible.
2. Remove the dashboard assembly as described in Chapter Body.
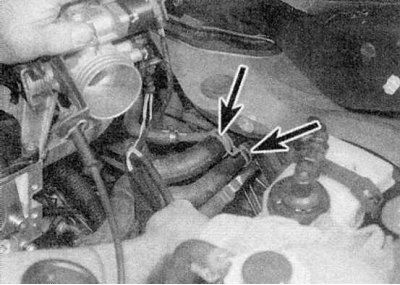
3. Loosen the clamps and remove the cooling system hoses from the pipes of the heater heat exchanger (refer to illustration).
4. Remove the seal from the top edge of the engine compartment bulkhead.
5. Turn away screws of fastening and remove the panel of the deflector of the vent located at a windshield (on right).
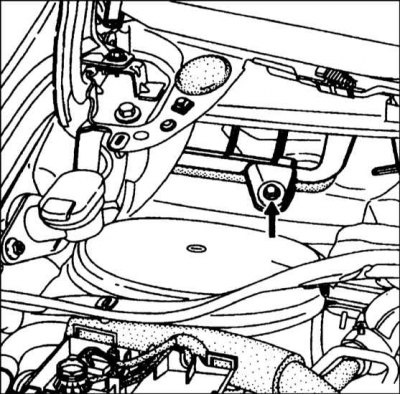
6. Loosen and remove air distributor housing bolt (refer to accompanying illustration).
7. Working in the engine compartment, remove the top bracket nut on the bulkhead and the two bolts at the base of the block (refer to accompanying illustration).
8. Remove the bolts of the two fluid-carrying tubes located on the side wall of the casing and separate the tube assembly from the heater heat exchanger and casing. Clog the ends of the pipes and the pipes of the heat exchanger of the heater so as not to spill the coolant into the passenger compartment. Cover the cover with a rag as a precaution and immediately wipe off any spilled coolant with a damp cloth to prevent stains.
9. Be sure to clear the wires and cables from the shroud and separate any attached components from the shroud.
10. Carefully separate the lower air duct and shroud assembly from the bulkhead and remove it from the vehicle. Be careful not to spill any coolant.
11. Install in reverse order. When attaching the tubes to the heater heat exchanger, use new seals. Finally, top up the fluid level in the cooling system.
Heater heat exchanger
Note. On models with a two-piece casing, it is enough to remove only the right half of the casing.
1. Disconnect the ground cable from the battery (contact the head Engine electrical equipment).
2. Drain the liquid from the cooling system. Alternatively, pinch the heater heat exchanger hoses as close to the bulkhead as possible.
3. Loosen the clamps and remove the cooling system hoses from the heater heat exchanger pipes.
4. Drain as much liquid as possible from the heat exchanger by forcing air through its top connection. Be prepared for liquid to come out of the lower nozzle and, if possible, divert the jet away from the engine.
5. Turn away a bolt and remove the cover located below the dashboard at the left.
6. Turn away a bolt of fastening of the tubes carrying a liquid located on a casing side wall, and three bolts fastening the heat exchanger of a heater to an air distributor casing.
7. Separate the pipes from the heat exchanger, being careful not to spill coolant in the cabin. Cover the cover with a rag as a precaution and immediately wipe off any spilled coolant with a damp cloth to prevent stains.
8. Remove the heater heat exchanger from the casing, being careful not to damage its plates.
9. Install in reverse order. Use new tube seals.
Models with air conditioning
1. On models equipped with air conditioning, the motorist can only remove / install the panel and heater control cables, as well as the blower motor control unit. These steps are the same as above (refer to sectionRemoval and installation of heater components (all models except Scenic)).
2. Removal of the blower motor, air distributor housing, heater heat exchanger and air recirculation damper motor must be carried out by a Renault workshop, as these operations involve the disconnection of the coolant-carrying tubes.
Attention! Do not disconnect the components of the air conditioning system until it is discharged.