
Note. Please note that slight damage to the radiator (minor leaks) can be eliminated with a special sealant without removing the radiator.
Removing
1. Disconnect the ground cable from the battery (on Scenic models, refer to Chapter Engine electrical equipment).
2. Drain the liquid from the cooling system.
3. Disconnect the electrical connector from the fan and its switch (screwed into the left side of the radiator).
4. Loosen the clamps and separate the cooling system hoses from the radiator (refer to section Separation and replacement of hoses of the cooling system).
5. Remove the block of the left forward direction indicator as it is described in the Head Onboard electrical equipment.
6. Turn away the central screw of fastening of a radiator lattice and remove a connecting level.
7. Turn away screws of fastening, then loosen the lower brackets, bring the left and right sections of a radiator grill forward and remove them from the car.
8. Loosen and remove the nuts/bolts securing the upper radiator brackets to the hood cross member. If access to the bolt/nut is difficult, try removing the heatsink from the bracket.
9. Turn away six fixing bolts of a crossbar from a cowl, then remove a crossbar from the car. Remove the brackets and rubber seals from the top of the radiator.
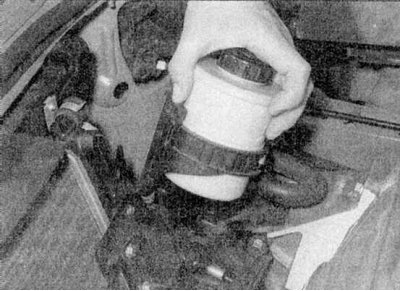
10. Where necessary, disconnect the power steering hydraulic reservoir and move it away from the radiator (refer to accompanying illustration).
11. On air-conditioned models, loosen and remove the mounting bolts and nuts and separate the filter drier reservoir from the rear of the radiator. Remove the bolts securing the condenser to the front of the radiator and also separate it.
Attention! Do not disconnect the components of the air conditioning system until it is discharged. See Precautions in Section Removal and installation of heater components (Scenic models).
12. Make sure all tubing/wires are disconnected, then lift the radiator and fan assembly out of the engine compartment, being careful not to lose the rubber parts of the bottom radiator mounts.
Inspection
1. If the radiator was removed due to its supposed blockage, flush it in reverse. Clean dirt and debris from radiator fins using compressed air (protect your eyes with goggles) or soft brush. Be careful not to cut or damage the sharp plates.
2. If necessary, have a specialist perform a specific radiator blockage test.
3. Have a leaky radiator repaired by a professional. Do not attempt to weld or solder it, as this may damage the adjacent plastic components.
4. Minor radiator leaks can be repaired with a suitable sealant without removing the radiator.
5. If the radiator is to be replaced or repaired, remove all hoses and fan switch from the radiator (where available).
6. Check up a condition of rubber pillows of a radiator and replace them if it is necessary.
Installation
1. Install in reverse order, placing each rubber pad in its original position. Finally, fill the cooling system.