
Examination
1. The power supply to the fan is supplied through the ignition switch and fuse (contact the head Onboard electrical equipment). The circuit is closed by the fan thermal switch, which is installed on the left side of the radiator.
2. If the fan does not work, check the fuse first. Start the engine, warm it up to normal operating temperature and let it idle. The fan should turn on within a few minutes (before the pointer goes to the red part of the scale or the coolant temperature control lamp lights up). If this is not the case, turn off the ignition and disconnect the wiring connector from the fan switch. Connect the two pins of the connector with a jumper wire and turn on the ignition. If the fan is now running, the switch is defective and should be replaced.
3. If the fan still does not work, check that the voltage in the supply wire matches the voltage of the battery; if not, the supply wiring is damaged. If the supply side of the circuit is OK, check the resistance between the negative terminal of the switch and the ground point on the body. If the current does not pass, the contact of the connection with the mass is defective.
4. If the switch and wiring are good, the blower motor is damaged. To verify this, disconnect the wiring harness from it and apply 12V to the motor.
Removing
1. Disconnect the ground cable from the battery (on Scenic models, refer to Chapter Engine electrical equipment).
2. Where necessary, disconnect the power steering hydraulic reservoir and move it away from the fan.
3. On air-conditioned models, loosen and remove the mounting bolts and nuts and separate the filter drier reservoir from the rear of the radiator.
Warning! Do not disconnect the refrigerant-carrying pipes. See Precautions in Section General Description and Precautions - Air Conditioning System.
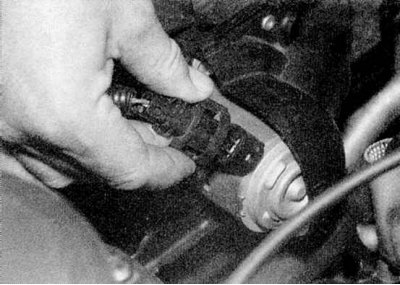
4. Disconnect the electrical connector from the fan motor and remove the wires from the fan shroud (refer to accompanying illustration).
5. Loosen and remove the bolts securing the fan shroud to the rear of the radiator, then remove the assembly from the engine compartment.
6. If necessary, pull out the mounting bracket / unscrew the mounting screw (depending on the model) and remove the fan impeller from the motor shaft. Disconnect the motor and remove it from the casing. If the motor is defective, replace it as the motor cannot be repaired.
Installation
1. Install in reverse order, paying attention to the following:
- a) Before installation, inspect the fan shroud fasteners and replace if worn or damaged.
- b) Make sure the wiring is routed correctly and attached with all brackets and zip ties.
- With) Install the radiator as described in Section Removal, inspection and installation of the radiator.