
Attention! On the models equipped with a pillow of safety see the Precautions given in the Head Onboard electrical equipment.
Removing
1. Disconnect the ground cable from the battery (on Scenic models, refer to Chapter Engine electrical equipment).
Attention! If the car radio in your car is coded, before disconnecting the ground cable from the battery, make sure you have the key code.
2. Remove the steering wheel as described in Section Removal and installation of a steering wheel.
3. Remove the combination switch assembly (contact the head Onboard electrical equipment).

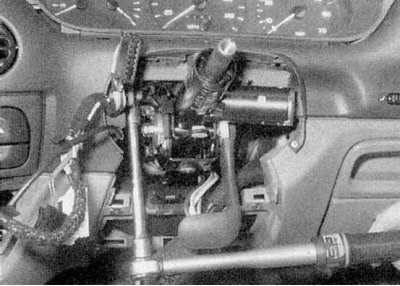
4. Turn away screws of fastening and remove the panel of furnish of a steering column (refer to accompanying illustration).
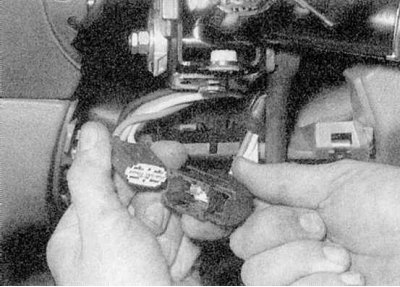
5. Trace the wiring from the ignition switch, releasing it from the brackets and ties, and disconnect the connectors (refer to accompanying illustration).
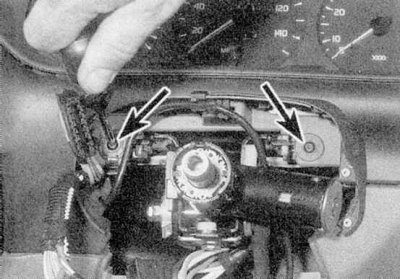
6. Remove the two bolts securing the top of the steering column to the dashboard (refer to accompanying illustration).
7. Engage the handbrake, then jack up the front of the vehicle and place it on axle stands.
8. Working under the vehicle, release the mounting bracket (where available) and fold back the protective rubber boot to access the lower steering column shaft universal joint. Mark the universal joint and steering gear with paint or a marker. Loosen and remove the nut and bolt of the clamp securing the pivot to the gear.
Attention! On vehicles equipped with an airbag, before removing the column shaft, place the wheels in position "directly" and lock the steering wheel with a suitable tool. If this is not done, the airbag wiring harness contact block will be damaged.
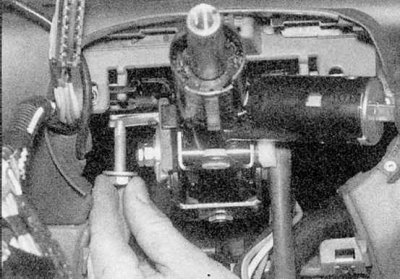
9. Working in the cabin, unscrew the four fixing nuts / bolts of the steering column (refer to accompanying illustration). Disconnect the steering column from the dashboard, then remove it from the mounts. On models equipped with power steering, separate the lower protective cover of the column shaft from the bulkhead.
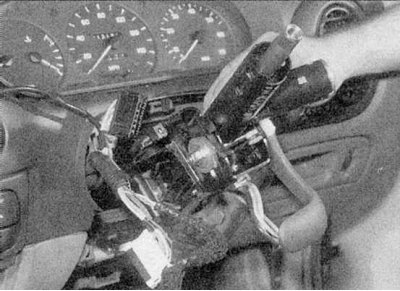
10. Unhook the universal joint from the steering gear and remove the column assembly (refer to accompanying illustration).
Inspection
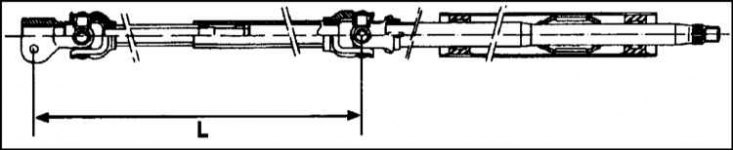
1. The lower part of the intermediate shaft of the column has an impact-absorbing telescopic section. In the event of a frontal collision, this area folds up to protect the driver from hitting the steering wheel. Before installing the steering column, compare the length of the intermediate shaft with the data given in Specifications (refer to accompanying illustration).
If the shaft is shorter, the steering column assembly must be replaced. If the pinch bolt does not fit freely into the base of the shaft when installing the column, this also indicates damage to the intermediate shaft.
2. Check the steering column shaft for play in the bushings; inspect the universal joints for wear and damage. If any are found, replace the steering column.
3. Inspect the rubber boot/steering column guard for damage and replace if necessary.
Installation
1. Bring the steering column assembly into position. Connect the universal joint to the steering gear, matching the marks made before removal.
2. Install and tighten the steering column mounting nuts/bolts. On models with power steering, install the steering column boot into the bulkhead (refer to accompanying illustration).
3. Working under the vehicle, install the universal joint pinch bolt and tighten to Specifications effort. Move the protective cover to the working position and (where necessary) attach it with a new clip. Lower the car to the ground.
4. Install the two bolts securing the top of the column to the dashboard and tighten them securely. Install the speaker trim panel.
5. Make sure the ignition switch wiring is routed correctly, then connect it to the main wiring harness.
6. Establish assembly of the combined switches as it is described in the Chapter Onboard electrical equipment. On models with an airbag, also install its contact block.
7. Install the steering wheel as described in Section Removal and installation of a steering wheel and connect the negative cable to the battery.