
Hood opening mechanism and its elements
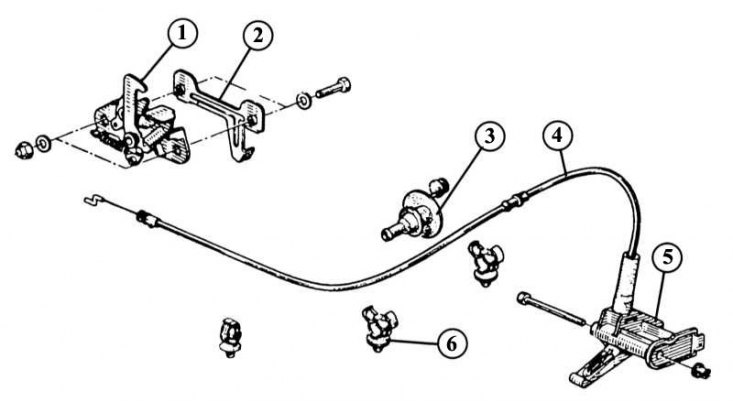
1 - lock trap; 2 - hood lock with a counter support for the opening mechanism; 3 - sealing funnel for connecting the technical hole in the front wall; 4 - cable for opening the engine hood; 5 - release lever; 6 - mounts in the engine compartment.
Removing the hood
1. Open and lock the engine hood.
2. Pull out the washer hose. Then, using a lever, bend both right plugs at the hood and remove the hose from the tee.
3. Pull the hose along the hood.
4. Mark the position of the fasteners.
5. Unscrew 2 bolts, and then remove a cowl from fastenings.
6. At installation of a cowl bolts of its fastening slightly gain.
7. Pull the washer hose from both sides of the hood and connect it to the tee.
Hood installation
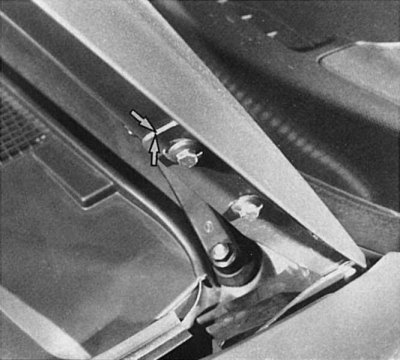
The illustration shows the left hood attachment and possible location (shown by arrows) for marking. Loosening the bolts allows the hood to be adjusted in a horizontal plane in order to establish a uniform gap with adjacent body parts and equalize in height.
If a new engine hood is installed, then all parts of the old hood must be rearranged. It is extremely important to fit both rubber seals between the headlights and the bonnet. The hood must be installed as follows:
1. When aligning the hood with the long holes in the side mounts, you need to align the rear of the engine hood in terms of angles and height.
2. By aligning the hood with the mounting holes in the body, you can install the hood so that the required height parameters are met.
3. With slightly baited fastening screws, the hood is aligned so that it is in the same plane with the surface of the wings and fairing.
4. To align the front of the hood, loosen the lock bolts.
5. In this case, the lock should take the highest position.
6. Carefully close the hood and press down until it stops until the hood is in the desired position.
7. Carefully open the hood and tighten the bolts.
8. If the adjustment after checking for closing and opening is unsatisfactory, loosen the hood latch and readjust.
9. Check if the engine hood closes well. To do this, release the hood cover from a height of 30 cm, while it should slam shut under its own weight.
Replacement of the broaching mechanism of the hood
To open the engine hood, tighten the cable, which is laid from the hood lock along the left wall of the engine compartment through the front and is attached under the dashboard to trim A. In case of a rupture, the tension cable must be replaced:
1. On a thick wire 30 cm long, bend a 2-centimeter corner.
2. Use this tool to press down on the cable attachment between the shock absorber and grille on the left side of the engine compartment. This can be done without the application of force, the main thing is to choose the right place for pressing, since the mount is not visible.
3. The hook needs to be inserted 20 cm and then set vertically. With some patience, unlocking will soon work. If possible, lightly press on the hood to make the latch open more easily.
4. To replace the cable, it is necessary to completely unscrew the long T-20 screw from the facing part.
5. Remove both inner (black color) grilles. In addition, carefully unscrew the plastic screws from the spacer until you can remove the entire device with the screws.
6. Remove the flexible cable sheath from the locking mechanism counterholder.
7. Disconnect the cable from the locking lever.
8. Release the cable from the clamps in the engine compartment and pull it through the front wall into the cab.
9. When installing, try to lay the cable without kinks and stress.
10. Hood cable is not adjustable.