



Warning: If the timing belt breaks while the engine is running, serious damage may occur. Replace the belt at the intervals specified in Specifications in Section 1, or more often if you have any doubts about its condition.
Removal
1. Disconnect both cables from the battery (start with the negative).
2. To provide additional working space, remove the hood as described in Section 11.
3. Remove the air cleaner assembly according to the corresponding Part Section 4.
4. Apply the handbrake, then jack up the front of the car and place it on axle stands. Remove the right wheel.
5. Remove the plastic cover from inside the wheel arch. Also unscrew the lower drive cover to gain access to the crankshaft pulley (see illustration).
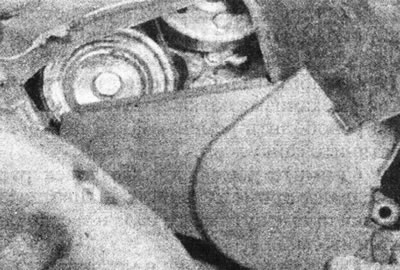
6.5. Remove the lower drive cover - engine F7P (with 16 valves).
6. Remove the right headlight assembly as described in Section 12, Chapter 7.
7. Remove the alternator drive belt as described in Section 1.
8. Loosen the crankshaft pulley bolt.
9. Support the weight of the engine with a jack.
10. Loosen the screw and remove the cover from the right engine mount.
11. Unscrew the bolts and nuts and remove the upper engine mount bracket.
12. Unscrew and remove the plastic intermediate timing belt cover.
13. Unscrew the metal upper drive belt cover from the cylinder head.
14. Turn the crankshaft clockwise until the TDC marks on the camshaft sprockets align with the corresponding marks or notches on the valve cover.
15. Lock the engine in the TDC position by inserting a rod through the hole under the TDC setting plug. See Chapter 3.
16. Completely loosen the crankshaft pulley bolt and remove the pulley from the end of the crankshaft. If this fails, use a puller.
17. Once again, make sure that the timing marks on the camshaft sprocket are aligned with the corresponding marks on the valve cover.
18. Check if there are arrows on the belt indicating the direction of its rotation; please mark this if necessary.
19. Loosen the nut, move the tensioner bracket outward to release the belt, then retighten the nut.
20. Remove the belt from the camshaft sprockets, intermediate pulley, intermediate shaft sprocket and crankshaft sprocket.
21. Clean the sprockets and tensioners and wipe them dry, but do not use excessive amounts of solvent on the tensioner pulleys or the bearing grease may become contaminated. Also clean the front of the cylinder head and block.
Inspection
22. Carefully inspect the toothed drive belt along its entire length, especially at the base of the teeth. Replace the belt if it is contaminated with oil or grease. Replace all leaking seals. The belt should be replaced when the maximum mileage given in Section 1A or 1B has been reached. Also inspect the sprockets and tensioner as described in Chapter 7.
Installation
23. Make sure that the piston of cylinder No. 1 is in the TDC position and that the crankshaft is also locked in this position using a metal rod inserted through the hole in the crankcase.
24. Make sure that the timing marks on the camshaft sprockets are aligned with the corresponding marks or notches on the valve cover.
25. Align the stripes on the belt with the marks on the sprockets. The mark on the crankshaft sprocket is in the form of a notch on the rear guide. There are no timing marks on the intermediate shaft sprocket. Install the timing belt onto the crankshaft sprocket, then onto the intermediate shaft and camshaft sprockets.
26. Make sure all timing marks are aligned, then tension the belt by turning the tensioner pulley counterclockwise and tightening the fastening nut. When the belt tension is approximately correct, if you grasp the belt with your thumb and index finger midway between the intermediate shaft sprocket and the intermediate pulley, it will only be able to be twisted 90°. The tensioner position can also be adjusted through a special hole next to the tensioner.
27. Remove the TDC setting rod from the cylinder block.
28. Install the crankshaft pulley and mounting bolt, but do not tighten it completely at this stage.
29. Rotate the crankshaft two full revolutions in the normal direction of rotation, then return it to the TDC position for cylinder No. 1 on the compression stroke, and reinsert the setting rod.
30. Make sure the alignment marks remain aligned.
31. Now it is necessary to check the belt tension by the amount of its deviation. To do this, first make a mark on the front engine mounting bracket flush with the timing belt, midway between the intermediate shaft sprocket and the intermediate pulley. Now a force of 100 N·must be applied to the toothed drive belt and its deviation must be measured, which must be within 3.0 mm±0.5 mm (for a cold engine). Renault technicians use a special tool for this, but the operation can be performed using a spring balance and a steel ruler. Apply force with a steelyard and read the deviations on the steel ruler (see illustration 5.21b in Part C of this Section).
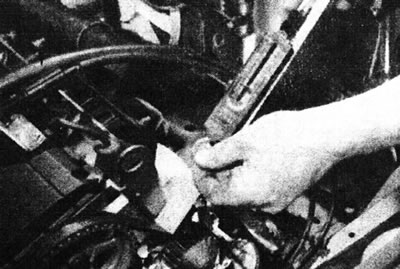
5.21b. Check the tension of the toothed drive belt using a spring balance and a steel ruler.
32. If the tension is incorrect, adjust the tensioner, then retighten the nut to the torque specified in the Specifications.
33. Remove the TDC setting rod from the cylinder block and install the plug.
34. Tighten the crankshaft pulley bolt to the torque specified in the Specifications.
35. Install the upper timing belt cover onto the cylinder head and tighten the bolts.
36. Install the intermediate timing belt cover.
37. Install the upper right engine mount bracket. Check its adjustment, see Chapter 18.
38. Place the cover on the hanger and tighten the screw. Remove the jack.
39. Install and tension the alternator drive belt as described in Section 1.
40. Install the right headlight unit as described in Section 12, Chapter 7.
41. Install the lower timing belt cover. Place the plastic cover inside the wheel arch, then install the wheel and lower the car to the ground.
42. Install the air cleaner assembly according to the relevant Section Section 4.
43. Install the hood as described in Section 11.
44. Connect the wiring to the battery.