



Table 1.5
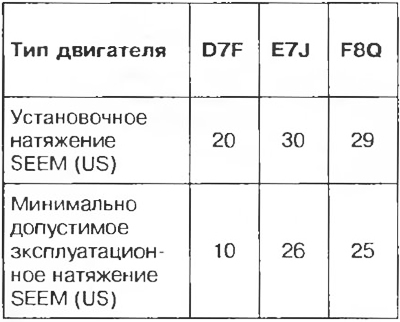
Engine D7F
1. Remove the retainer Mot. 1054
2. Fit the extension sleeve of tool Mot. 1386 and tighten the crankshaft toothed pulley mounting bolt.
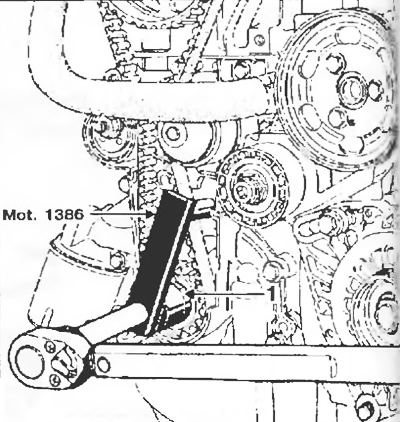
Figure 1.8a
3. Install the Mot 1273 meter and use the Mot. 1135-01 device to turn the tensioning roller counterclockwise until the value of 20 US is reached (turn the sensor handwheel until it is triggered (three clicks)).
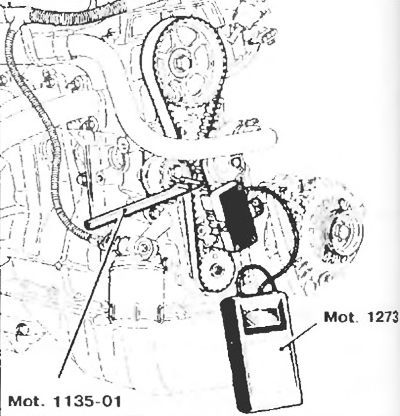
Figure 1.8b
4. Tighten the tension roller mounting nut.
5. Turn the engine crankshaft at least two revolutions (without allowing rotation in the opposite direction).
6. Lock the crankshaft with the locking device in the position corresponding to the piston of the first cylinder being at TDC, then remove the locking device.
7. Check the correct installation of the valve timing mechanism by aligning the marks on the toothed pulleys of the camshaft with the installation marks on the cylinder head cover and the front cover of the cylinder block, respectively.
8. Loosen the tension roller nut and turn the roller slightly using tool Mot. 1135-01 clockwise until both holes on the tension roller are almost horizontal.
9. Tighten the tension roller axle mounting nut.
10. Turn the crankshaft at least two revolutions (without allowing rotation in the opposite direction).
11. Lock the crankshaft with a locking device in the position corresponding to the piston of the first cylinder being at TDC, then remove the locking device.
12. Using tool Mot. 1386, create a pre-tension of 10 Nm on the belt on the branch between the crankshaft toothed pulley and the coolant pump pulley.
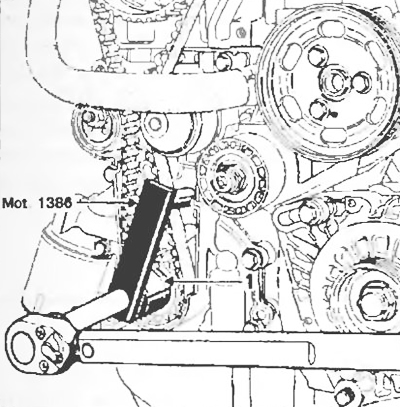
Figure 1.8c
13. Install the Mot. 1273 gauge and measure the tension value, which should be within 20±3 US (installation tension); if the value is different, correct it by changing the position of the tension roller using the Mot. 1135-01 device, and repeat the tensioning procedure according to points 10-12.
14. Tighten the tension roller axle mounting nut to a torque of 50 Nm.
Note: After each change in the position of the tension roller, the crankshaft should be rotated at least two revolutions to be able to measure the tension.
15. Create a belt pre-tension of 1 Nm, which will eliminate belt deflection.
Engine E7J
1 Allow the engine to cool to ambient temperature.
2. Fit the measuring unit of the Mot. 1273 instrument to the belt.
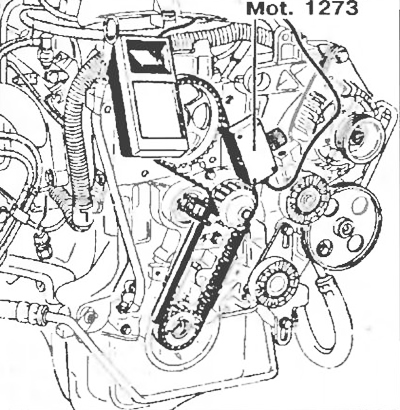
Figure 1.9
3. Turn the knob of the pressure device regulator until the third click, thereby preparing the device for operation.
4. Tighten the belt until the Mot. 1273 instrument display shows the desired setting value.
5. Lock the tensioner, perform a control check, and bring the tension to the required value.
6. Turn the crankshaft three revolutions.
7. Make sure the tension value is within the tolerance (±10%), otherwise readjust.
8. Tighten the tension roller axle mounting nut to a torque of 50 Nm.
Engine F8Q
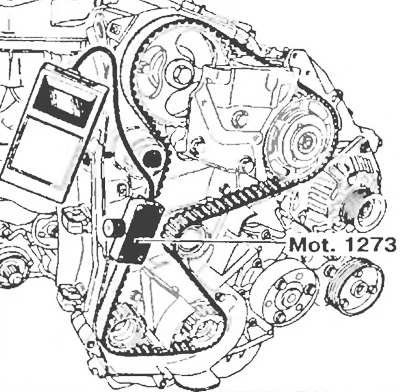
Figure 1.10
On the F8Q engine, before installing the measuring unit of the Mot. 1273 instrument, remove the TDC position fixing pin Mot 1054 and press hard on the belt in the area between the intermediate shaft pulley and the tension roller, then take the measurement.