
Removing
- relieve pressure in the power supply system;
- remove the wire from the negative terminal of the battery;
- raise the back seat;
- remove the metal hatch cover in the rear floor to gain access to the pump cover;
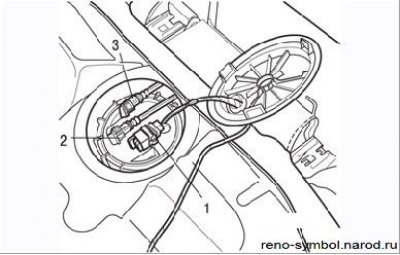
Figure 3.97. Fuel pump cover: 1 - contact connector; 2 - fuel supply pipeline; 3 - drain pipeline
- disconnect the electrical connector (Figure 3.97);
- Disconnect the quick-detachable fitting of the fuel supply pipe (Green colour);
- disconnect the quick-release fitting of the drain pipe (Red). Plug openings to prevent dirt from entering;
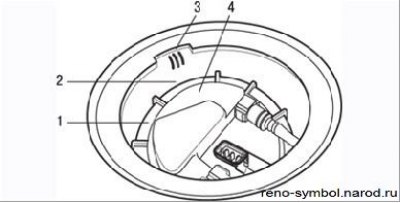
Figure 3.98. Fuel pump cover marking: 1 – a round nut of fastening of the fuel pump; 2 - mark on a round nut; 3 - three risks on the fuel tank; 4 – a label on a cover of the fuel pump
- fix the marking to align the assembly elements (Figure 3.98). Use a wide-blade screwdriver to lean on the protrusion of the round nut and, lightly hitting it with a hammer, remove the nut from its place, and then unscrew it by hand;
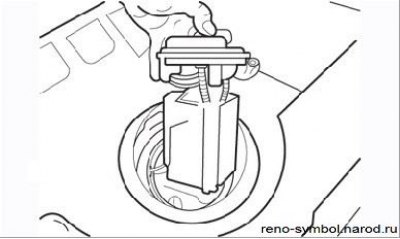
Figure 3.99. Removing the fuel pump from the fuel tank
- carefully remove the fuel pump and level sensor assembly from the tank (Figure 3.99);
- inspect the gasket. If it is free of defects, it can be reused.
Note. In the event that several hours must pass between the removal and installation of this assembly, tighten the nut on the tank to prevent deformation.
Installation
- clean, if necessary, the fuel receiver grid;
- install the sealing gasket on the top of the fuel tank;
- carefully place the pump in the tank;
- align the marks as shown in Figure 3.99 and install the round nut. Tighten it securely and make sure the marks are aligned;
- snap the fitting of pipelines;
- connect the connector;
- install the hatch cover;
- perform other operations in the reverse order of removal.