
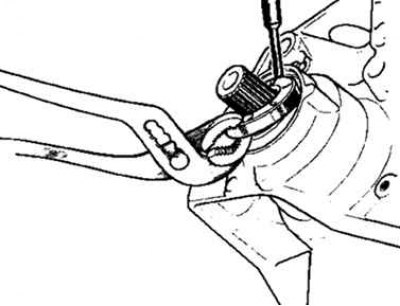
Pic. 3.93. Removing the sealing ring
Remove the O-ring, taking care not to damage the splines of the planetary gear (pic. 3.93).
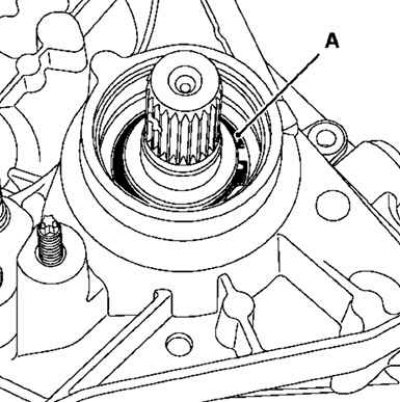
Pic. 3.94. Removing the circlip
For support when operating the press, place a plate under the driven gear. to release and remove the circlip A, push it against the clutch housing (pic. 3.94).
The differential is removed by pressing hard on the planetary gear.
Bearing replacement (gear side)
Insert a block into the housing and place it flat on the bearing.
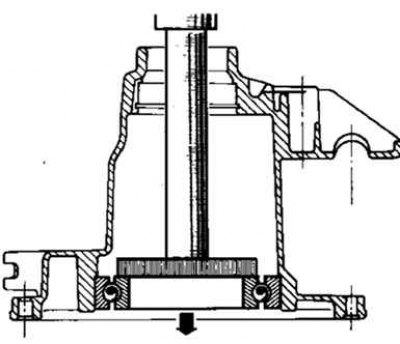
Pic. 3.95. Pressing out a bearing with a bushing
Press out the bearing with a bushing (pic. 3.95).
Installation
Bearing separator C is directed in the opposite direction from the driven gear.
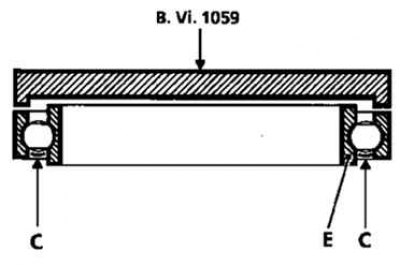
Pic. 3.96. Pressing in a bearing
Press in the bearing using the tool (V.Vi.1059) supported on the outer ring of the bearing (pic. 3.96).
From planetary gear
Remove the circlip A holding the bearing.
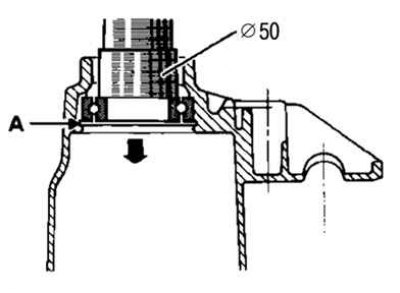
Pic. 3.97. Pressing out a bearing with a bushing
Press the bearing with a 50 mm diameter bushing into the crankcase (pic. 3.97).
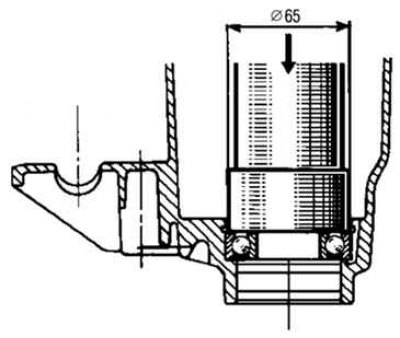
Pic. 3.98. Installing a bearing with a sleeve
Mount the bearing using a 65 mm diameter bushing. The bearing cage must be directed away from the driven gear (pic. 3.98).
Install the circlip holding the bearing.
Reinstall the differential into the crankcase. Place a block of wood under the gear.
Install circlip B on tool head 1 (B.Vi.946), and then the head - to the planetary gear.
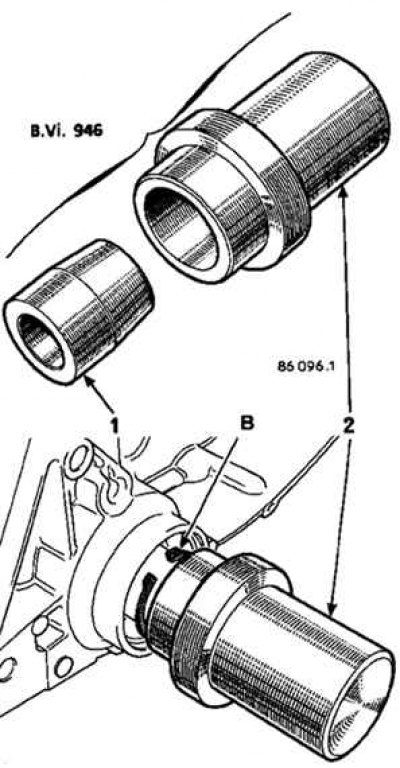
Pic. 3.99. Installing the snap ring holding the bearing: 1 - fixture head (V.Vi.946); 2 - fixture (B.Vi.946)
Install fixture 2 (B.Vi.946) on the head and insert with force until the snap ring snaps into place. Remove fixture (B.Vi.946) (pic. 3.99).
Rotate the entire assembly and check if the speedometer drive gear is rotating (if it is installed).