



Contents: Removal 🠛 Examination 🠛
Removal
The adsorber is installed on the fuel tank under the vehicle.
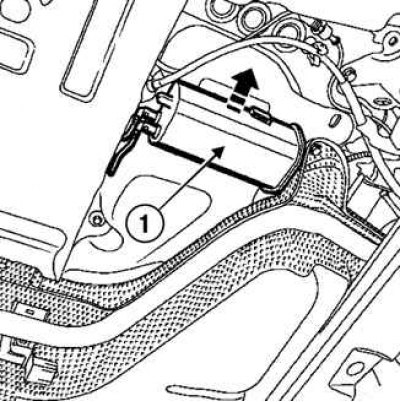
Fig. 2.285. Releasing the adsorber mount: 1 – adsorber
Release the canister from the retainer on the fuel tank by moving it in the direction of the arrow (fig. 2.285).
Disconnect the vapor supply lines from the fuel tank and to the solenoid valve.
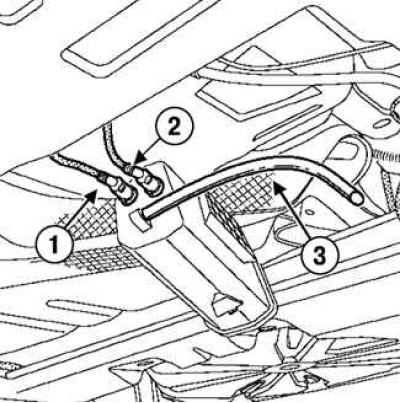
Fig. 2.286. Removing the adsorber: 1 – fuel tank vapor supply line; 2 – pipeline for supplying steam to the electromagnetic valve; 3 – communication tube with the atmosphere
Disconnect the vent line and remove the canister (fig. 2.286).
Examination
Plug the pipe branch on the adsorber that comes from the fuel tank.
Connect the pressure gauge of the device (Mot. 1311-01) to the connection nipple with the absorber atmosphere.
When the engine is idling, make sure that there is no vacuum in the connection with the atmosphere of the adsorber (and also that the value of the parameter "degree of cyclic opening of the electromagnetic valve of the adsorber purge" read on the device remains minimal: X is less than or equal to 1.5%).
If there is a vacuum, then with the ignition off, use a vacuum pump to create a vacuum of 500 mbar at the output of the electromagnetic valve. The vacuum should not change by more than 10 mbar in 30 s.
If the pressure changes, the solenoid valve is faulty, replace it.
If the pressure does not change, the vacuum should increase under the blowdown conditions (at the same time, the parameter value on the diagnostic device screen should increase).
Under this condition, an electrical fault occurs, so the circuit needs to be checked.