
Stroke check
1. The clutch pedal assembly includes an automatic regulator, the operation of which can be checked as follows.
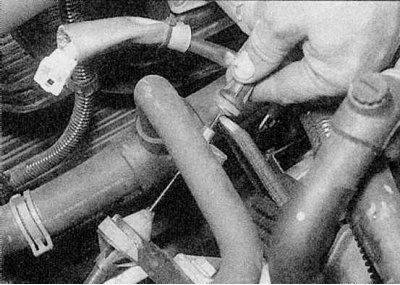
2. First, measure the free play of the clutch cable: without depressing the clutch pedal, pull the end of the cable facing the transmission from its casing and measure the length of the exposed section. If the mechanism is working correctly, the free play of the cable should be at least 20 mm. If this is not the case, check to see if the gear segment of the regulator is jammed.
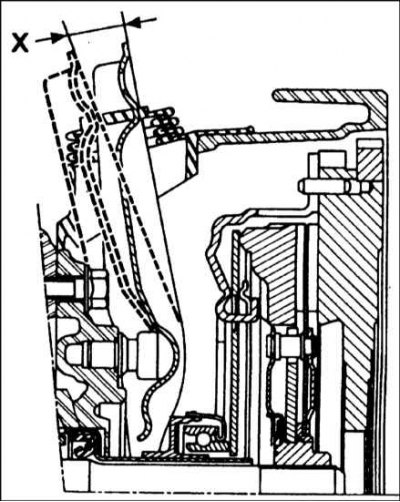
3. Have an assistant fully depress and release the clutch pedal and measure the total displacement of the end of the clutch release fork. If the mechanism is working correctly, the fork travel should be 27.4 - 30.7 mm (refer to accompanying illustration). If not, inspect the auto adjuster teeth for damage and check for a loose spring. Also make sure that the cable is not jammed in the casing.
Removing
1. Disconnect the ground cable from the battery (on Scenic models, refer to Chapter Engine electrical equipment).
Attention! If the radio in your car is coded, make sure you know the code before disconnecting the battery.
2. On all engines except E7J, remove the air filter assembly and air ducts (contact the head Power and exhaust systems).
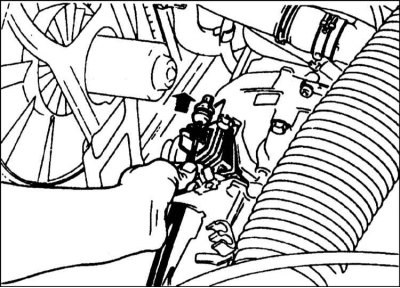
3. Working in the engine compartment, unhook the end of the cable from the clutch release fork on the transmission.
4. Turn away screws of fastening and remove the lower casing of a steering column to get access to assembly of a pedal of coupling.
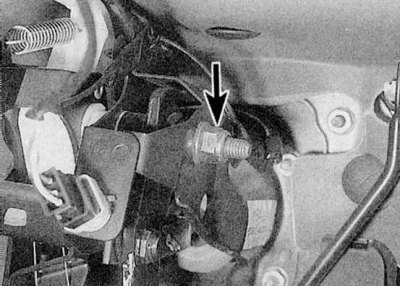
5. Loosen and remove the nut and washer from the pedal pivot (refer to accompanying illustration). Where available, remove the mounting nut/bolt and remove the bracket from the end of the axle.
6. Partially remove the clutch/brake pedal pivot shaft so that the clutch pedal can be removed along with the pivot bushings and spacer. Note the position of the pivot bushings to ensure proper pedal installation later on.
7. Separate the clutch cable from the upper end of the pedal, then unhook it from the toothed segment and remove the pedal assembly from the vehicle. Push the pedal pivot back into working position.
8. Inspect the pedal assembly for damage and signs of wear, paying special attention to the auto adjuster. Do not attempt to disassemble the assembly - its individual components are not sold. If the pedal assembly is damaged, it must be replaced as a whole. Replace pivot bushings if worn or damaged.
Installation
1. Apply some multipurpose grease to the running surfaces of the bushings and pedal spacer, and to the surfaces of the adjuster teeth.
2. Install the bushings on the pedal, each in its original place. Make sure that the locating lug of each bushing is aligned with the corresponding notch in the pedal, place the spacer in the working position.
3. Place the pedal assembly under the dashboard. Hook the end of the clutch cable to the adjuster, then move the pedal to the operating position.
4. Make sure the clutch cable is correctly positioned on the gear segment of the adjuster, then install the bracket (where available) and tighten its nut/bolt only by hand for now.
5. Push the pivot shaft fully into position, then install the washer and nut. Tighten the axle nut and bracket nut/bolt.
6. Hook the end of the cable facing the transmission to the clutch release fork.
7. Depress the clutch pedal several times, watching the position of the cable on the gear segment. This will allow the auto adjuster to set the required pedal free play.
8. Check regulator operation as described above.
9. Install lower steering column shroud, air filter assembly and air ducts (where there are) and connect the mass cable to the battery.