
Attention! Handle fuel injectors with extreme care. Never expose your hands or any other part of your body to the nozzle jet, as due to the high working pressure, the jet of fuel can penetrate the skin, which will lead to fatal consequences. It is strongly recommended that all work related to checking the health of the pressure injectors be entrusted to a specialist in fuel injection systems or a workshop.
Examination
1. Injectors wear out over time and it is reasonable to expect them to need repair or replacement after 100,000 km. An accurate check of serviceability, overhaul and calibration of injectors must be entrusted to a specialist. A defective injector that may be causing detonation or smoke can be identified without disassembly as follows.
2. Start the engine, set to fast idle. Slowly loosen the coupler on each nozzle one at a time. When the coupler on the defective injector is loosened, detonation or pressure should stop.
Removing
Note. Be very careful not to let dirt get into the injectors or fuel lines.
1. Gently clean the area around the nozzles and nozzle tube union nuts.
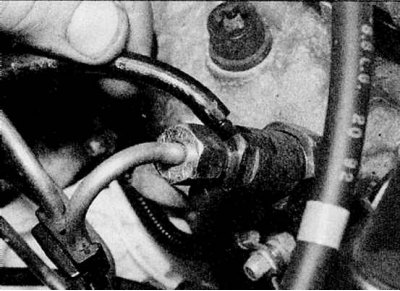
2. On F8Q engines, disconnect the outlet pipes from the injectors (see illustration).
3. Remove the union nuts securing the injector tubes to the high pressure fuel pump. Close open couplings to prevent dirt from entering.
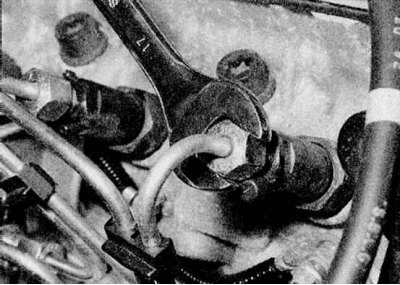
4. Turn away nuts and disconnect tubes from atomizers (refer to accompanying illustration). If necessary, the tubes can be removed completely. Note the location of the brackets attached to the tubes. Close the ends of the nozzles to prevent dirt from entering.
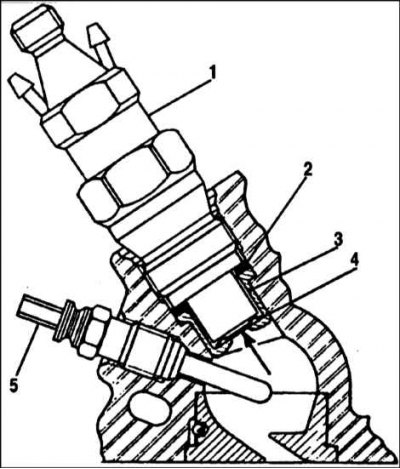
5a. Sectional fuel injector - F8Q engines:
1 - Fuel injector; 2 - Copper washer; 3 - Bushing; 4 - Sealing refractory washer; 5 - Glow plug
5b. On F8Q engines, unscrew the injectors using a deep socket or a box wrench (27 mm).
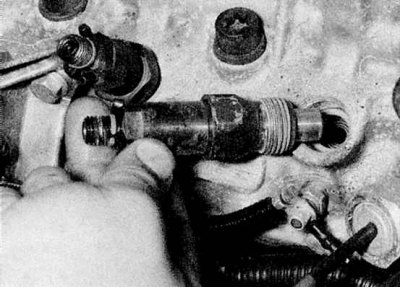
5c. Remove them from the cylinder head.
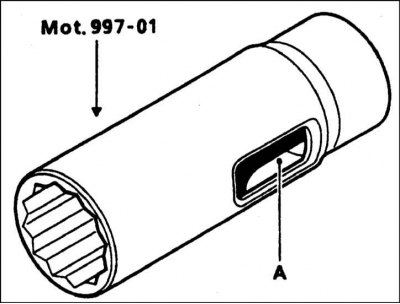
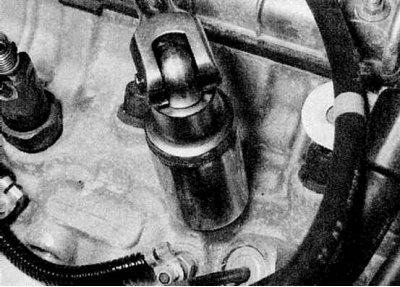
5d. On F8Q engines with a turbocharger, the No. 1 injector holder has an injector needle lift sensor installed, so a special tool is required to remove the injector. If it is not there, then in a deep socket it is necessary to make a slot for the sensor wiring (refer to accompanying illustration).
6. On F9Q engines, remove the bolts holding the injector clamps to the cylinder head. Remove the trims and injectors, then remove the seal gaskets between the injectors and the cylinder head.
7a. On F8Q engines, remove the copper washers.
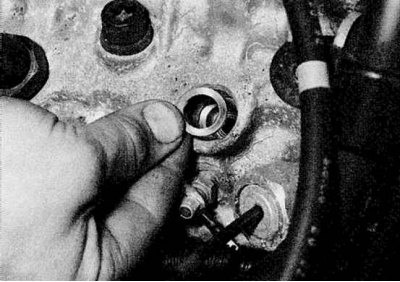
7b. Remove fire-resistant washers from a head of the block of cylinders. Also remove bushings if they are free (refer to illustrations).
Installation
1. On F8Q engines, purchase new copper and fire washers. Also replace the bushings if they are damaged.
2. Try not to drop the nozzles. Also, do not clamp them in a bench vise.
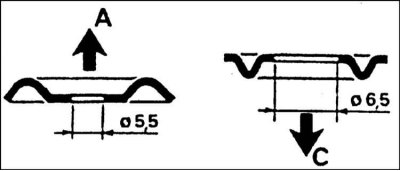
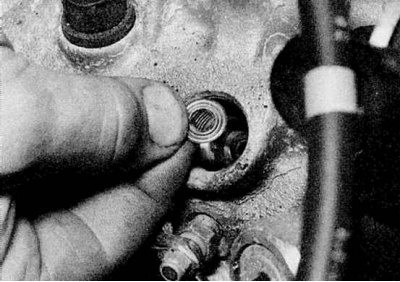
3. On F8Q engines, start installation by inserting bushings (if removed) into the cylinder head. Install new fire-resistant washers in the cylinder head. Please note that these washers must be installed with the convex side down (to the cylinder head) (see illustration).
4. Install new copper washers in the cylinder head.
5. Insert the nozzles and tighten them to the Specifications effort. On F8Q engines with a turbocharger, use the special tool (refer to paragraph 7 above), to clamp the No. 1 nozzle with the needle lift sensor.
6. On F9Q engines, install new gaskets between injectors and cylinder head. Insert the nozzles, then install the clamping bars. Tighten the straps given in Specifications effort.
7. Install the nozzle tubes and securely tighten the union nuts. Place the brackets on the tubes as noted before removal.
8. Connect outlet tubes (F8Q engines).
9. Start the engine. If this fails, bleed the fuel system, refer to Section Filling and bleeding the fuel system.