



Contents: Crankshaft sprocket 🠛 Intermediate shaft sprocket/roller 🠛 Fuel pump sprocket 🠛 Camshaft sprocket 🠛 Intermediate pulley 🠛 Tensioning mechanism 🠛
Note: F8Q 620 and early F8Q 784 engines are equipped with a toothed drive belt "HTD", while late F8Q and all F9Q engines are equipped with a belt with a different tooth profile "HTD2". Whenever the toothed drive belt is replaced always make sure you purchase the correct type of belt to match the sprockets - the same applies to any sprocket that will be replaced.
Note: Use a new timing belt when installing.
Crankshaft sprocket
Note: This operation may require a suitable puller.
Removal
1. Remove the toothed drive belt as described in Chapter 5.
2. Usually the sprocket can be easily removed from the crankshaft (see illustration).
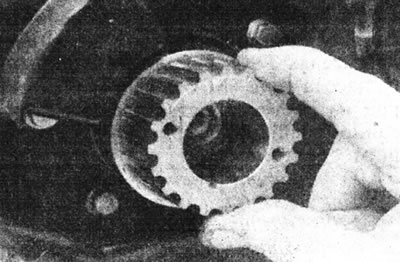
6.2. Removing the crankshaft sprocket.
But in some cases a puller may be required.
3. Remove the woodruff key if it is loose. Inspect the oil seal for oil leaks and replace it if necessary as described in Chapter 12.
Installation
4. Install in reverse order. Insert the woodruff key, install the sprocket.
5. Install the new timing belt as described in Chapter 5.
Intermediate shaft sprocket/roller
Removal
6. Remove the toothed drive belt as described in Chapter 5.
7. On engines with an intermediate shaft (see Specifications), hold the sprocket with a special tool. You can also use an old timing belt for this by wrapping it around the pulley and gripping it with pliers.
8. Loosen the mounting bolt, then pull the pulley off the end of the shaft (see illustration).
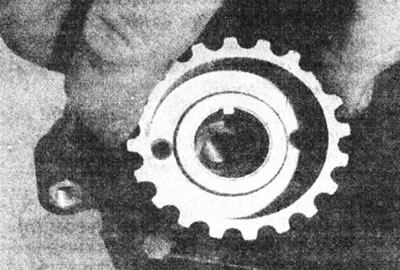
6.8. Removing the intermediate shaft sprocket.
If necessary, use two levers or screwdrivers to release the pulley (if necessary, you can use a puller as described above for the crankshaft sprocket). Please note that on some engines the woodruff key is part of the sprocket. On engines without an intermediate shaft, unscrew the bolt and remove the intermediate roller.
Installation
9. On engines with an intermediate shaft, install a woodruff key (where available) and put the sprocket on the shaft. Tighten the pulley mounting bolt to the torque specified in the Specifications. On engines without an intermediate shaft, install the roller and tighten the mounting bolt securely.
10. Install the new timing belt as described in Chapter 5.
Fuel pump sprocket
Note: On F8Q 620 engines, a suitable puller will be required. On early versions of the turbocharged F8Q engines (predominantly F8Q 784), the MAA fuel pump sprocket must be removed using Renault tools Mot. 1359 and Mot. 1357, and installation requires a torque wrench to tighten the left-hand threaded fasteners. On later versions of these engines (especially on F8Q 786 and F8Q 788) and on all F9Q engines, the MAA fuel pump sprocket is secured with a non-ferrous metal nut with a built-in washer. For all engines see. information in Chapter 14 of Section 4D.
Removal
11. On all engines, remove the timing belt (see Chapter 5).
12. On F8Q 620 engines, proceed as follows: (see illustrations):
- Hold the sprocket with the Renault Mot. 1200 tool (see Section 4D, Chapter 14) or other suitable ones. You can also use an old timing belt for this purpose by wrapping it around the pulley and gripping it with pliers.
- Unscrew the pump sprocket nut. Do not remove the nut at this stage.
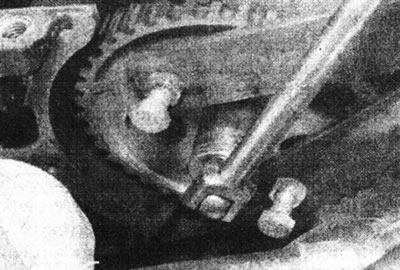
6.12a. Loosen the fuel pump sprocket nut...
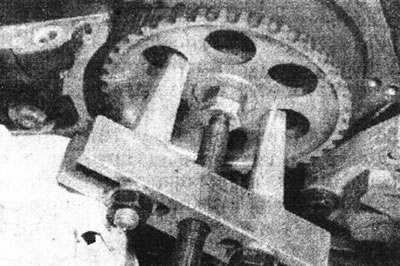
6.12b....and remove the pulley - F8Q 620 engines.
- Note the location of the woodruff key on the end of the fuel pump bolt. The pulley has two slots for a woodruff key (for Bosch and Lucas fuel pumps - see illustrations 5.15a and 5.15b). Mark the woodruff key slot to ensure proper installation.
- Using a suitable puller, release the pulley from the cone on the pump shaft.
- Then unscrew the pulley nut and remove the washer.
- Remove the sprocket and remove the woodruff key from the end of the pump shaft if it is loose.
Warning: On early turbocharged F8Q engines (predominantly F8Q 784), the MAA fuel pump sprocket must be removed using Renault Mot. 1359 and Mot. 1357 tools, and installation will require a torque wrench to tighten the left-hand threaded fasteners. On later versions of these engines (especially on F8Q 786 and F8Q 788) and on all F9Q engines, the MAA fuel pump sprocket is secured with a non-ferrous metal nut with a built-in washer. For all engines see. information in Chapter 14 from Section 4D.
13. On early versions of the F8Q turbocharged engines (the MAA fuel pump sprocket is secured with a regular nut and separate washer), proceed as follows:
- Install the Renault Mot tool. 1131 (early version) or Mot. 1200 (late version), to prevent the pulley from rotating. You may need to rotate the crankshaft slightly clockwise to allow the tool to engage the pulley teeth - make sure the dowel pin has been removed from the cylinder block before rotating the crankshaft.
- Unscrew the sprocket nut and remove the washer.
- Using Renault tool Mot. 1359, loosen the pulley's central bolt clockwise - the bolt has a left-hand thread.
- Instead of the central bolt, screw the Renault Mot. 1357 tool counterclockwise, then screw a 40 mm long M12 x 1.25 bolt into the center of this tool. Clamp the bolt in the tool to remove the sprocket.
- Remove the sprocket and remove the woodruff key from the end of the pump shaft if it is loose.
14. On later turbocharged F8Q engines and all F9Q engines (MAA fuel pump sprocket secured with a non-ferrous nut with a washer fitted), proceed as follows:
- Install the Renault Mot tool. 1131 (early version) or Mot. 1200 (late version), to prevent the pulley from rotating. You may need to rotate the crankshaft slightly clockwise to allow the tool to engage the pulley teeth - make sure the dowel pin has been removed from the cylinder block before rotating the crankshaft.
- By unscrewing the nut, release the sprocket from the pump shaft cone.
- Remove the sprocket and remove the woodruff key from the end of the pump shaft if it is loose.
Installation
15. Install in reverse order, paying attention to the following:
- On F8Q 620 engines, ensure the woodruff key is inserted into the correct slot in the pulley.
- Tighten the sprocket nut to the torque specified in the Specifications (see Section 4D).
- Install and tension the new timing belt as described in Chapter 5.
- Before installing the outer drive belt cover onto the fuel pump sprocket, check the injection timing as described in Section 4D.
Camshaft sprocket
Note: You will need a suitable puller for this job.
Removal
16. Remove the toothed drive belt as described in Chapter 5.
17. On models with F9Q engines and air conditioning, remove the auxiliary drive belt tensioner mounting plate, then remove the alternator/fuel pump mounting bolt.
18. Remove the bolts securing the right engine mount main bracket to the engine and remove the bracket.
19. Unscrew the camshaft sprocket bolt. The pulley can be held using a suitable socket and an extension rod placed on the head of one of the inner timing belt cover mounting bolts (see illustration).
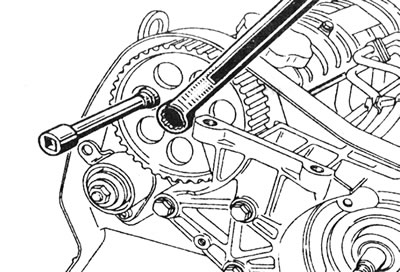
6.19. Fixing the camshaft sprocket when unscrewing the pulley bolt.
Alternatively, use an old drive belt wrapped around the pulley. Remove the washer.
20. Remove the bolt, washer and sprocket from the camshaft. This may require a suitable puller.
21. Remove the woodruff key from the end of the camshaft if it is loose - note that on later model engines the key is part of the pulley (see illustration).
Original publication on the portal RenaultBook.ru
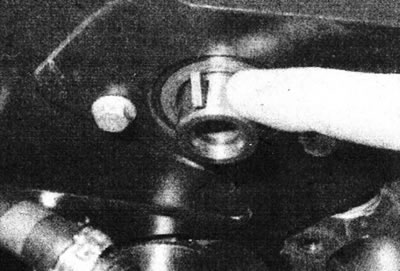
6.21. Remove the woodruff key from the end of the camshaft.
Installation
22. Install the woodruff key (where available) into the camshaft. Install the sprocket with the protruding part towards the cylinder head. Make sure the key fits into the slot correctly.
23. Install the bolt and washer and tighten it to the torque specified in the Specifications, holding the pulley in the same manner as used during removal.
24. Install the right engine mount main bracket onto the engine and tighten the mounting bolts.
25. Install the bolts securing the accessory drive belt tensioner mounting plate and the fuel pump/generator.
26. Install the new timing belt as described in Chapter 5.
Intermediate pulley
Removal
27. Remove the toothed drive belt as described in Chapter 5.
28. Unscrew the two mounting bolts and remove the intermediate pulley, removing it from the inner toothed belt covers.
Installation
29. Install in reverse order.
30. Install the new timing belt as described in Chapter 5.
Tensioning mechanism
Removal
31. Remove the toothed drive belt as described in Chapter 5.
32. Remove the mounting nut and washer, unscrew the mounting bolt, then remove the tensioner assembly.
Installation
33. Install in reverse order. Make sure the protrusion on the cylinder block fits into the hole in the tensioner bracket.
34. Install the new timing belt as described in Chapter 5.