
- Ball plate adjusting screw - B.Vi.1462
Torque:
- Automatic transmission pan bolts - 10 Nm
- Valve block mounting bolts - 8 Nm
Removing
1. Put the car on a lift.
2. Disconnect the battery.
3. Drain the automatic transmission fluid.
4. Remove the air filter duct.
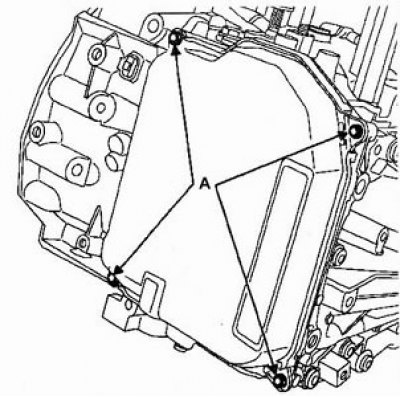
5. Remove four bolts (A) automatic transmission pan mounting. Be careful, liquid may spill.
6. Turn away seven bolts of fastening of the block of valves.
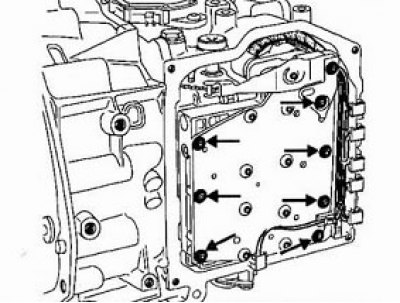
7. Disconnect the wiring connector and remove the valve block.
Installation
1. Connect the wiring connector to the valve block.
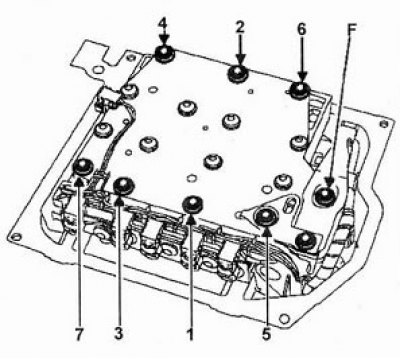
2. Install the valve block in place and tighten the bolts by hand (4) And (5). Then install the rest of the bolt.
3. Tighten the mounting bolts to 8 Nm in the order 1-2-3-4-5-6-7.
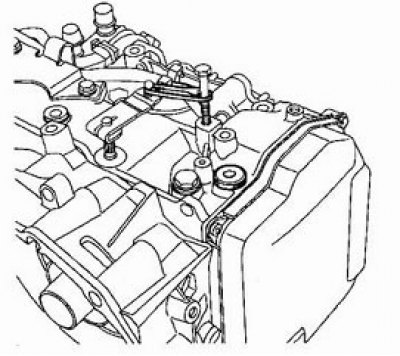
4. Adjust the ball board position:
- A) Lock the automatic transmission control lever in the 1-1 gear position.
- b) Remove the bolt (F).
- V) Install the ball board and its bracket so that the sector cut corresponding to 1st gear is held in position (1) roller.
- G) Install but do not tighten the bolt (E) board fasteners.
- d) Install and tighten the maximum adjusting screw B.Vi. 1462.
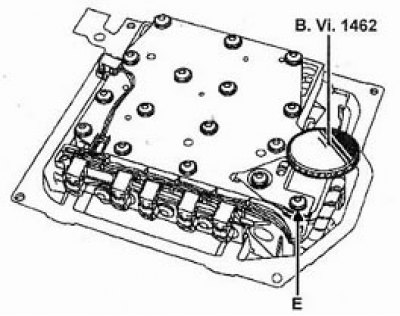
- e) tighten bolt (E) torque 8 Nm.
- and) Remove the adjusting screw.
- h) tighten bolt (F) torque 8 Nm.
5. Install the automatic transmission pan and tighten the fastening bolts to 10 Nm.
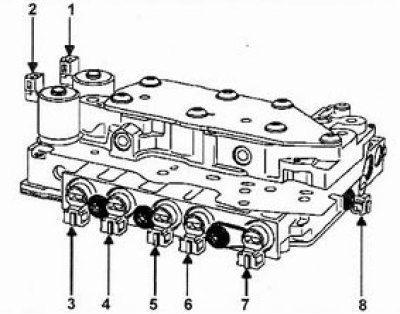
Valve location. 1 - Shift lockout valve, 2 - Torque converter lockup valve, 3 - Sequential valve #4, 4 - Sequential valve #3, 5 - Sequential valve #1, 6 - Sequential valve #2, 7 - Sequential valve #6, 8 - Sequential valve number 5.