
Withdrawal:
- install the wiper blades in their original position and mark their location on the windshield to facilitate reinstallation;
- disconnect the wire from the negative terminal of the battery;
- pay attention to the fact that the leashes of the cleaner are of different lengths, do not confuse them during installation;
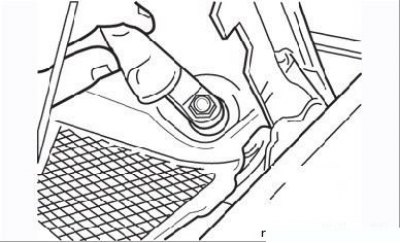
Figure 8.43. Cap covering the leash fastening nut
- lift the plastic cover or plug covering the leash attachment nut (Figure 8.43);
- use a screwdriver or puller to move the leash off the axis. Do not damage the paint or decorative trim;
- remove the windshield trim as described in section «Body»;

Figure 8.44. Disconnecting the windshield wiper motor connector
- release the lock and disconnect the connector from the cleaner motor (Figure 8.44);
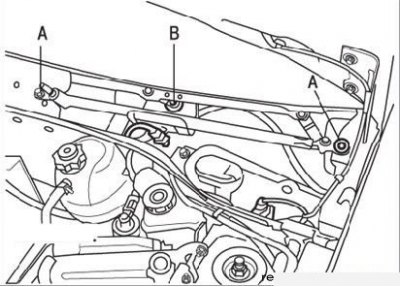
Figure 8.45. screws (A) windshield wiper drive mechanism mounting and nut (IN) motor shaft
- unscrew the two fixing screws A (Figure 8.45) drive mechanism and separate it from the rear attachment point;
- after removing the drive mechanism and the motor assembly, unscrew the nut B of the motor shaft and release the rod, marking its position;
- remove the three motor mounts.
Installation
- install the thrust on the motor in accordance with the mark applied during removal;
- before installing wiper arms, make sure the motor is in the fixed stop position;
- use a brush with metal bristles to clean the slots on the axes of the wiper arms;
- install the cleaner leads by placing the brush against the mark made during removal;
- install new nuts and tighten them to the specified torque;
- check the operation of the purifier.
Wiper motor check

| Terminal | Description |
| 1 | Stop position |
| 2 | Not used |
| 3 | Low speed |
| 4 | High speed |
| 5 | "Earth" |