
Removing
1. Mark the position of the front wheels on the hub with paint. This will allow the assembly to set the balanced wheel in its original position.
2. Loosen the wheel bolts. The vehicle must be on wheels during this operation.
3. Place the vehicle on jack stands and remove the front wheels.
Attention! If the brake pads are to be reinstalled for later use, they should be marked before removal. Swapping pads from the right wheel to the left and vice versa is not allowed. Such a rearrangement can lead to uneven braking of the wheels. Be sure to change all front brake pads, even if only one of them has reached the minimum wear limit.
4. Disconnect the brake pad wear sensor wire attached to the suspension strut by cutting the clamp.
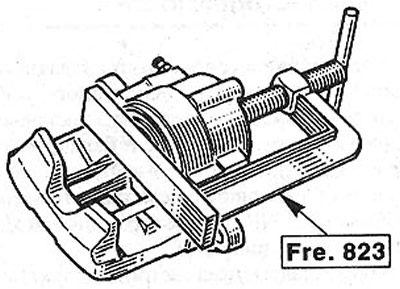
5. Pull the caliper with your hand and push the wheel cylinder piston in this way.
Attention! When the piston is depressed, the brake fluid is squeezed out of the wheel brake cylinder into the expansion tank. Observe the liquid in the tank, if necessary, select it.
Note: Use a siphon or a plastic bottle that is not destroyed by the brake fluid to drain. Do not use regular drinking water bottles! Brake fluid is poisonous and must never be sucked out by mouth through a hose. Use a siphon. And after replacing the brake pads, the level of brake fluid in the reservoir should also not exceed the maximum mark, because. when heated, it expands. Leaking brake fluid flows down the brake master cylinder, destroying the paintwork and causing corrosion.
6. Unscrew the two bolts 7 with a hex head, which secure the shoe guide, while holding the guide pins from turning with a wrench (see illustration).

2.6 Unscrew the two bolts 7 with a hexagonal head, which secure the shoe guide, while holding the guide pins from turning with a wrench
Attention! Re-installation of these bolts is not allowed.
7. Remove the caliper by pushing it up, and then secure it with wire to the body, preventing the brake hose from stretching.
Attention! Do not disconnect the brake hose from the caliper. Otherwise, you will have to bleed the brake system later.
8. Remove the brake pads.
Installation
Attention! With the brake pads removed, do not press the brake pedal. Otherwise, the piston will be squeezed out of the brake cylinder body.
9. Clean the seating and guide surfaces of the brake pads with a suitable soft metal brush or wipe with a rag soaked in alcohol. Do not use solvents containing mineral oils or sharp-edged tools.
10. Before installing the pads, check the brake disc for the absence of grooves by running your hand over it. Brake disks with a corrugated surface replace with new ones.
11. Measure the thickness of the brake discs.
12. Check up a condition of a dustproof cap 8 of the piston of the brake cylinder. Replace a damaged and cracked cap immediately, because penetrating dirt quickly leads to depressurization of the brake caliper. To do this, the brake caliper must be removed and disassembled (see illustration 2.6). The work is done in the workshop.
13. Press the piston of the brake cylinder with a special tool, but you can do with a hardwood rod (hammer handle). Do not distort the piston and do not damage its surface and the dust cap itself (see illustration).
2.13 Press the piston of the brake cylinder with a special tool
Attention! If the brake pads are badly worn, then it is necessary to check the ease of movement of the piston of the brake cylinder. To do this, insert a wooden block into the caliper and ask the assistant to slowly press the brake pedal. The piston of the brake cylinder should move easily. To check, you need to install a second caliper. Pay attention that the piston has not been squeezed out completely. If the piston has a hard stroke, repair the caliper (work being done in the workshop).
14. Lubricate the back of the brake pads and the sides of the pad base plate with a thin layer of high-temperature anti-squeak paste. The following products are suitable for this: Plastilube, Tunap VC 582/S, Chevron SRJ/2, Liqui Moly LM-36 or LM-508-ASC (see arrows in illustration). This step is not mandatory.
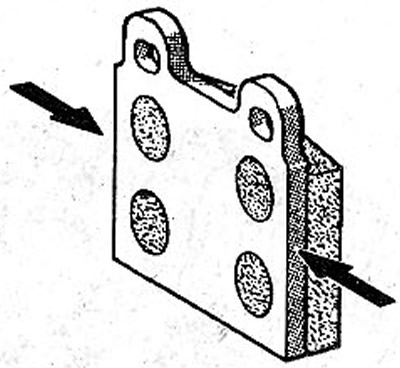
2.14 Lubricate the back of the brake pads and the sides of the pad base plate with a thin layer of high temperature anti-squeak paste (see arrows)
Attention! The paste must never come into contact with the active surface of the brake linings or the brake disc. Immediately remove the Paste that has fallen, and clean the disc with alcohol.
15. Install both brake shoes in the guide. Make sure the compression springs are vertical and parallel to the top edge of the pads.
Attention! Brake pads with a pad wear sensor wire terminal must be installed on the inside.
16. Replace bolts 7 with new ones (see illustration). Before installing them, apply a protective paste, such as LOCTITE FRENBLOC, to their threads.
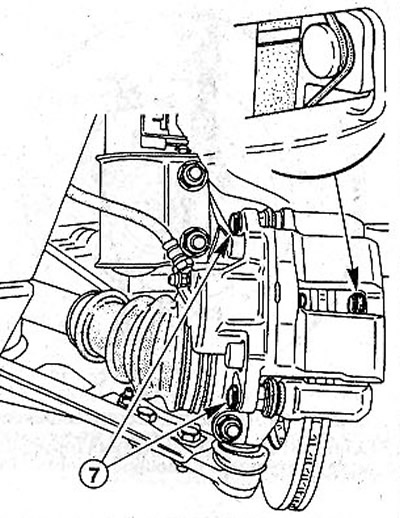
2.16 Replace bolts 7 with new ones
17. Replace the caliper and secure it to the shoe guide with two new bolts 7 (see illustration 2.16). the tightening torque of the bolts is 3-5 Nm. Install the bottom bolt first, then the top bolt. In this case, the caliper should be pressed against the brake pads by hand, overcoming the resistance of the springs. Make sure that the ends of the springs at the top and bottom are pressed against the caliper.
18. Connect the brake pad wear sensor wire and secure it with a new clamp to the brake hose.
19. Establish forward wheels according to the marks put at removal and fix with bolts.
20. Lower the vehicle and tighten the wheel bolts in a cross pattern to 90 Nm.
Attention! Depress the brake pedal with force several times until a strong resistance is felt.
21/ Check the brake fluid level in the expansion tank. If necessary, top up to the maximum mark.
Attention! Make sure that
- A) brake hoses are securely connected;
- b) the brake hose is fixed in the holder;
- V) fittings for bleeding the brake actuator are wrapped;
- G) There is enough brake fluid in the expansion tank.
22. Carry out a leak test of the brake system with the engine running.
To do this, depress the brake pedal with a force of 200-300 N (20 -30 kg) for approximately 10 seconds. The pressure in the system and, accordingly, on the brake pedal, must not fall. Check all connections for tightness.
23. Carefully run in new brake pads. To do this, brake several times, bringing the speed from about 80 km / h to a speed of 40 km / h, and slightly pressing the brake pedal. Let the brakes cool down in between.
Attention! New brake pads should be worn in. Therefore, before driving approximately 200 km, refrain from braking, causing a complete stop of the car.
Note: Brake linings must not be disposed of with normal waste, as the dust that forms on them is hazardous to health. They need to be disposed of only at special points.