



Contents: Removal 🠛 Installation 🠛
Removal
- make sure the cleaner motor is in the fixed stop position;
- disconnect the negative battery cable;
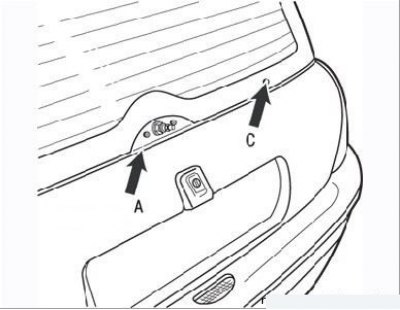
Figure 8.46. Wiper blade position mark (C) and decorative cover (A) on the rear door glass
- mark the position of the wiper blade on the glass (Figure 8.46) and remove the leash from the axle;
- remove the decorative cover by overcoming the force of the latches;
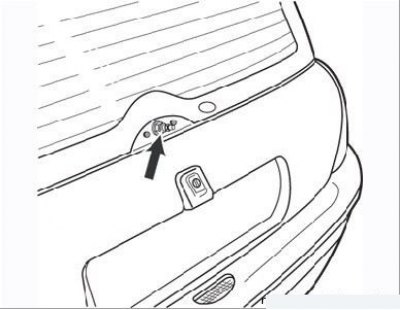
Figure 8.47. Wiper motor axle mounting nut
- unscrew the nut securing the wiper motor shaft (Figure 8.47) and remove the washer;
- open the tailgate and, having unscrewed the screws and overcome the force of the latches, remove the door trim panel;
- disconnect the contact connector from the wiper motor;
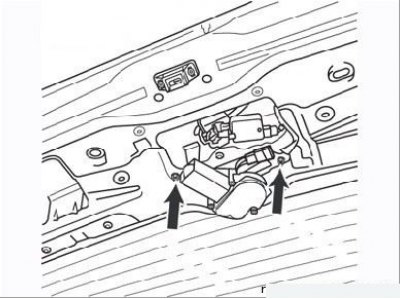
Figure 8.48. Tailgate window wiper motor mounting screws
- remove two screws (Figure 8.48) motor mounts, holding the stands with a screwdriver;
- remove the washers from the support posts and remove the motor from the door cavity.
Installation
Install in the reverse order of removal. Do the following:
- before installing the wiper arm, make sure the motor is in the locked stop position;
- use a wire bristle brush to clean the splines on the wiper arm axle;
- install the wiper arm by placing the blade opposite the "C" mark on the rear window;
- install the new nut and tighten it to the specified torque.