



Contents: Removal 🠛 Installation 🠛
Removal
- place the vehicle on a lift or raise the rear of the vehicle and place supports under the body;
- release the parking brake (push the lever down);
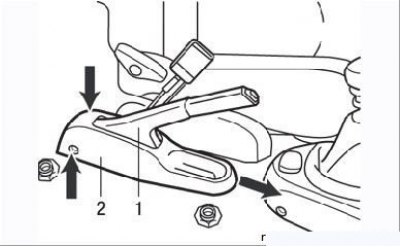
Figure 7.28. Brake drive lever: 1 – lever lining; 2 – plastic lever cover; the arrows show the bolts for fastening the lining
- remove the two screws securing the plastic cover of the lever (Figure 7.28);
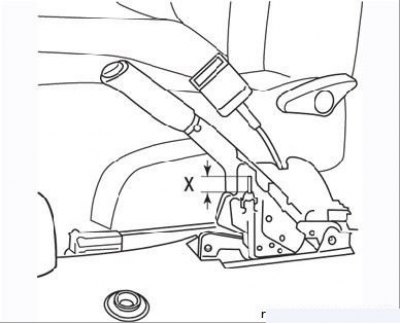
Figure 7.29. Parking brake adjusting nut: X=20.0 mm
- unscrew the nut (Figure 7.29) adjusting the parking brake, having first measured the dimension X (should be about 20mm), to loosen the tension of the cable;
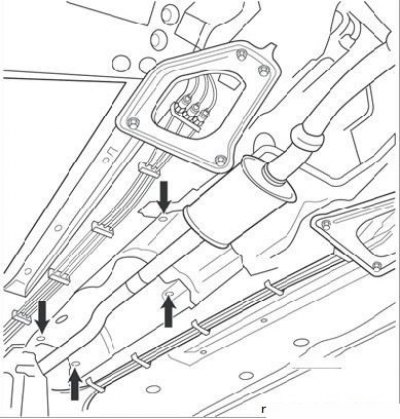
Figure 7.30. Bolts for fastening the heat-insulating shield
- remove the heat shield from underneath the car by unscrewing four bolts (Figure 7.30);
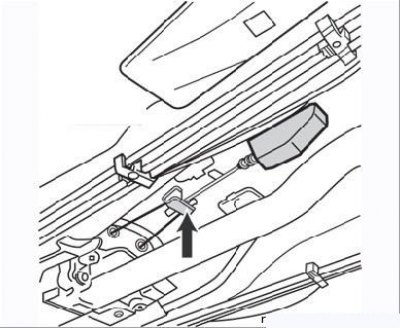
Figure 7.31. Parking brake cable equalizer (arrow)
- release both cables in the equalizer area (Figure 7.31);
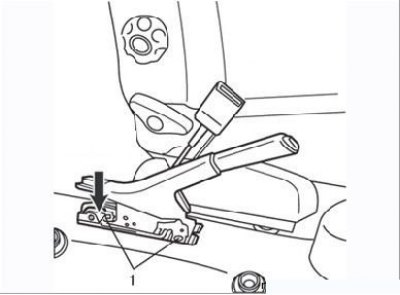
Figure 7.32. Nuts (1) securing the parking brake drive lever (the arrow shows the contact connector of the parking brake indicator lamp)
- in the passenger compartment, unscrew the two nuts securing the parking brake drive lever and disconnect the contact connector of the parking brake indicator lamp switch (Figure 7.32);
- remove the parking brake lever.
Installation
1. Installation is carried out in reverse order.
2. Set the X distance of the cable adjuster to 20mm.
3. If necessary, adjust the travel of the parking brake lever.
4. Install the heat shield correctly.