
2. Drain the transmission fluid as described in Chapter Maintenance.
3. Disconnect a broad tank of a cooling liquid and shift it aside.
4. Remove the air filter assembly as described in Chapter Power systems, release.
5. Engage the handbrake, then jack up the front of the vehicle and place it on axle stands. Remove the left wheel.
6. Remove the wheel arch insert - it is attached with plastic brackets and screws.
7. Support the transmission using a jack and a piece of board.
8. Loosen and remove the bolts securing the left engine/transmission mount to the body.
9. On models with ABS, remove the retaining nut for the ABS pump located on the left engine mount.
10. Raise the transmission on a jack to create a workspace for removing its pallet.
11. Loosen and remove bolts and lower pan. Remove the pan seal.
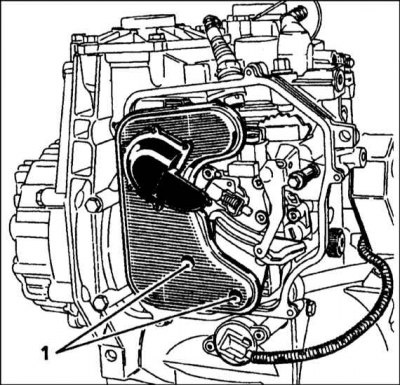
12. Disconnect the filter from the base of the transmission and remove its gasket (refer to accompanying illustration).
13. Remove the magnets from the inside of the sump, noting their location, and remove all metal particles from them. The particles must be very small; the presence of tangible metal crumbs indicates wear on the transmission components. Set the magnets to working position.
14. Place a new gasket on the filter and install it on the transmission. Install the mounting bolts, making sure that the gasket does not move, and tighten them to Specifications effort.
15. Place a gasket on the pallet, install the pallet on the transmission and tighten the mounting bolts given in Specifications effort.
16. Lower transmission, then install left engine/transmission mount bolts and tighten to specified torque.
17. On models with ABS, install the pump mounting nut on the left engine mount and tighten.
18. Install the arch insert and wheel and lower the vehicle to the ground. Tighten the wheel bolts to Specifications effort.
19. Install the air filter and attach the expansion tank.
20. Fill the transmission with the Specifications type and amount of fluid (contact the head Maintenance).