
Removing
Front door glass - all models except Scenic
1. Lower the window glass approximately 3/4 down, then disconnect the earth cable from the battery.
2. Remove the door trim panel as described in Section Removal and installation of the door trim panel.
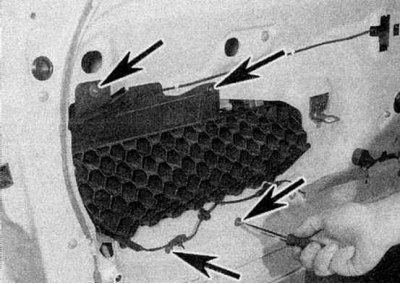
3a. Remove the shock absorber from the door.
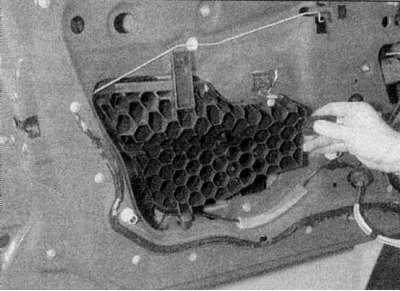
3b. On Coupe and Scenic models, the panel is fastened with screws, and on all others - with brackets (refer to illustrations).
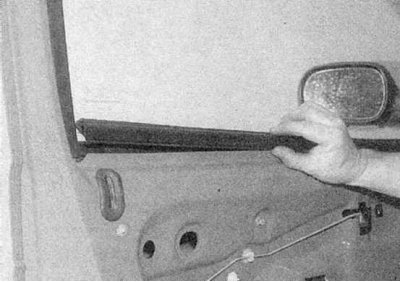
4. On Hatchback and Sedan models, disconnect the inner sealing strip of the window and remove it from the door (refer to accompanying illustration). On Coupe models, detach the lower and rear parts of the sealing strip; there is no need to remove the entire strip.
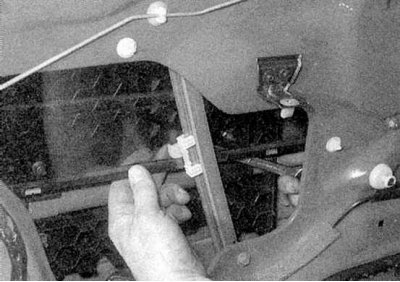
5a. Remove the window guide bracket...
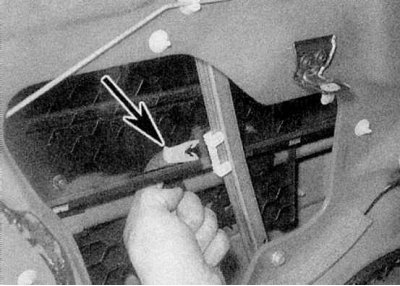
5b....by sliding it off the power window (refer to illustrations).
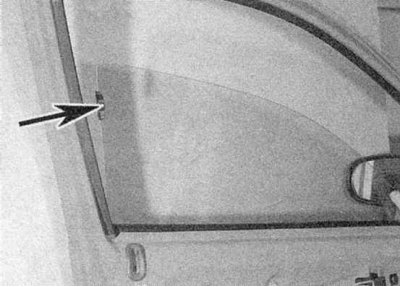
6a. Release the window glass from the power window.
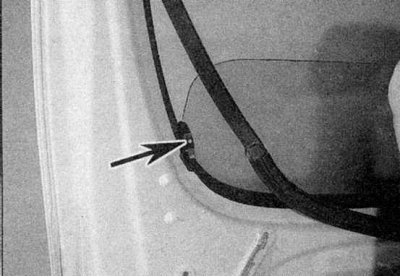
6b. Then lower it slightly. Release the rear guide from the sealing strip.
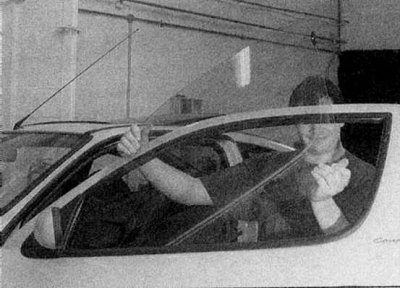
6s. Then tilt the glass and pull it up (refer to illustrations).
Sliding front door glass - Scenic models
1. Lower the window glass approximately 3/4 down, then disconnect the earth cable from the battery
2. Remove the door trim panel as described in Section Removal and installation of the door trim panel.
3. Remove the impact panel from the door. It is attached with screws and brackets.
4. Gently pry off the window's inner sealing seal strip and remove it from the door.
5. Remove the window guide mounting bracket by sliding it off the power window.
6. Remove the two bolts securing the rack (between sliding glass and non-lowering glass) to door.
7. Release the window glass from the power window, then lower it down.
8. Remove the trim cover and splitter post upper mounting bolt. Lower the stand down to release it from the top mount. Rotate the post 90°and remove it from the door.
9. Release the rear guide from the sealing strip, then tilt the glass and pull it up.
Safety glass front door - Models - Scenic
1. Follow the steps described in paragraphs for FRONT DOOR SLIDING GLASS - SCENIC MODEL.
2. Pull the window back to release the front of the window from the door frame. Remove the glass from the door.
Front door window regulator
1. Remove the window as described above, depending on the model.
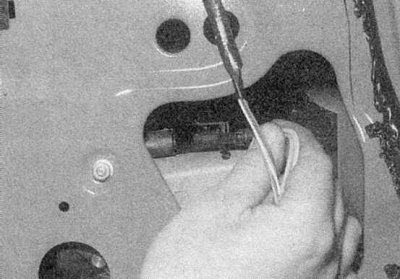
2. On models with power windows, disconnect the electrical connector from the power window motor (refer to accompanying illustration).
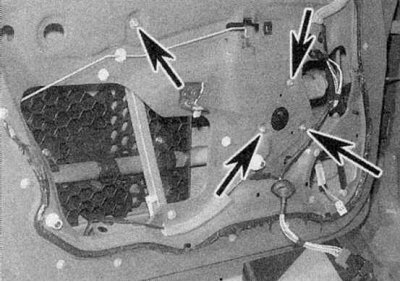
3a. Turn away fixing nuts and bolts of a window regulator and the bottom support of glass.
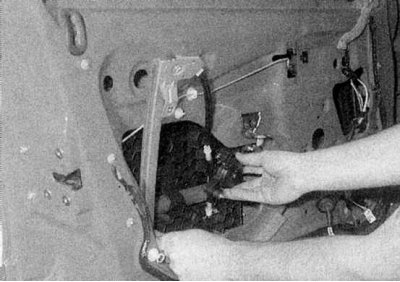
3b. Then release the assembly from the door and remove it through the door opening (refer to illustrations).
Rear Door Sliding Glass - Hatchback and Sedan Models
1. Lower the window glass approximately 3/4 down, then disconnect the earth cable from the battery.
2. Remove the door trim panel as described in Section Removal and installation of the door trim panel.
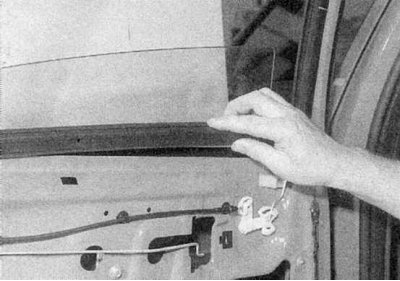
3. Gently peel off the window's inner sealing strip and remove it from the door (refer to accompanying illustration).
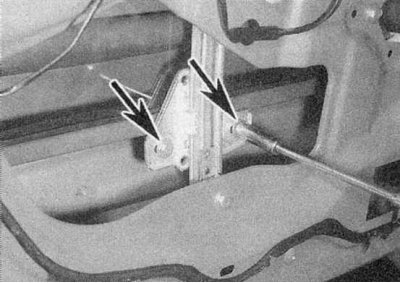
4. Remove the bolts securing the window glass to the power window, then release the glass and lower it completely down (refer to accompanying illustration).
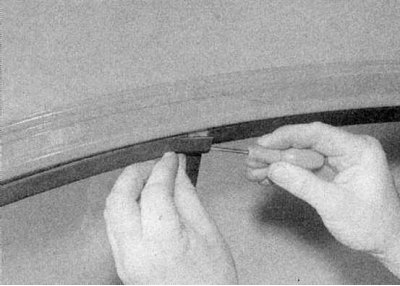
5a. Remove cover...
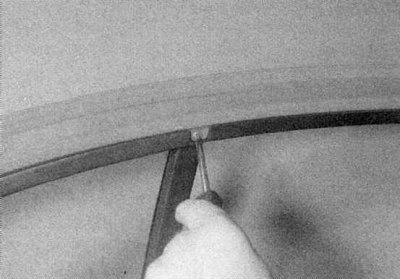
5b....to gain access to the top screw securing the rear window rail.
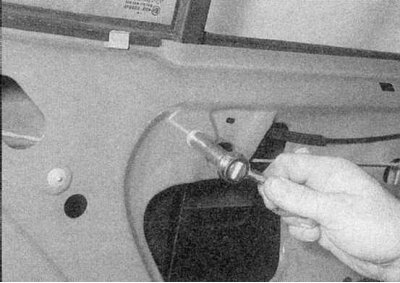
5c. Then unscrew the top and bottom screws.
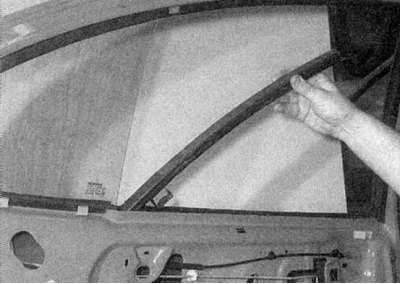
5d. Release the separating column from the non-lowering glass, then release the glass and lower it completely down (refer to accompanying illustration).
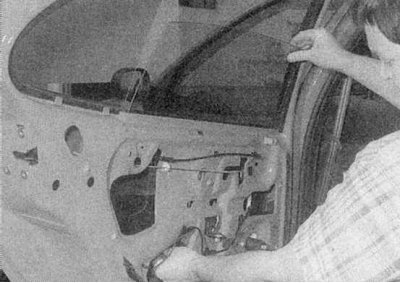
6. Carefully remove the glass from the door (refer to accompanying illustration).
Rear Door Sliding Glass - Scenic Models
1. Lower the window glass approximately 3/4 down, then disconnect the earth cable from the battery.
2. Remove the door trim panel as described in Section Removal and installation of the door trim panel.
3. Remove two bolts (upper and lower), that secure the rear window rail to the door.
4. Disconnect the inner sealing strip of the window and remove it from the door.
5. Remove the window guide mounting bracket by sliding it off the power window (refer to description above).
6. Release the window glass from the power window, then lower it down.
7. Remove the outer door seal as follows. Remove the emblem on the rear door pillar. Starting at the front edge of the door, loosen the seal using a flat tool to reach the mounting lug. When the seal reaches where it touches the rear door pillar, lift it up to release the locating tab, then pull the seal forward to release the rear locating pin.
8. Remove the glass side guide by pulling it up.
9. Apply strips of wide adhesive tape to the two vertical door posts to protect them when the glass is removed.
10. Carefully remove the glass from the door.
Tailgate non-rolling glass - Models - Hatchback and Sedan
1. Remove the sliding glass as described above.
2. Slide the glass forward and remove it from the vehicle.
Rear side window - coupé models
1. Open the window, then unscrew the fastening screw and release the opening mechanism from the motor shaft.
2. Loosen the screw securing the opening mechanism to the window, then remove the washers and end caps from the window, noting their correct position.
3. Have an assistant support the window, then remove the screws securing the front edge of the window to the hinges. Remove the spacers, rubber pads and end caps, noting their correct position.
Rear side window - Scenic models
1. Rear side windows on Scenic models are installed with a special adhesive.
Tailgate Window Regulator - Hatchback and Sedan Models
1. Remove the sliding glass as described in the paragraphs above.
2. On models with power windows, disconnect the electrical connector from the power window motor.
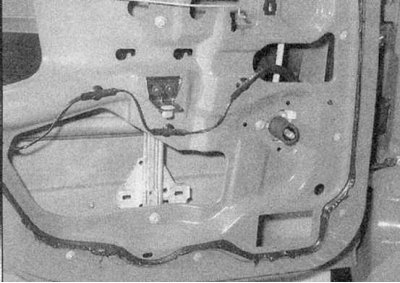
3. Turn away fixing bolts of a window regulator, then release assembly from a door and remove it through an aperture of a door (refer to accompanying illustration).
Rear Door Window Regulator - Scenic Models
1. Lower the window glass approximately 3/4 down, then disconnect the earth cable from the battery.
2. Remove the door trim panel as described in Section Removal and installation of the door trim panel.
3. Carefully detach the window's inner sealing strip and remove it from the door.
4. Remove the window guide mounting bracket by sliding it off the power window (refer to description above).
5. Release the window glass from the power window and move it to the closed position. Tape the glass to the door frame.
6. On models with power windows, disconnect the wiring connector from the power window motor.
7. Turn away window regulator and fixing nuts/bolts of the bottom support of glass, then release assembly from a door and remove it through an aperture of a door.
Installation
Sliding front door glass - all models
1. Install in reverse order. Before installing the trim panel, check the operation of the window.
Safety glass front door - Scenic models
1. Install in reverse order. Before installing the trim panel, check the operation of the window.
Front door power window - all models
1. Install in reverse order. Before installing the trim panel, check the operation of the window.
Rear Door Sliding Glass - Hatchback and Sedan Models
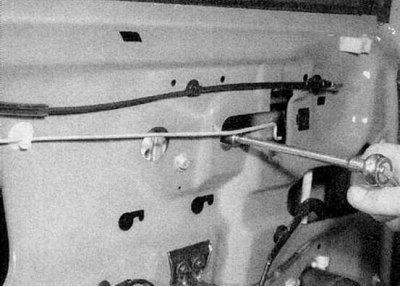
1. Install in reverse order. Before installing the trim panel, adjust the position of the window glass. Loosen the mounting bolts, then fully raise the window and tighten them securely (refer to accompanying illustration).
Sliding rear door glass - Scenic models
1. Install in reverse order. Before installing the trim panel, check the function of the window.
Tailgate non-rolling glass - Hatchback and Sedan models
2. Install in reverse order. Make sure that the glass is correctly placed in the sealing strip.
Rear side window - coupé models
1. Install in reverse order. Before installing window screws, apply a few drops of tack compound to their threads.
Rear Door Window Regulator - All Models
1. Install in reverse order. Before installing the trim panel, check the operation of the window.