
English Русский
Български
Беларускі
Український
Српски
Hrvatski
Română
Polski
Slovenský
Magyar
Bookmark Contacts Articles Sitemap
Company vehicles Peugeot Company vehicles Opel Company vehicles Skoda Company vehicles Land Rover Company vehicles Mitsubishi Company vehicles Volkswagen Company vehicles Honda
RenaultBook.ru


Duster   Fluence   Kangoo   Laguna   Logan   Megane   Sandero   Scenic   Symbol   Clio   Other
Megane 1 (1995-2002) Megan 2 (2002-2009, petrol)

Removal and installation rear door lock components (Renault Megane 1)

  • Main
  • Megane
  • Megane 1 (1995-2002)
  • Body and interior
  • Doors, locks and windows
  • Removal and installation rear door lock components
0
Contents: Removal 🠛 Installation 🠛

Removal


Assembling the lock


1. Open the trunk lid, then disconnect the ground cable from the battery.
1. Open the trunk lid, then disconnect the ground cable from the battery.


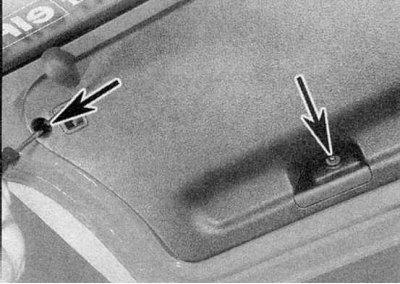
2a. Remove the four screws/bolts securing the tailgate trim panel.
2a. Remove the four screws/bolts securing the tailgate trim panel.


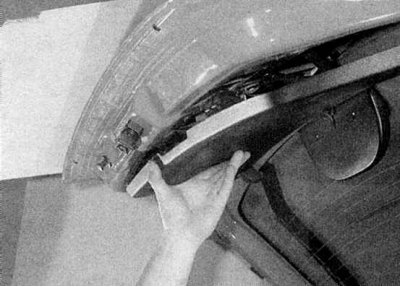
2b. Release the retaining clips and remove the panel from the tailgate (refer to the illustrations).
2b. Release the retaining clips and remove the panel from the tailgate (refer to the illustrations).


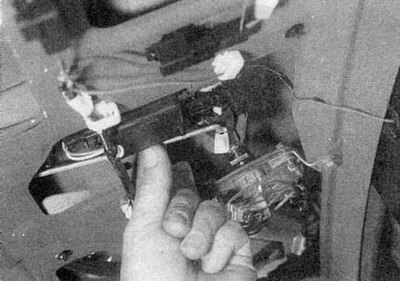
3. Separate the rod from the lock button assembly (refer to the accompanying illustration).


3. Separate the rod from the lock button assembly (refer to the accompanying illustration).


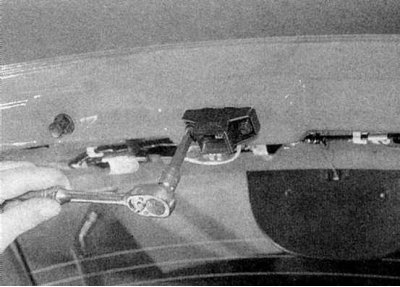
4. Loosen the mounting bolts and remove the lock assembly from the trunk lid (refer to the accompanying illustration).

Assembling the lock button


1. Follow the steps described in paragraphs 1-3 above.
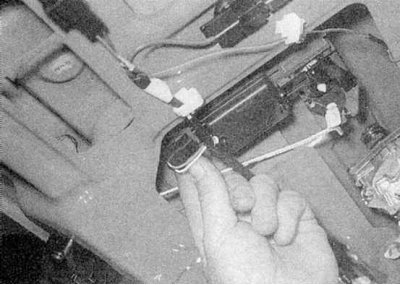
1. Follow the steps described in paragraphs 1-3 above.


2a. Disconnect the wiring harness connector from the single lock activator where fitted).
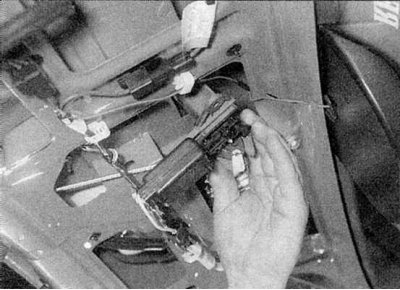
2a. Disconnect the wiring harness connector from the single lock activator where fitted).


2b. Loosen and remove the mounting nuts and brackets, then remove the lock button assembly (and the single lock activator - where available) from the tailgate (refer to the illustrations).


Lock strike plate


1. Open the tailgate and remove the plastic trim from the lock striker plate.

2. Draw a line around each mounting bolt, then remove them and remove the impact plate from the vehicle.

Installation


Assembling the lock


1. Install in reverse order. Before installing the trim panel, check the operation of the lock.

Assembling the lock button


1. Install in reverse order. Before installing the trim panel, check the operation of the lock.

Lock strike plate


1. Install the impact plate to the vehicle. Align the bolts with the marks made before removal and tighten them securely.

2. Check the operation of the lock. If adjustment is necessary, loosen the bolts and move the strike plate.
This article is available on: russian, bulgarian, belarusian, ukrainian, serbian, croatian, romanian, polish, slovak, hungarian
Article has been reviewed by editor: Fedoseev Denis
Share with friends:
Previous
Megane 1: Doors, locks and windows
Next

Removal and installation the tailgate
Removal and installation trunk lid lock components
Removal and installation the trunk lid
Removal and installation door window glass and window lifter
Removal and installation door handle and lock components
Removal and installation of single lock system components
Removal and installation electric window components
Windshield and rear window — general information
Top hatch — general information
Other articles on other Renault models

➽ Rear door lock retainer Renault Duster 1 (2009-2017)
➽ Replacing the inner handle of the rear door lock actuator Renault Logan 1 (2004-2012, petrol)
➽ Replacing the inner handle of the rear door lock actuator Renault Sandero 1 (2007-2012, petrol)
➽ Removal and installation the rear door lock Renault Symbol 1 (1999-2008, petrol)
➽ Rear Door Components — Removal and Installation Renault Espace I and II (1984-1996)
Link to this article in different formats
Reviews and comments of visitors
No comments yet


Add two numbers 35 + 40


Megan 2 (2002-2009, petrol) 
  • User manual
  • Introduction to manual
  • Controls and instruments
  • Salon equipment
  • Operation and driving
  • Maintenance and care
  • Power unit
  • Engine repair
  • Fuel system
  • Injection system
  • Intake and exhaust system
  • Starting and charging system
  • Cooling system
  • Decreased toxicity
  • Transmission
  • Clutch
  • Mechanical gearbox
  • Automatic gearbox
  • Wheel drive mechanism
  • Chassis, running gear
  • Suspension and wheels
  • Steering
  • Brake system
  • Body and interior
  • Exterior (external elements)
  • Interior (internal elements)
  • Doors, locks and windows
  • Heating and air conditioning
  • Electrical equipment
  • Equipment and devices
  • Headlights and lighting
  • Electrical circuits
Megane 1 (1995-2002) 
  • General information
  • User manual
  • Maintenance
  • Power unit
  • Petrol engines 1.4/1.6 l
  • Petrol engines 2.0 l
  • Diesel engines 1.9 l
  • Overhaul of engines
  • Cooling system
  • Fuel system (petrol)
  • Fuel system (diesel)
  • Decreased toxicity
  • Charge and launch systems
  • Ignition system (petrol)
  • Preheat system (diesel)
  • Transmission
  • Clutch
  • Mechanical gearbox
  • Automatic gearbox
  • Drive shafts
  • Chassis, running gear
  • Brake system
  • Car suspension
  • Steering
  • Body and interior
  • Exterior (external elements)
  • Interior (internal elements)
  • Doors, locks and windows
  • Electrical equipment
  • Equipment and devices
  • Electrical circuits
RenaultBook.ru © 2018–2026 | Mobile version | News and articles | Sitemap: EN BG BY UA RS HR RO PL SK HU | Administration | Site search | Bookmark
Duster 1 (2009-2017) | Fluence 1 (2009-2020, petrol) | Kangoo 1 (1997-2007) | Laguna 2 (2001-2007) | Logan 1 (2004-2012, petrol) | Logan 2 (2012-2020) | Megane 1 (1995-2002) | Megan 2 (2002-2009, petrol) | Sandero 1 (2007-2012, petrol) | Scenic 1 (1996-2003) | Symbol 1 (1999-2008, petrol) | Symbol 2 (2008-2013, petrol) | Renault 19 (1988-1996) | Espace I and II (1984-1996) | Espace III (1996-2002) | Clio 1 (1990-1998) |
We want your visit to be comfortable 😌 and use cookies 🍪 to do so.