
English Русский
Български
Беларускі
Український
Српски
Hrvatski
Română
Polski
Slovenský
Magyar
Bookmark Contacts Articles Sitemap
Company vehicles Peugeot Company vehicles Opel Company vehicles Skoda Company vehicles Land Rover Company vehicles Mitsubishi Company vehicles Volkswagen Company vehicles Honda
RenaultBook.ru


Duster   Fluence   Kangoo   Laguna   Logan   Megane   Sandero   Scenic   Symbol   Clio   Other
Renault 19 (1988-1996) Espace I and II (1984-1996) Espace III (1996-2002)

Rear Door Components — Removal and Installation (Renault Espace I)

  • Main
  • Renault
  • Espace I and II (1984-1996)
  • Body and interior
  • Doors, locks and windows
  • Rear Door Components — Removal and Installation
0
Contents: Removal 🠛 Installation 🠛

Removal


1. Remove the rear door trim (see Chapter 9).

2. Disconnect the ground wire from the battery.

Latches


3. To remove both latches, disconnect the locking rods of their levers; to do this, either unfasten the buttons or simply unhook the threaded part of the rods (see illustration). Unscrew the two bolts securing each latch and remove the latter.
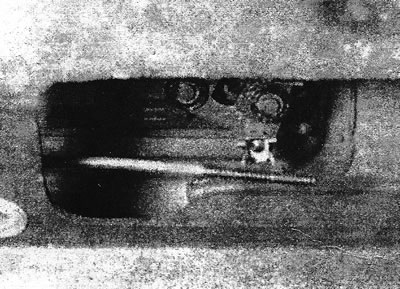
16.3 Unhook the threaded portion of the rear door latch lever rods

16.3 Unhook the threaded portion of the rear door latch lever rods


Central locking motor


4. Disconnect the connector from the central locking motor.

5. Remove the cotter pin securing the electric motor rod from the outer handle (see illustration).
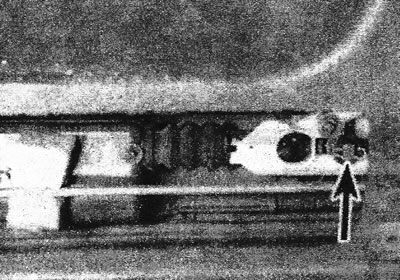
16.5 Fastening pin (indicated by the arrow) rod of the central locking motor

16.5 Fastening pin (indicated by the arrow) rod of the central locking motor


Source link is located on RenaultBook

6. Loosen the two mounting bolts, tilt the entire assembly down and remove the electric motor from the door.

External door handle


7. Remove the central locking motor (see above).

8. Disconnect the outer handle locking rods either by unscrewing the drive frame adjustment nuts or by simply disconnecting the threaded part of the rods from their mount on the frame (see illustration).
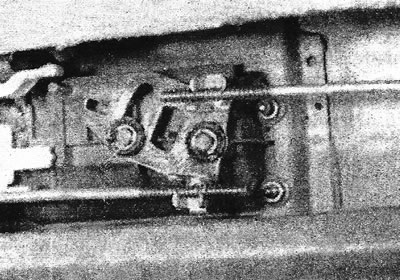
16.8 Rear door outer handle lock rods

16.8 Rear door outer handle lock rods


9. Loosen the mounting bolts and remove the door handle.

Rear door lock cylinder


10. Remove the rear door outer handle (see above).

11. Remove the cotter pin, then remove the pin and the central lock bolt.

12. Remove the lock pin and remove the lock cylinder.

Installation


13. Installation is carried out in the reverse order. Adjust the central lock rods using the adjusting nuts or by changing the position of their threaded ends so that the mechanism levers begin to move when you press the outer door handle.
This article is available on: russian, bulgarian, belarusian, ukrainian, serbian, croatian, romanian, polish, slovak, hungarian
Article has been reviewed by editor: Fedoseev Denis
Share with friends:
Previous
Espace I and II: Doors, locks and windows
 

Lock cylinders, exterior door handles and latches — removal and…
Rear door window lifters — removal and stop
Front door window lifters — removal and installation
Rear door glass — removal and installation
Front door glass — removal and installation
 
Other articles on other Renault models

➽ Removal and installation rear door lock components Renault Megane 1 (1995-2002)
➽ Rear door drop glass Renault Duster 1 (2009-2017)
➽ Rear door protective trim Renault Fluence 1 (2009-2020, petrol)
➽ Rear door protective pads Renault Kangoo 1 (1997-2007)
➽ Removal and installation the outer decorative trim of the rear… Renault Laguna 2 (2001-2007)
Link to this article in different formats
Reviews and comments of visitors
No comments yet


Add two numbers 39 + 21


Renault 19 (1988-1996) 
  • General information
  • Maintenance
  • Power unit
  • Engine repair
  • Exhaust system
  • Cooling system
  • Supply system
  • Single-point injection
  • Multi-point injection
  • Diesel injection system
  • Transmission
  • Clutch
  • Car gearbox
  • Chassis, running gear
  • Car suspension
  • Steering
  • Brake system
  • Wheels and tires
  • Body and interior
  • Exterior (external elements)
  • Interior (internal elements)
  • Heating and ventilation
  • Electrical equipment
  • Equipment and devices
  • Headlights and lighting
  • Ignition system
  • Power devices
  • Electrical circuits
Espace I and II (1984-1996) 
  • General information
  • Introduction to the guide
  • Troubleshooting
  • Power unit
  • Engine repair
  • Cooling system
  • Carburetor fuel system
  • Injection fuel system
  • Diesel fuel system
  • Ignition system
  • Transmission
  • Clutch
  • Car gearbox
  • Drive shafts
  • Chassis, running gear
  • Brake system
  • Steering
  • Front suspension
  • Rear suspension
  • Body and interior
  • Exterior (external elements)
  • Interior (internal elements)
  • Doors, locks and windows
  • Electrical equipment
  • Equipment and devices
  • Electrical circuits
Espace III (1996-2002) 
  • General information
  • Introduction to the manual
  • User manual
  • Power unit
  • Petrol engines F3R
  • Petrol engines Z7X
  • Diesel engines G8T
  • Diesel engines G9T
  • Transmission
  • Clutch
  • Mechanical gearbox
  • Automatic gearbox
  • Drive shafts
  • Chassis, running gear
  • Steering
  • Front suspension
  • Rear suspension
  • Brake system
  • Body and interior
  • Exterior (external elements)
  • Interior (internal elements)
  • Doors, locks and windows
  • Heating and ventilation
  • Electrical equipment
  • Equipment and instruments
  • Power devices
  • Electrical circuits
RenaultBook.ru © 2018–2026 | Mobile version | News and articles | Sitemap: EN BG BY UA RS HR RO PL SK HU | Administration | Site search | Bookmark
Duster 1 (2009-2017) | Fluence 1 (2009-2020, petrol) | Kangoo 1 (1997-2007) | Laguna 2 (2001-2007) | Logan 1 (2004-2012, petrol) | Logan 2 (2012-2020) | Megane 1 (1995-2002) | Megan 2 (2002-2009, petrol) | Sandero 1 (2007-2012, petrol) | Scenic 1 (1996-2003) | Symbol 1 (1999-2008, petrol) | Symbol 2 (2008-2013, petrol) | Renault 19 (1988-1996) | Espace I and II (1984-1996) | Espace III (1996-2002) | Clio 1 (1990-1998) |
We want your visit to be comfortable 😌 and use cookies 🍪 to do so.