



Contents: Headlights 🠛 Rear lights 🠛 High-mounted brake light 🠛 License plate light 🠛 Side turn signal repeaters 🠛 Interior lighting lamps 🠛
You can replace the lamps described below. In any case, if the replacement seems complicated, we recommend contacting the manufacturer's representative for replacement of the lamps.
Caution: In accordance with the law and as a precaution, purchase a spare set of bulbs and fuses from the manufacturer's service station.
Headlights
Caution: When working in close proximity to the engine, be aware that it may be hot. Also remember that the cooling fan may start at any time, which may cause injury.
Version A
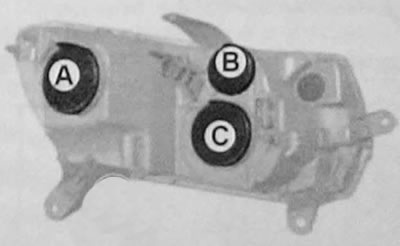
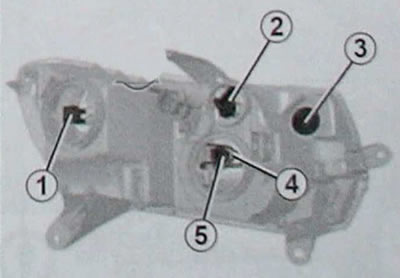
Low beam headlights
Remove the cover (A).
Rock the lamp holder (1) to remove it and replace the lamp.
Note: Bulb type: H7.
Warning: The bulbs are under pressure and may explode when replaced. This may cause injury.
High beam headlights
Remove the cover (C).
Disconnect the lamp connector (5).
Disconnect the spring clip (4) and remove the lamp.
Note: Lamp type: H1.
Caution: Do not touch the glass bulb of the lamp with your hands - hold it by the base.
Before removing the lamp, remember its original position so that you can reinstall it correctly.
After replacing the pump, make sure the cover is installed correctly.
Daytime running lights, front parking lights
Remove the cover (B).
Turn the socket (2) a quarter turn to remove the lamp.
Note: Bulb type: W21/5W
Direction indicator
Turn the socket (3) a quarter turn to remove the lamp.
Note: Lamp type: PY21W.
Version B
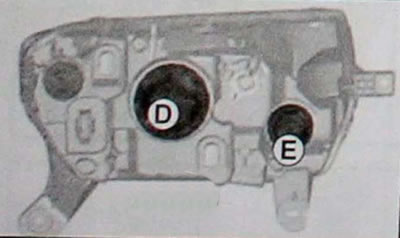
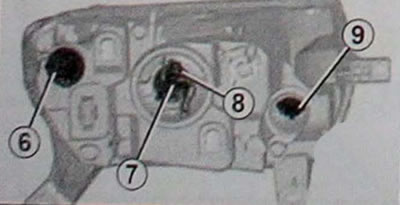
Low beam headlights, high beam headlights
Remove the cover (D).
Disconnect the lamp connector (7).
Disconnect the spring clip (8) and remove the lamp.
Note: Lamp type: H4, does not emit ultraviolet rays.
Caution: Do not touch the glass bulb of the lamp with your hands - hold it by the base.
Before removing the lamp, remember its original position so that you can reinstall it correctly.
After replacing the lamp, make sure the cover is installed correctly.
Daytime running lights, front parking lights
Remove the cover (E) and take out the lamp (9).
Note:Lamp type: W21/5W LL.
Direction indicator
Turn the socket (6) a quarter turn to remove the lamp.
Note:Lamp type: PY21W.
Fog lights
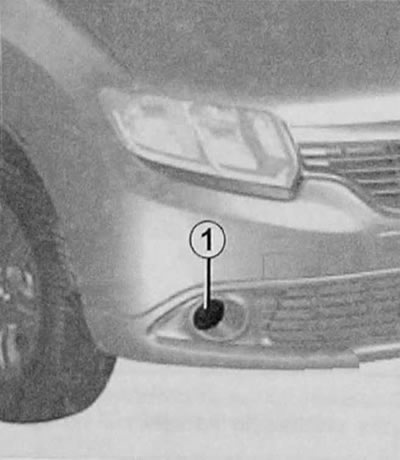
Contact the manufacturer's service station.
Note: Lamp type: HI6LL.
Warning: Bulbs are under pressure and may explode when replaced. Risk of injury.
Note: If you want to install fog lights on your car, please contact the manufacturer's service station.
Warning: All maintenance or modification work on your vehicle's electrical equipment must be performed by a specialist service station of the manufacturer, otherwise incorrect connection of electrical equipment components may result in its failure (this applies to wiring, devices and especially the generator); in addition, the service station has all the necessary tools to install this equipment on your car.
Rear lights
Sedan
Side lights/brake lights, direction indicators, rear fog lights
Before removing, mark the position of the wires (1) to ensure their correct placement later.
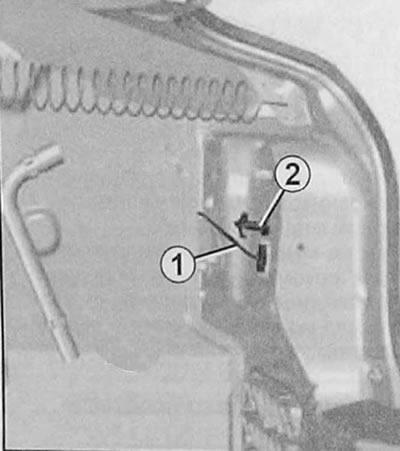
Remove the screw (2) and remove the rear light assembly from the outside.
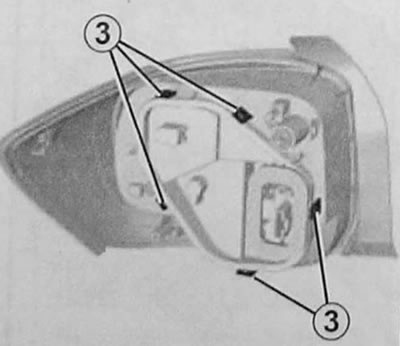
Disconnect the board with lamps by pressing the latches (3).
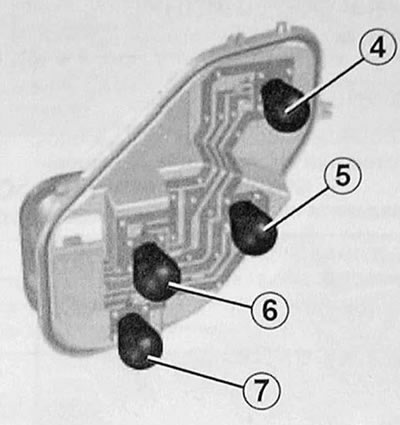
4. Side lights and brake lights (lamp type: P21/5W). 5. Direction indicators (lamp type; PY21W). 6. Reversing light (lamp type: P21W). 7. Fog light (lamp type: P2IW).
Hatchback
Side lights/brake lights, direction indicators, rear fog lights
Before removing, mark the position of the wires (10) to ensure their correct placement later.
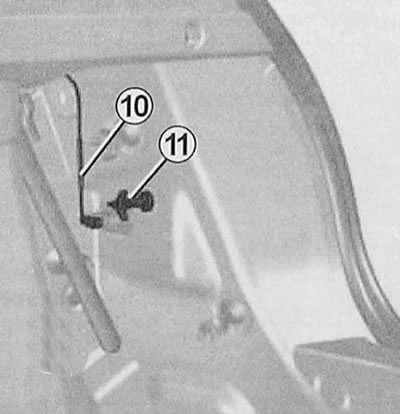
Remove the screw (11) and remove the rear light assembly from the outside.
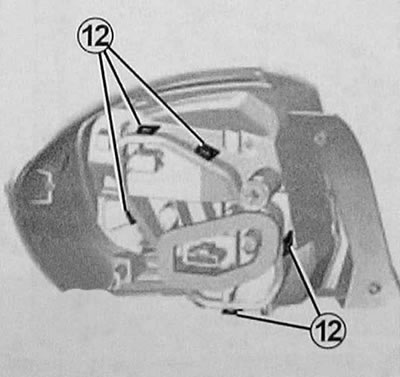
Disconnect the board with lamps by pressing the latches (12).
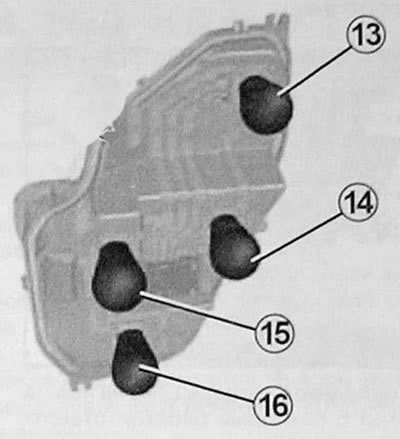
13. Side lights and brake lights (lamp type: P21/5W). 14. Direction indicators (lamp type: PY21W). 15. Reversing light (lamp type: P21W). 16. Fog light (lamp type: P21W).
Station wagon
Side lights/brake lights, direction indicators, rear fog lights
Lift up the carpet (17). Before removing, mark the position of the wires (18) to ensure their correct placement later.
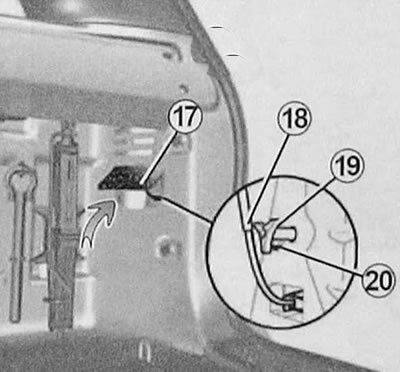
Remove the screw (19), press the lock (20) and remove the headlight from the outside.
Disconnect the board with lamps by pressing the latches (21).
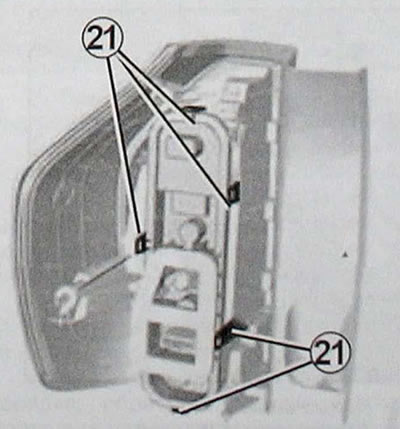
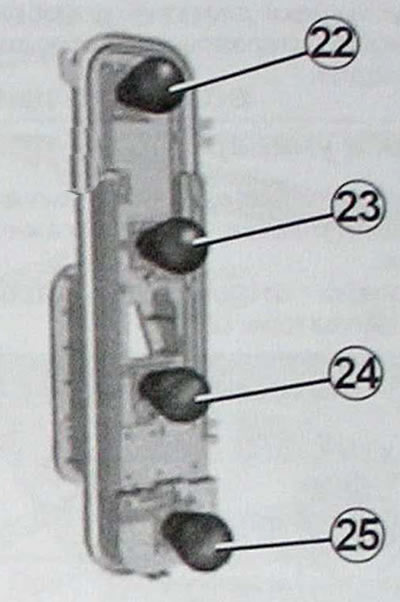
22. Side lights and brake lights (lamp type: P21/5W). 23. Direction indicators (lamp type: PY21W). 24. Reversing light (lamp type: P21W) 25. Fog light (lamp type: P21W).
High-mounted brake light
Sedan
The third brake light (8) is accessed through the luggage compartment.
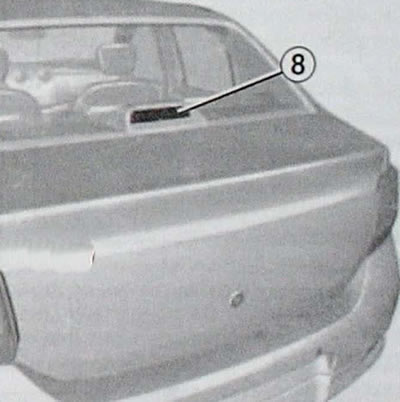
Turn the socket (9) a quarter of a turn, disconnect it and remove the lamp.
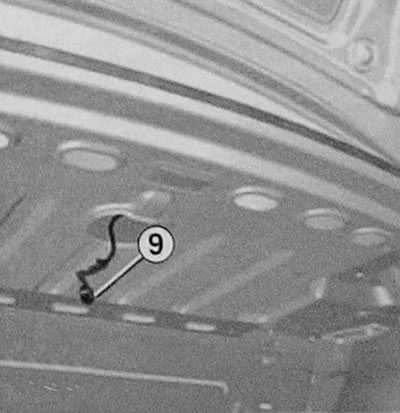
Note: Lamp type: P 21 W.
To install, proceed in reverse order, being careful not to damage the wiring harness.
Hatchback and station wagon
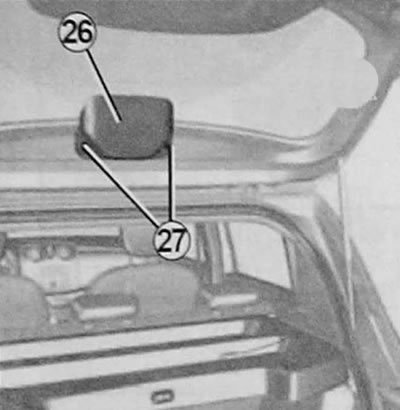
Access to the high-mounted brake light (26) is via the luggage compartment.
Carefully remove the cartridge by pressing the latches (27)
Original publication on the portal RENAULTBOOK.ru
Turn the socket (28) a quarter turn, disconnect it and remove the lamp.
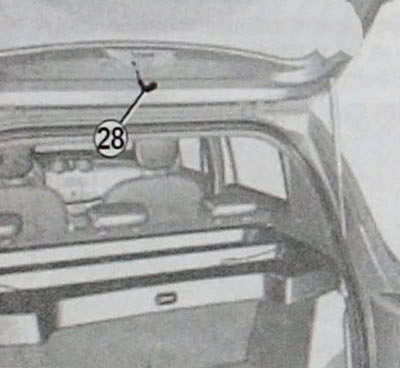
Note: Lamp type: P 21 IV
License plate light
Sedan and hatchback
Remove the light (29) by pressing the latch (30) with a flat-head screwdriver.
Remove the lamp cover to access the bulb.
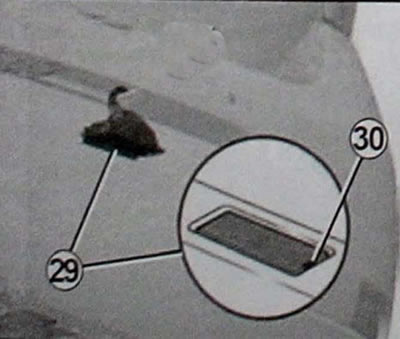
Note: Bulb type: W5W
Station wagon
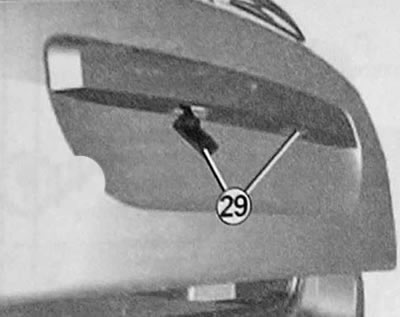
Disconnect the light (29) by pressing the latch with a flat-head screwdriver.
Remove the lamp cover to access the bulb.
Note: Bulb type: W5W.
Side turn signal repeaters
Disconnect the direction indicator (31) using a flat-blade screwdriver.
Turn the socket (32) a quarter turn to remove the bulb.
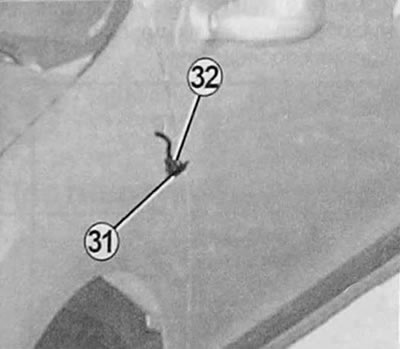
Note: Bulb type W5W
Disconnect the turn signal (33) using a flat-blade screwdriver. To do this, place it in the housing (A) and swing the turn signal back and forth.
Turn the socket a quarter turn to remove the bulb.
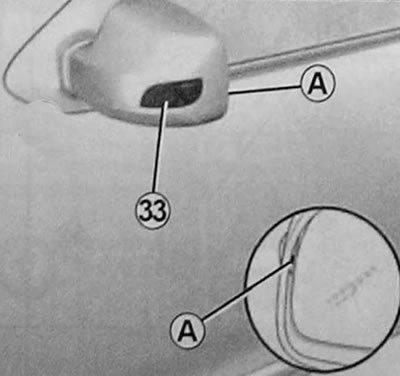
Note: Bulb type W5W
Interior lighting lamps
Ceiling lamp
Using a flat-head screwdriver type tool, remove the diffuser.
Remove the burnt out lamp (1)
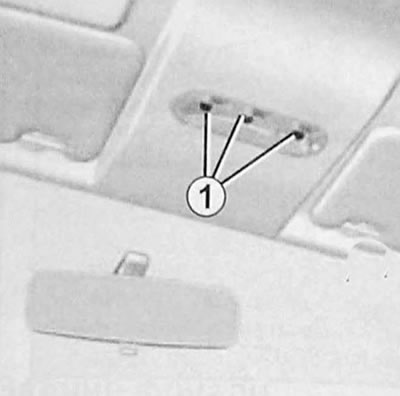
Note: Bulb type W5W
Luggage compartment lighting (hatchback and station wagon)
Remove the lampshade (2) using a flat-head screwdriver-type tool by pressing on the tabs located on both sides of the lampshade. Disconnect the lampshade.
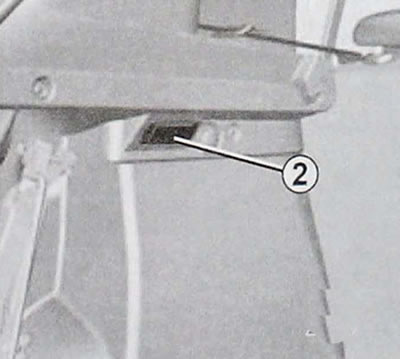
Press the latch (3) to release the diffuser (5) and gain access to the lamp (4).
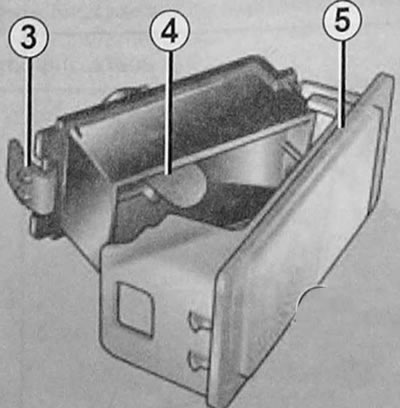
Note: Bulb type W5W
Warning: Bulbs are under pressure and may explode when replaced. Risk of injury.
Trunk lighting (sedan)
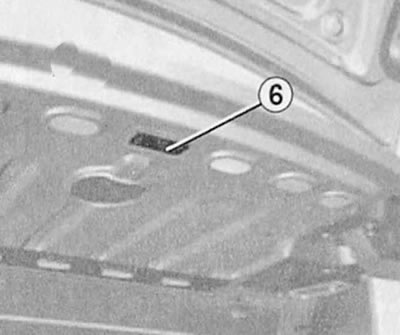
Remove the light (6) using a flat-blade screwdriver by pressing the catch and rotating the light towards the inside of the luggage compartment.
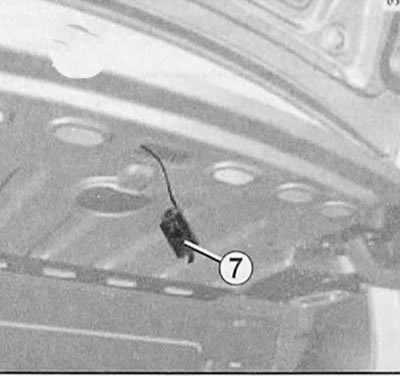
Disconnect the light (7).
Press the latch (8) to release the diffuser (10) and gain access to the lamp (9).
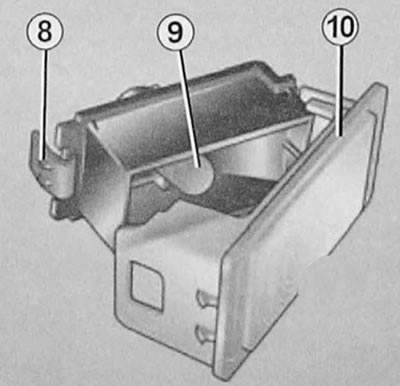
Note: Bulb type: W5W.
Warning: Bulbs are under pressure and may explode when replaced. Risk of injury.