English Русский
Български
Беларускі
Український
Српски
Hrvatski
Română
Polski
Slovenský
Magyar
Bookmark Contacts Articles Sitemap
Company vehicles Peugeot Company vehicles Opel Company vehicles Skoda Company vehicles Land Rover Company vehicles Mitsubishi Company vehicles Volkswagen Company vehicles Honda
RenaultBook.ru


Duster   Fluence   Kangoo   Laguna   Logan   Megane   Sandero   Scenic   Symbol   Clio   Other
Duster 1 (2009-2017)

Replacing lamps (Renault Duster 1)

  • Main
  • Duster
  • Duster 1 (2009-2017)
  • User manual
  • Practical Tips
  • Replacing lamps
0
Contents: Headlights 🠛 Low beam headlights 🠛 Front side light 🠛 High beam headlights 🠛 Direction indicator 🠛 Fog lights 🠛 Additional lights 🠛 Rear lights 🠛 High-mounted brake light 🠛 License plate light 🠛 Side turn signal repeaters 🠛

Headlights


You can replace the lamps described below yourself. In any case, we advise you to contact a service station for their replacement if this operation seems complicated.

Low beam headlights


Low beam headlights


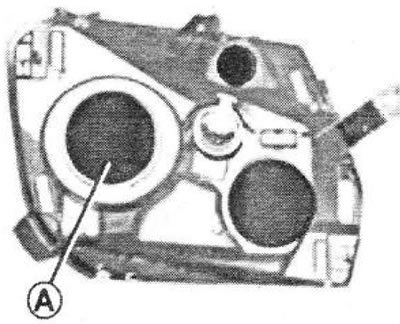
Remove cover A.

Remove cover A.


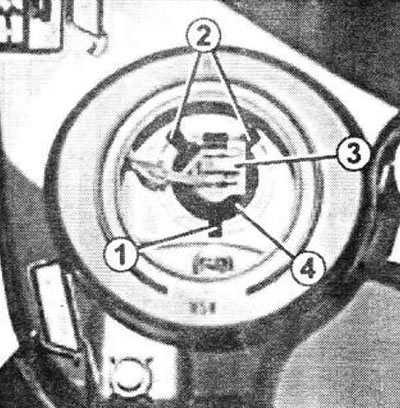
Disconnect lamp 4 by pressing down holder 3 to release the lamp from latches 2 and 1.
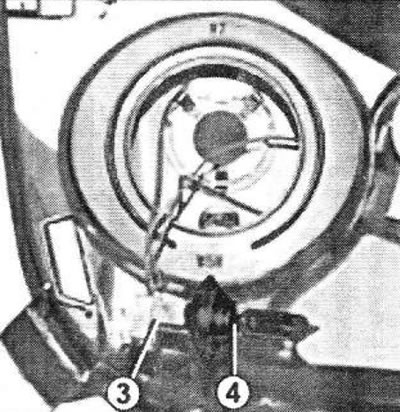
Disconnect lamp 4 by pressing down holder 3 to release the lamp from latches 2 and 1.


Do not touch the bulb. Hold it by the base.
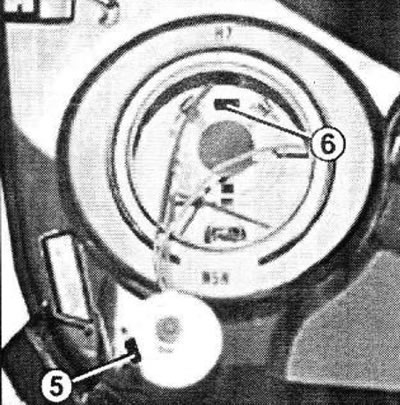


Do not touch the bulb. Hold it by the base.


Be sure to use bulbs with UV-blocking bulbs to prevent damage to the plastic headlight lenses.

Remove lamp 4 from holder 3.

Lamp type: H7.

After replacing the lamp, ensure that protrusion 5 is correctly positioned in recess 6, then install cover A.

The lamps are under pressure inside and may explode when replaced.

This may cause injury.

Front side light


Remove cover A.
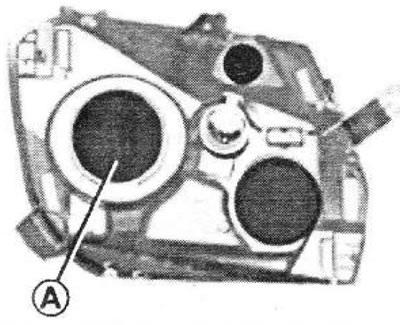
Remove cover A.


Remove lamp holder 7.
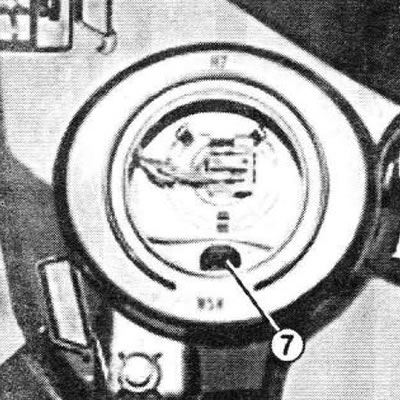
Remove lamp holder 7.


Remove lamp 8.
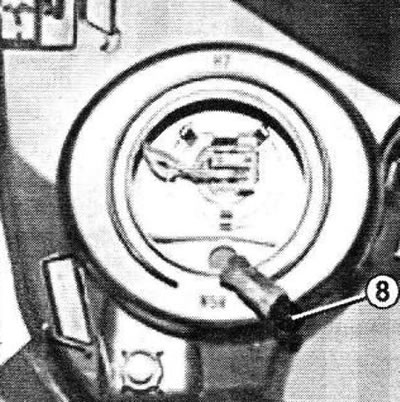


Remove lamp 8.


Lamp type: W5W.

After replacing the lamp, make sure that cover A is installed correctly.

High beam headlights


Remove cover B.
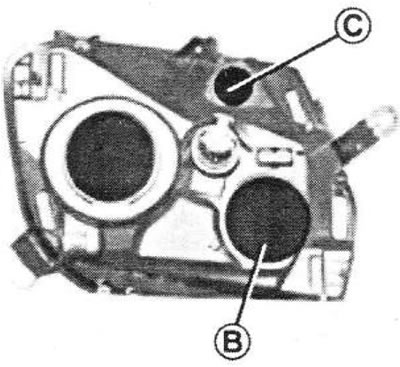
Remove cover B.


Release spring 9 and remove lamp 12 with holder 10.
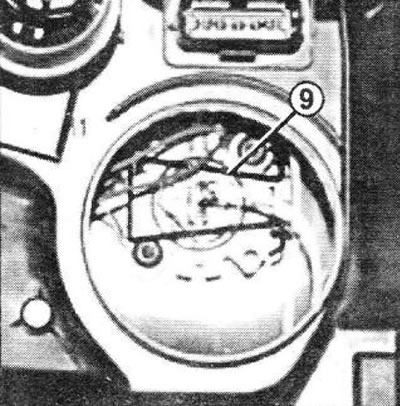
Release spring 9 and remove lamp 12 with holder 10.


Remove the lamp from the holder.

Lamp type: H1.
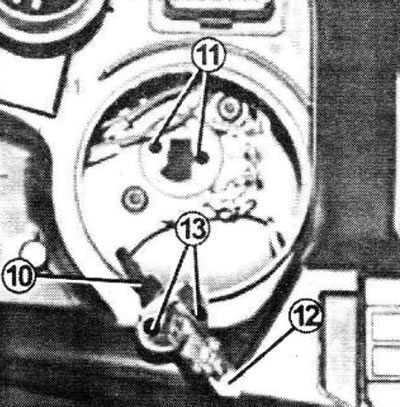
Lamp type: H1.


After replacing the lamp, make sure that the two protrusions 13 are correctly positioned in the holes 11, then the spring and the cover.


Direction indicator
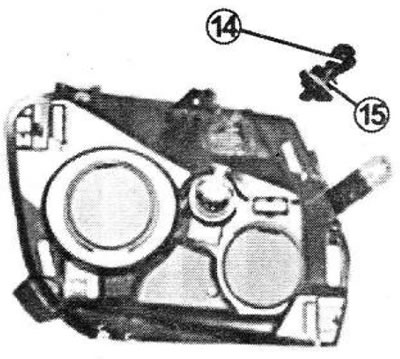


Direction indicator


Turn the lamp holder C counterclockwise until it stops and remove it.

Replace lamp 14.

Lamp type: PY21W.

After replacing the bulb, make sure that the two protrusions 15 are correctly positioned in relation to the headlight slots. Turn the bulb holder clockwise until it stops.

Fog lights
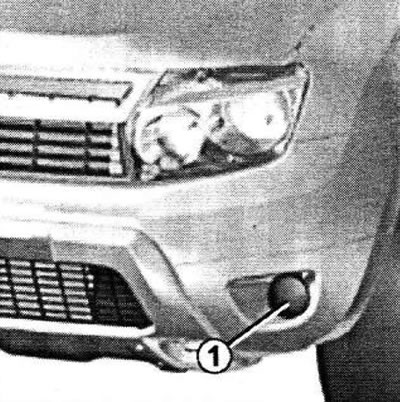


Fog lights


1 - Fog lights.

Contact a service station.

Lamp type: H11.

Additional lights


If you want to install additional fog lights or projector lights on your car, contact a service station.

Rear lights
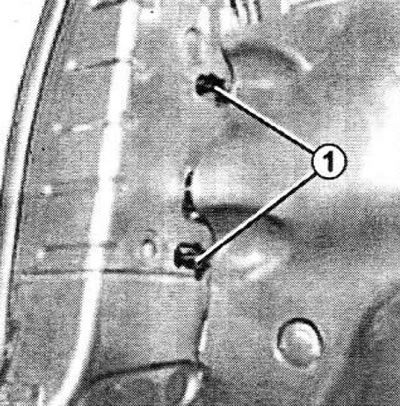


Rear lights


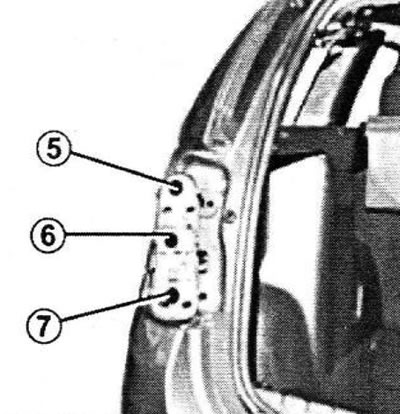
Open the tailgate and remove nuts 1, then remove light unit 2 by pulling it backwards.
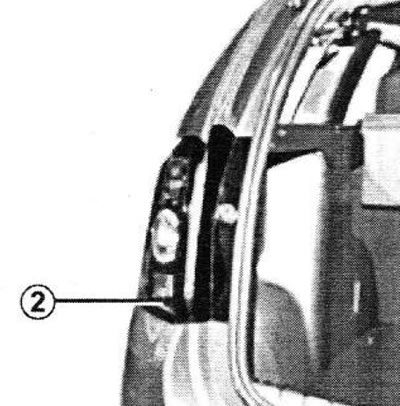


Open the tailgate and remove nuts 1, then remove light unit 2 by pulling it backwards.


Release latches 3 to remove lamp holder 4.
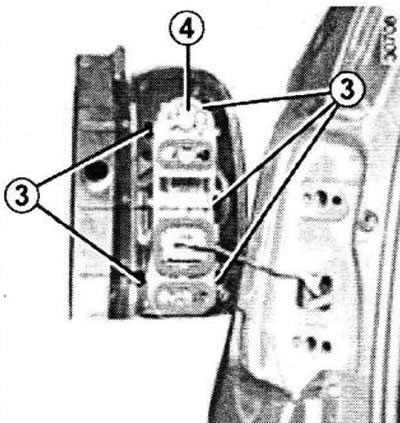
Release latches 3 to remove lamp holder 4.

5 - Side light and brake light Pear-shaped lamp with bayonet base with two filaments P 21/5W.

6 - Direction indicator.

Pear-shaped lamp with bayonet base P 21 W or P¥ 21 W (depending on the vehicle configuration).

7 - Reversing light.

Pear-shaped lamp with bayonet base P 21 W or


Rear fog light Pear-shaped lamp with bayonet base P 21 W.

Installation


To install, proceed in reverse order, being careful not to damage the wiring harness.

High-mounted brake light
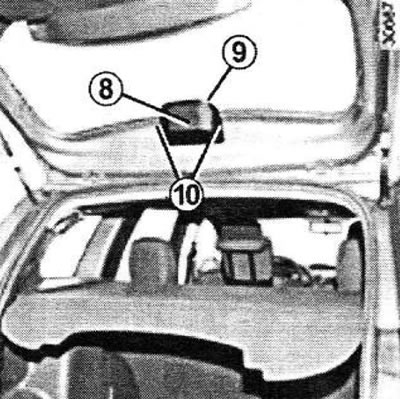


High-mounted brake light


Access to the third brake light 9 is via the luggage compartment.

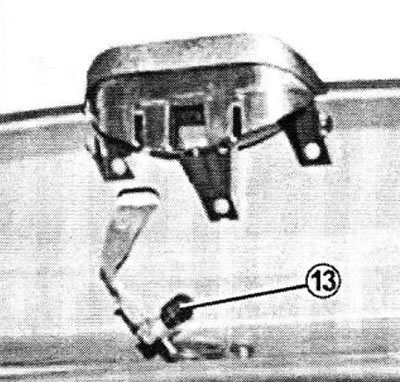
Carefully remove cover 8 by pressing on latches 10.

Remove lamp 13.

Lamp type: P 21 W.

Carefully disconnect the retainer 12 (in direction A) and turn 1/8 of a turn (in direction B), to remove the lamp holder 11.
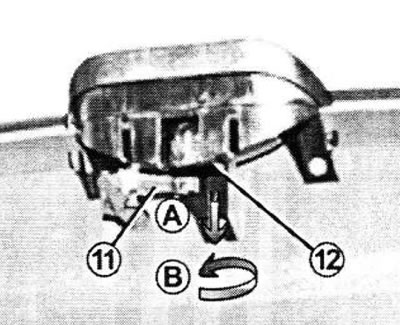
Carefully disconnect the retainer 12 (in direction A) and turn 1/8 of a turn (in direction B), to…


Remove lamp 13.

Remove lamp 13.


Lamp type: P 21 W.


License plate light
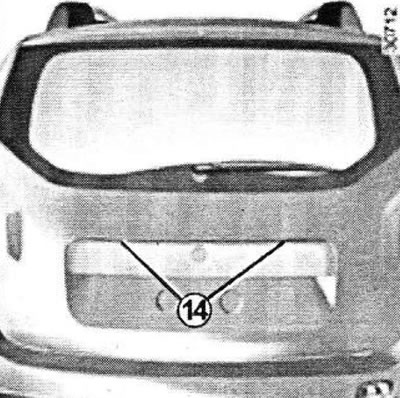


License plate light


Disconnect the lamp 14 by pressing the retainer 15 using a flat-blade screwdriver.
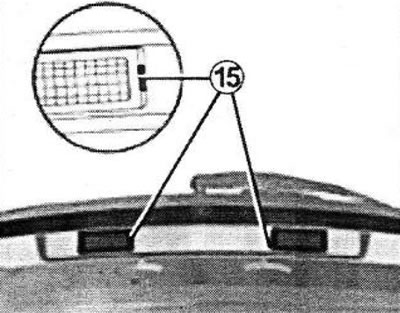
Disconnect the lamp 14 by pressing the retainer 15 using a flat-blade screwdriver.


Disconnect diffuser 17 and remove lamp 16.
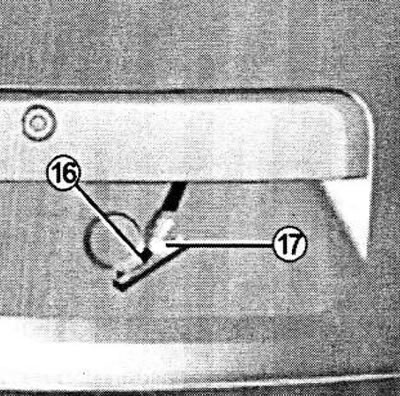
Disconnect diffuser 17 and remove lamp 16.


Lamp type: W5W.

Side turn signal repeaters


Side turn signal repeaters


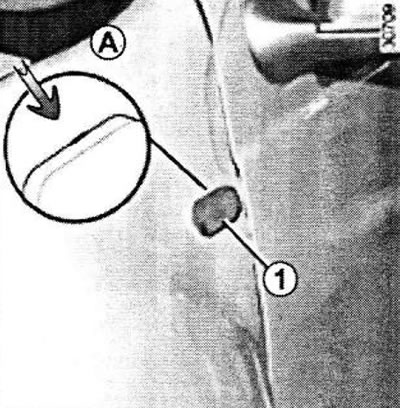
Disconnect the side turn signal repeater 1 (using a flat-blade screwdriver, setting it to position A, then turning the side repeater outward).


Disconnect the side turn signal repeater 1 (using a flat-blade screwdriver, setting it to position…


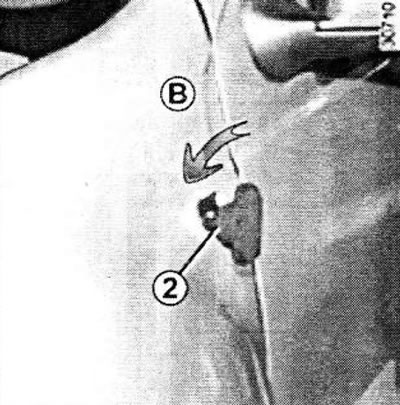
Turn a quarter turn (movement B) lamp holder 2 and remove lamp 3 (in direction C).
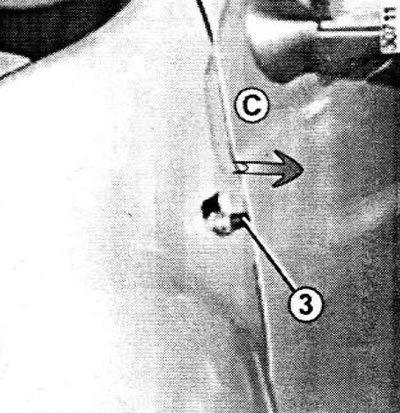
Turn a quarter turn (movement B) lamp holder 2 and remove lamp 3 (in direction C).


Lamp type: WY51V.
This article is available on: russian, bulgarian, belarusian, ukrainian, serbian, croatian, romanian, polish, slovak, hungarian
Article has been reviewed by editor: Fedoseev Denis
Share with friends:
Previous
Duster 1: Practical Tips
Next

Features of tire operation in winter conditions
Wheel rotation
Tire pressure
Tire care
Wheel replacement
Interior lighting
Fuses and fuses
Purpose of fuses in the passenger compartment
Towing a car
Traction device
Other articles on other Renault models

➽ Replacing incandescent lamps Renault Fluence 1 (2009-2020, petrol)
➽ Replacing incandescent lamps Renault Kangoo 1 (1997-2007)
➽ Replacing lamps Renault Logan 2 (2012-2020)
➽ Replacing lamps Renault Sandero 1 (2007-2012, petrol)
➽ Replacing lamps in lighting fixtures Renault 19 (1988-1996)
Link to this article in different formats
Reviews and comments of visitors
No comments yet


Add two numbers 28 + 20


Duster 1 (2009-2017) 
  • User manual
  • Governing bodies
  • Car driving
  • Devices for comfort
  • Car care
  • Practical Tips
  • Power unit
  • Petrol engine (K4M)
  • Diesel engine (K9K)
  • Power system (K4M)
  • Power system (K9K)
  • Fuel system
  • Petrol injection system (K4M)
  • Diesel injection system (K9K)
  • Starting and ignition system
  • Cooling system
  • Exhaust system
  • Transmission
  • Clutch
  • Manual gearbox
  • Drive shafts
  • Chassis, running gear
  • Front bearing elements
  • Rear load-bearing elements
  • Steering
  • Control devices
  • Body and interior
  • Exterior (external elements)
  • Interior (internal elements)
  • Interior trim
  • Interior heating
  • Air conditioning
  • Electrical equipment
  • Equipment and devices
  • Headlights and lighting
  • Governing bodies
  • Wipers/washers
  • Audio system
  • Electrical circuits
RenaultBook.ru © 2018–2026 | Mobile version | News and articles | Sitemap: EN BG BY UA RS HR RO PL SK HU | Administration | Site search | Bookmark
Duster 1 (2009-2017) | Fluence 1 (2009-2020, petrol) | Kangoo 1 (1997-2007) | Laguna 2 (2001-2007) | Logan 1 (2004-2012, petrol) | Logan 2 (2012-2020) | Megane 1 (1995-2002) | Megan 2 (2002-2009, petrol) | Sandero 1 (2007-2012, petrol) | Scenic 1 (1996-2003) | Symbol 1 (1999-2008, petrol) | Symbol 2 (2008-2013, petrol) | Renault 19 (1988-1996) | Espace I and II (1984-1996) | Espace III (1996-2002) | Clio 1 (1990-1998) |
We want your visit to be comfortable 😌 and use cookies 🍪 to do so.