English Русский
Български
Беларускі
Український
Српски
Hrvatski
Română
Polski
Slovenský
Magyar
Bookmark Contacts Articles Sitemap
Company vehicles Peugeot Company vehicles Opel Company vehicles Skoda Company vehicles Land Rover Company vehicles Mitsubishi Company vehicles Volkswagen Company vehicles Honda
RenaultBook.ru


Duster   Fluence   Kangoo   Laguna   Logan   Megane   Sandero   Scenic   Symbol   Clio   Other
Laguna 2 (2001-2007)

Removal and installation the sliding panel (Renault Laguna 2)

  • Main
  • Laguna
  • Laguna 2 (2001-2007)
  • Body and interior
  • Doors, locks and windows
  • Removal and installation the sliding panel
0
Contents: Removal 🠛 Adjustment of rear, front and side…🠛 Height clearance adjustment along…🠛
Removal and installation the sliding panel


Removal


Removal


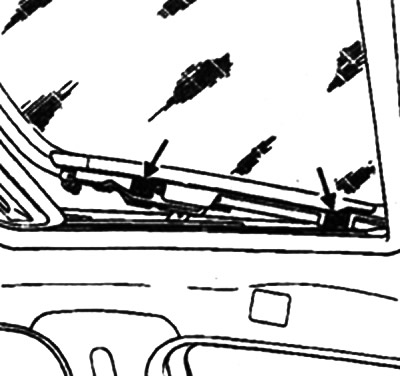
After removing the two mechanism covers, remove the four mounting bolts A (M5 head BTR4).
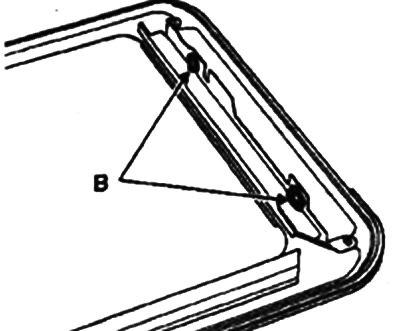
After removing the two mechanism covers, remove the four mounting bolts A (M5 head BTR4).


Please note the insertions B.

Once the sunroof is installed, proceed to adjust the panel.
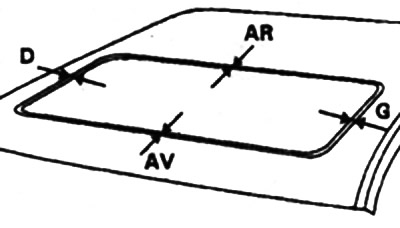


Once the sunroof is installed, proceed to adjust the panel.


The gaps between the panel and the roof opening for the hatch should be evenly distributed between the front and back sides, as well as between the right and left sides.

Using a ruler, check the gap distribution at three points.

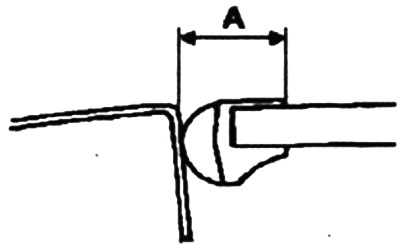
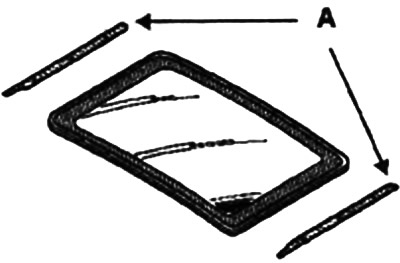
The measurement must be taken between the cutout in the roof for the hatch and the top of the molding A.
  • AV Line (front side): 14±1.
  • AR Line (back side): 14±1.
  • Line D (right side): 15±0,5.
  • G Line (left side): 15±0,5.

G Line (left side): 15±0,5.


Adjustment of rear, front and side clearances


This operation must be performed after removing the sliding panel or hatch assembly.
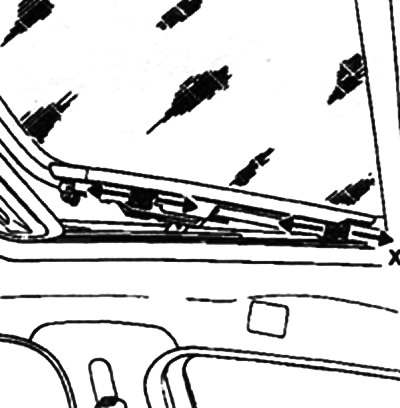
This operation must be performed after removing the sliding panel or hatch assembly.


The adjustment is made with the panel in the closed position and four mounting bolts, this allows the panel to be adjusted along the X axis.
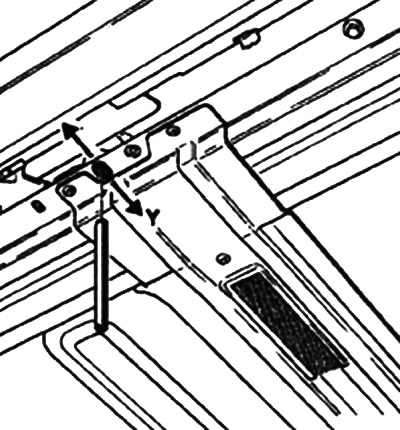


The adjustment is made with the panel in the closed position and four mounting bolts, this allows…


To adjust the Y-axis, slightly loosen the hatch mounting bolts. Install two 10 mm diameter cylindrical rods into the specially designed holes to fix the hatch drive mechanism along the X-axis and install the panel along the Y-axis.

Height clearance adjustment along the axis (Z)
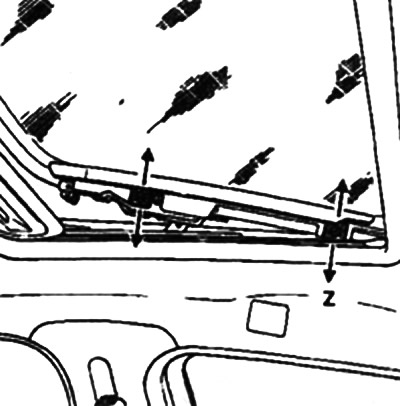


Height clearance adjustment along the axis (Z)


Set the hatch to the closed position.

Just like with the front and rear clearance adjustment, the adjustment is done using the bolts and panel, see above.

Place a straightedge on the edge of the roof hatch cutout area and make sure it is level with the sliding panel.
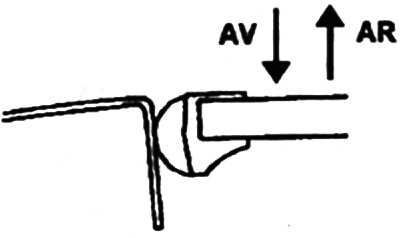
Place a straightedge on the edge of the roof hatch cutout area and make sure it is level with the…


Height adjustment: tolerance for the rear part: 1 mm panel protrusion.


Tolerance for the front part: 1 mm for panel recess.

(The original can be found on the website: RENAULTBOOK)
This article is available on: russian, bulgarian, belarusian, ukrainian, serbian, croatian, romanian, polish, slovak, hungarian
Article has been reviewed by editor: Podkrepilov Maxim
Share with friends:
Previous
Laguna 2: Doors, locks and windows
Next

Removal and installation the sunroof drive electric motor
Removal and installation the roof hatch
Tailgate and luggage compartment door
Adjusting the hood position
Fuel filler cap — removal and installation
Removal and installation sunroof trim
Removal and installation the windshield
Removal and installation front door glass
Removal and installation rear door glass
Removal and installation the rear window
Other articles on other Renault models

➽ Instrument panel — removal and installation Renault Duster 1 (2009-2017)
➽ Front body panel Renault Fluence 1 (2009-2020, petrol)
➽ Instrument panel Renault Kangoo 1 (1997-2007)
➽ Instrument panel and controls Renault Logan 1 (2004-2012, petrol)
➽ Instrument panel and indicator lights Renault Megane 1 (1995-2002)
Link to this article in different formats
Reviews and comments of visitors
No comments yet


Add two numbers 47 + 11


Laguna 2 (2001-2007) 
  • General information
  • User manual
  • Maintenance
  • Power unit
  • Engine repair
  • Cooling system
  • Fuel system
  • Fuel injection (petrol)
  • Power system (petrol)
  • Fuel injection (diesel)
  • Fuel system (diesel)
  • Exhaust system
  • Transmission
  • Clutch
  • Mechanical gearbox
  • Automatic gearbox
  • Drive shafts
  • Chassis, running gear
  • Wheels and tires
  • Car suspension
  • Steering
  • Brake system
  • Body and interior
  • Exterior (external elements)
  • Doors, locks and windows
  • Electrical equipment
  • Power devices
  • Equipment and devices
  • Headlights and lighting
  • Breakers and switches
  • Safety system
  • Electrical circuits
RenaultBook.ru © 2018–2026 | Mobile version | News and articles | Sitemap: EN BG BY UA RS HR RO PL SK HU | Administration | Site search | Bookmark
Duster 1 (2009-2017) | Fluence 1 (2009-2020, petrol) | Kangoo 1 (1997-2007) | Laguna 2 (2001-2007) | Logan 1 (2004-2012, petrol) | Logan 2 (2012-2020) | Megane 1 (1995-2002) | Megan 2 (2002-2009, petrol) | Sandero 1 (2007-2012, petrol) | Scenic 1 (1996-2003) | Symbol 1 (1999-2008, petrol) | Symbol 2 (2008-2013, petrol) | Renault 19 (1988-1996) | Espace I and II (1984-1996) | Espace III (1996-2002) | Clio 1 (1990-1998) |
We want your visit to be comfortable 😌 and use cookies 🍪 to do so.