
Door moldings
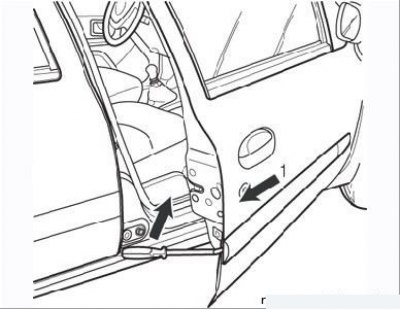
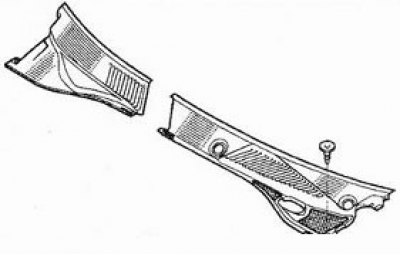
Figure 9.18. Decorative door trim: arrow 1 - removal direction
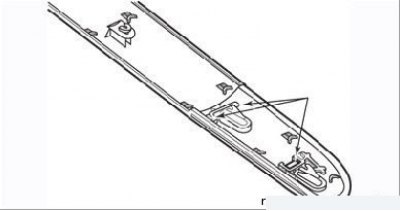
Figure 9.19. Front door trim retainers
Protect the door edge from damage. Insert Car tool. 1597, then press it in such a way as to remove the trim (Figure 9.18). Use a small screwdriver to release the three latches, then remove the factory badge (Figure 9.19).
Rear door trim
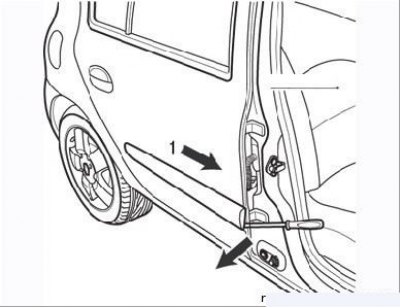
Figure 9.20. rear door trim: arrow 1 - removal direction
Protect the door edge from damage. Insert Car tool. 1597 to detach the trim at the bottom, then push it towards the front of the car (Figure 9.20).
Installation of decorative overlays
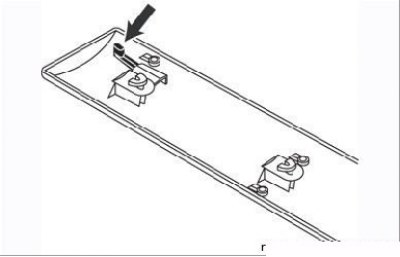
Figure 9.21. Door side trim retainer
Before installing the pads, you need to move the latch a little to ensure that the pad is locked (Figure 9.21).
Removing the hood grill
Removing the left side
1. Using a Torx 10 screwdriver (or 20) click on the center of the piston (1) and push your finger in about 5 mm.
2. Remove the grating fastening caps.
3. Release the grille from the latches (2).
4. Release the grille from the latches (3) across the windshield opening.
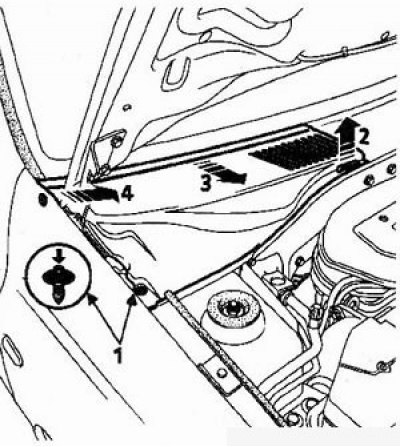
5. Remove the grid from the guide pins (4).
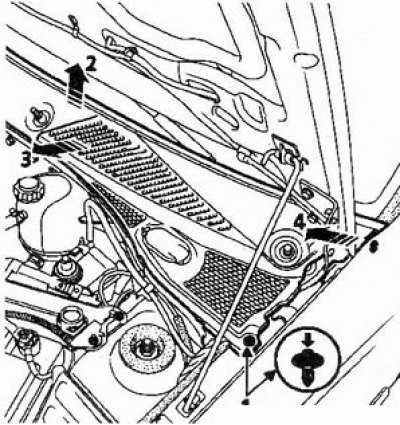
Removing the right side
1. Remove the left side of the hood grille.
2. Remove the right side in the same way as the left side.
Replacing grille clips
Raise retaining ring (1) and turn the latch (2) a quarter turn.
To bring the grille fastening caps into working condition, push out the piston pin by about 5 mm. The piston is fixed when the pin is flush with the head of the piston.