
Withdrawal procedure:
- disconnect the wire from the negative terminal of the battery;
- drain the liquid from the cooling system by removing the lower hose from the radiator;
- remove the timing belt and tensioner pulley (see subsection «cylinder head»);
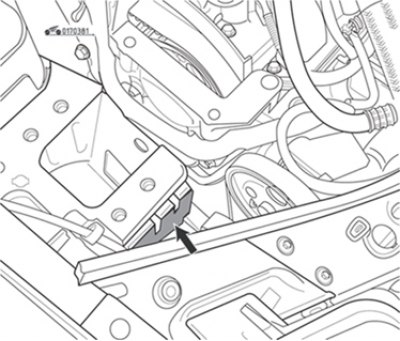
Pic. 3.81. Acoustic cargo
- remove acoustic weight (pic. 3.81);
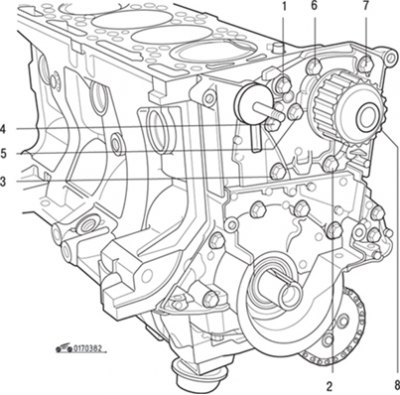
Pic. 3.82. Water pump mounting bolts: 1–8 - bolt tightening sequence
- after loosening, unscrew the water pump mounting bolts (pic. 3.82), remembering their installation, since they are of different lengths;
- remove the water pump assembly from the cylinder block;
- clean the mating surfaces of the pump and cylinder block. It is strictly forbidden to use tools with a sharp edge for this. Use Decapjoint, which dissolves the remnants of the gasket.
Apply the indicated agent to the surface to be cleaned, wait approximately 10 minutes, then remove the agent with a wooden spatula. This operation is recommended to be carried out with protective gloves. Do not allow cleaner to come into contact with paintwork.
Installation order:
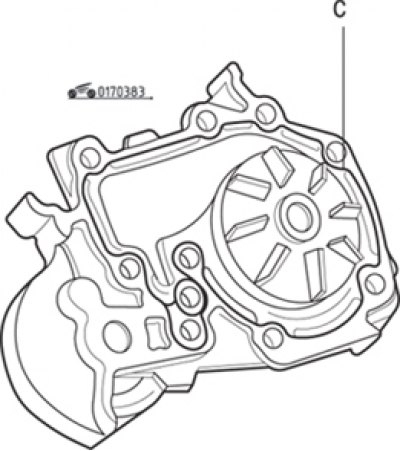
Pic. 3.83. Applying sealant to the mating surface of the water pump: c=0.6–1.0 mm
- apply a bead of Loctite 518 0.6-1.0 mm wide (pic. 3.83) on the mating surface of the installed pump;
- install the pump on the cylinder block, put the bolts in their places and tighten them beforehand with a torque of 8 Nm in the sequence shown in fig. 3.83, then finally tighten the M6 bolts to 11 Nm, and the M8 bolts to 22 Nm;
Note. Apply 1-2 drops of Loctite Frenetanch to bolts 1 and 4 (see fig. 3.83) water pump mountings.
- perform the remaining operations in the reverse order of removal;
- check for coolant leaks.