



Contents: Removal 🠛 Installation 🠛
Note: Only the instrument panel glass is subject to replacement. If other parts are faulty, the entire instrument panel is subject to replacement.
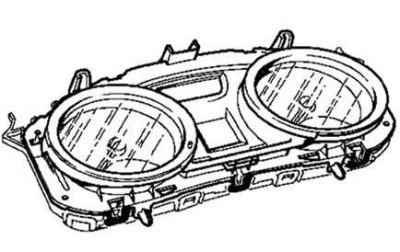
Fig. 7.54. Instrument panel
Removal
Disconnect the wires from the battery terminals, starting with the negative terminal.
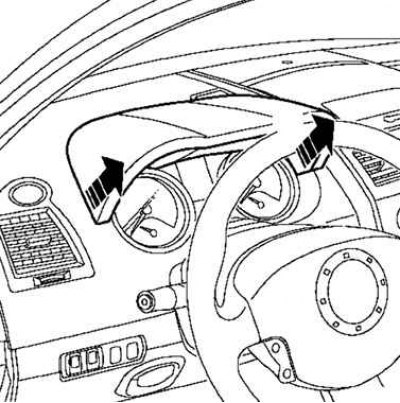
Fig. 7.55. Removing the instrument panel visor
Remove the instrument panel visor, secured with spring clips to the instrument panel, in the direction of the arrows shown in Figure 7.55.
Disconnect the navigation system speaker if your vehicle has one.
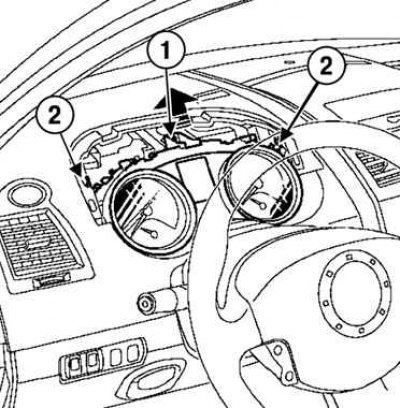
Fig. 7.56. Removing the instrument panel: 1 – central bolt; 2 – spring clamps
Unscrew the central bolt and remove the instrument panel by pressing on the two spring clips located on each side (Fig. 7.56).
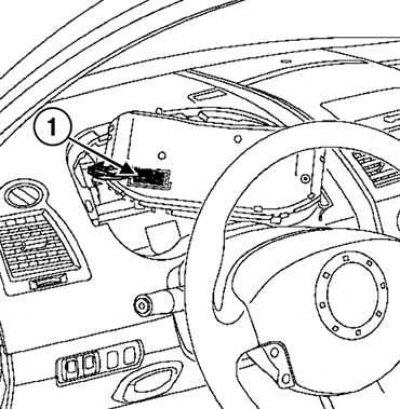
Fig. 7.57. Instrument cluster power supply connector: 1 – connector
Disconnect the instrument cluster power supply connector (Fig. 7.57).
Installation
Installation is carried out in the reverse order of removal.
Connect the battery without programming.
Perform the necessary configuration.
Disconnect the battery.
Note: This operation automatically registers the instrument cluster configurations.
Connect the battery and perform the necessary programming.
Tighten the battery cover mounting bolts to the specified torque of 4 N·m.