
Devices Dir. 1306-02 and Dir. 1305 are used respectively to hold the rack and loosen the axial ball joints.
To avoid damage to the drive gear and rack when replacing the steering rod axial joint, it is necessary to hold the rack with tool Dir. 1306-02.
Removal
- Disconnect the cable from the negative terminal of the battery.
- Puller T. Av. 476 disconnect the tie rod end ball joint from the steering knuckle.
- Loosen the tie rod end adjusting clutch bolt and unscrew the tie rod end, holding the tie rod axial joint from turning with a wrench installed on the tie rod hexagon.
- To pre-adjust the toe-in of the front wheels when unscrewing the tie rod end, count the number of threads onto which the end is screwed.
- Remove the plastic clamp securing the corrugated protective cover of the rack and remove the cover.
- Install fixture Dir. 1306-02 onto the rack teeth on the hydraulic distributor side and tighten the two bolts.
- Turn the wheels like this. to enter fixture Dir. 1306-02 in crankcase (a, fig. 9.16) steering mechanism.
- In this position, use the device Dir. 1305 loosen the axial ball joint (pic. 9.17).
- Remove the steering rod axle joint.
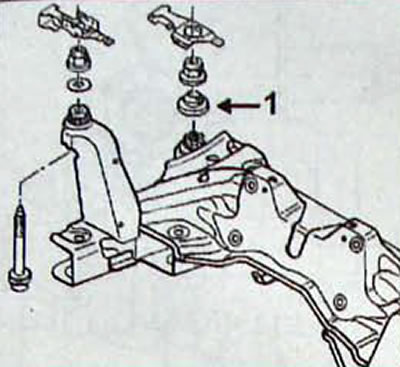
Pic. 9.14. Washer location (1) for centering the sub-frame relative to the body
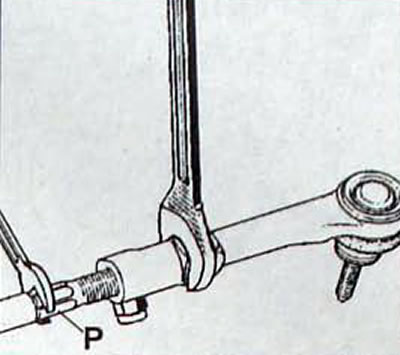
Pic. 9.15. Unscrewing the tie rod end and placing (R) installing a key to keep the axial joint from turning
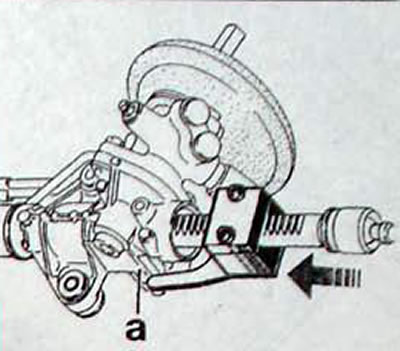
Pic. 9.16. Introduction of fixture Dir. 1306-02 crankcase (A) steering gear
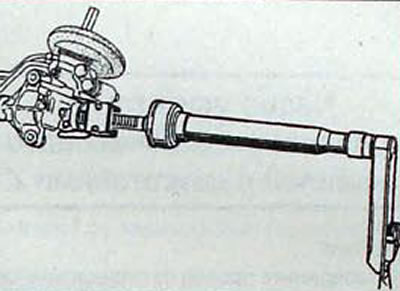
Pic. 9.17. Using the Dir. 1305 for loosening the axial ball tie rod
Installation
Notes
- Before installing new steering rods, use an M12x100 tap to clean the threaded holes at the ends of the steering rack to completely remove the LOCTITE adhesive sealant remaining from the factory assembly and to avoid jamming of the threaded parts during installation.
- Whenever you remove the axle joint, be sure to replace the thrust washers and lock washers.
- Install on the rack (3, fig. 9.18) thrust washer with lock washer (2)» new axial ball joint (1), applied a small amount of LOCTITE FRENBLOC adhesive-sealant to the threaded part.
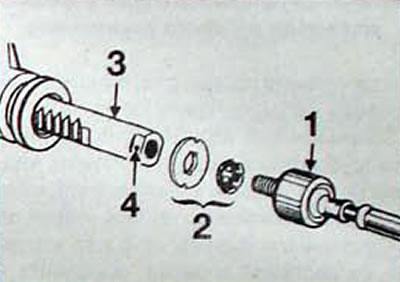
Pic. 9.18. Installation of tie rod: 1 - axial ball joint; 2 - thrust washer with lock washer; 3 - toothed rack; 4 - flat
- Before tightening the axial ball joint using tool Dir. 1305 check that the lock washer petals are positioned correctly on the rack flats.
- Tighten the axial ball joint to the required torque.
- Set the steering gear to the midpoint position to equalize the air volumes in the bellows before attaching them.
- Screw the tie rod end the same number of turns as when removing it.
- Check and adjust the toe-in of the front wheels, then tighten the tie rod end adjusting clutch bolt to the required torque.