
Removing
Note. Be sure to replace the alternator pulley with a breakaway clutch with the same pulley.
Remove the generator.
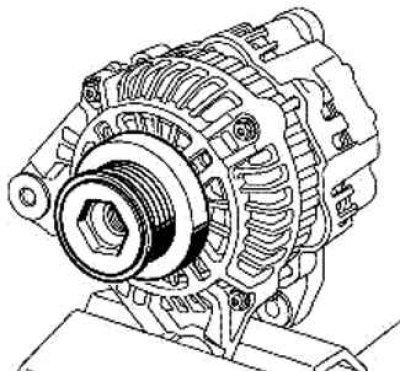
Pic. 2.266. Fixing the generator in a vise
Fix the generator in a vise (pic. 2.266).
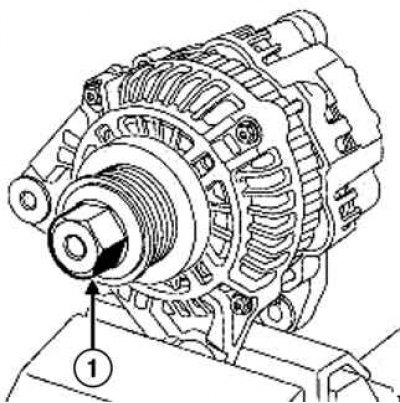
Pic. 2.267. Installation on a hex head pulley: 1 - hex head
Install the hex head from the alternator pulley removal and installation tool kit into the pulley (Mot. 1732) (pic. 2.267).
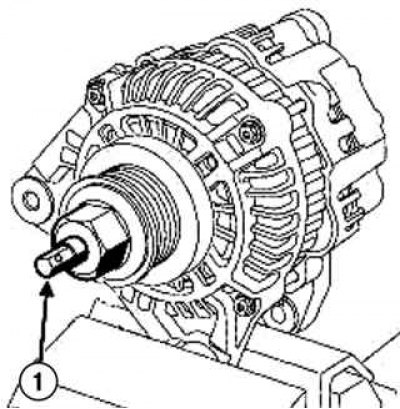
Pic. 2.268. Tip installation: 1 - tip
Install the tip that matches the shape of the hole in the generator rotor from the tool kit for removing and installing the generator pulley (Mot. 1732) in hex head (pic. 2.268).
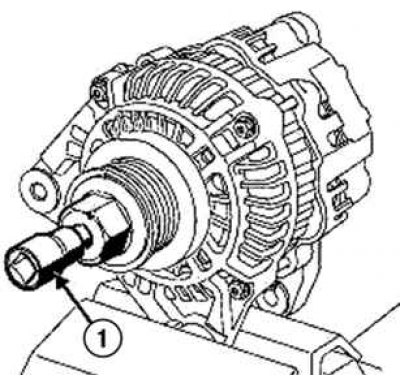
Pic. 2.269. Installing the crank: 1 - collar
Install the knob on the tip (pic. 2.269).

Pic. 2.270. Loosening the alternator pulley: 1 - hex head; 2 - flat key; 3 - a pulley with an opening clutch; 4 - ratchet
Holding the hex head with a flat wrench, unscrew the pulley with the release clutch with a ratchet wrench (turning the ratchet counterclockwise) (pic. 2.270).
Installation
Screw the pulley with the disconnecting clutch onto the generator rotor.
Install:
- hexagonal bushing in the generator;
- a tip corresponding to the shape of the generator rotor hole;
- collar on the tip.
Torque tighten (80 Nm) a pulley with a disconnecting clutch of the generator using a torque wrench.
Install the generator on the car.