



Contents: Removal 🠛 Installation 🠛
Inner joint of the left drive shaft - gearboxes RK and JC
Removal
Notes
- The protective cover of the left drive shaft together with the bearing is replaced using a press.
- Do not use solvents to clean the hinge parts.
- Using special pliers, remove the retaining ring securing the three-axis support of the tripod CV joint rollers.
- Using a press and a special device, push the drive shaft out of the three-axis support of the tripod CV joint rollers (Fig. 8.18).
- Using a press and a special tool, push the drive shaft out of the bearing and protective cover (fig. 8.26).
Installation
- Clean and lubricate the drive shaft and the constant velocity joint.
- Using a tubular mandrel of the appropriate diameter and length L or a device, install the protective cover with the bearing on the drive shaft. When installing the protective cover with the bearing on the drive shaft for the RK gearbox, it is necessary to use the T. Av. 1244 device with the size L = 99.5 mm. and for the JC gearbox - the T. Av. 944 device with the size L = 123.2 mm (fig. 8.27). This dimension is achieved using the T. Av. 1244 or T. Av. 944 device, when the end of the device is flush with the end of the shaft. To avoid damaging the bearing with a protective cover, which can cause oil leakage, do not use a hammer to install the bearing, but use a press that provides a gradual increase in pressure.
- Using a tubular mandrel of the appropriate diameter, install the three-axis roller support on the drive shaft.
- Secure the tripod CV joint roller support with a new retaining ring.
- Install the drive shaft.
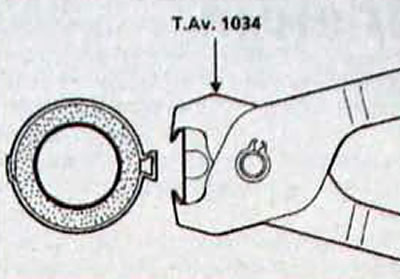
Fig. 8.25. Using T. Av. 1034 pliers to tighten the protective cover fastening clamp
[Source link is located on www.RENAULTBOOK.ru]
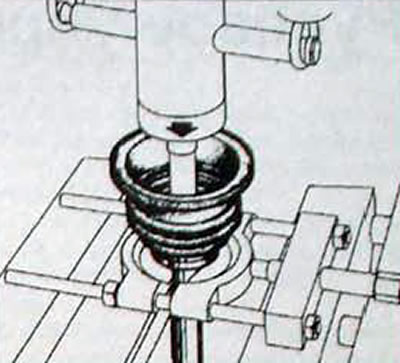
Fig. 8.26. Using a press to press the drive shaft out of the bearing and protective cover
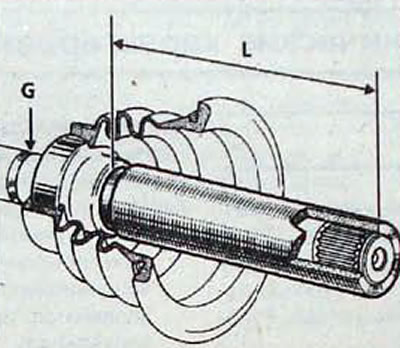
Fig. 8.27. Distance (L) for installing the elastic corrugated protective cover assembled with the bearing on the left drive shaft: L = 123.2 mm for JC5 gearbox; L = 99.5 mm for gearbox RK1
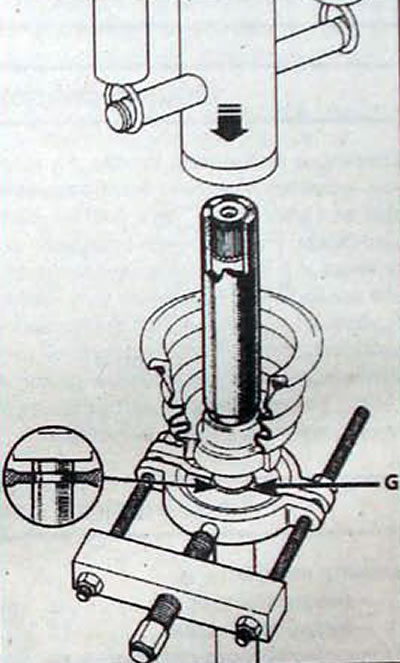
Fig. 8.28. Installing the elastic corrugated protective cover assembled with the bearing on the left drive shaft: G - drive shaft groove