
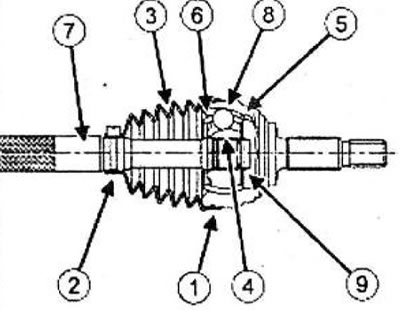
1 - Large clamp
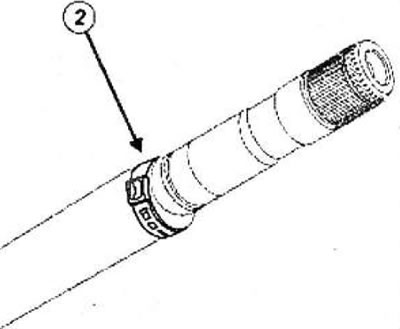
2 - Small clamp
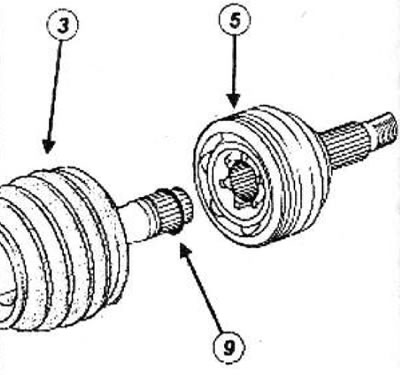
3 - Protective cover
4 - clip
5 - Hinge body
6 - Separators
7 - Wheel drive shaft
8 - Balls
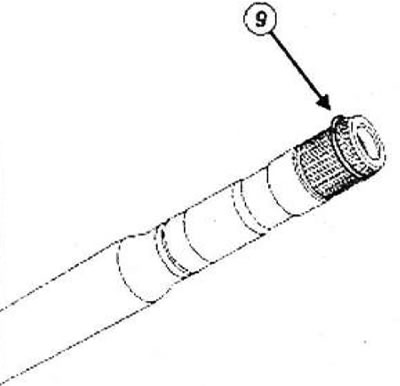
9 - Clamp
Removing
Remove the wheel drive shafts from the desired side.
Cut big (1) and small (2) clamps with wire cutters or a metal saw, being careful not to damage the joint housing and drive shaft.
 |  |
Remove the hinge housing using the tool (11) and puller (Emb. 880) (12).
Remove:
- retaining ring (9),
- drive shaft protective cover (3).
Installation
Attention! Do not use solvents to clean hinge parts.
Note: Strictly adhere to the prescribed lubricant volume.
Parts that must be replaced:
- protective cover of the drive shaft of the front wheel, from the side of the wheel,
- a lock ring of a laying of a forward power shaft from outside a wheel.
Be sure to replace:
- small clamp,
- large clamp.
Using a pressure cleaner, clean the drive shaft and joint housing.
Put on a small diameter collar (2) to the drive shaft.
To facilitate installation of the protective boot, lightly lubricate the drive shaft with the lubricant supplied with the boot
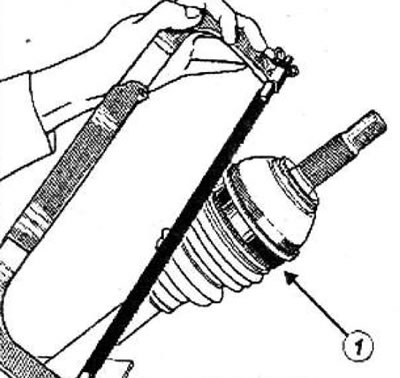
Install protective cover (3) to the drive shaft.
Install:
- new retaining ring (9),
- hinge body (5) on the drive shaft, tapping the hinge body with a brass drift so that the retaining ring snaps into place behind the cage.
Fill boot and hinge housing with grease in equal quantities.
Position the edges of the boot in the grooves of the hinge housing and the wheel drive shaft.
Note: Check that the sealing lip of the protective boot is correctly positioned in the groove of the drive shaft.
Rock the CV joint by hand to check that the boot bands are properly installed.
Insert a rounded rod between the boot and hinge body to adjust the amount of air inside the hinge.
Install:
- a small clamp on the protective cover of the inner joint of the drive shaft,
- a large tie-down collar on the protective cover of the inner joint of the drive shaft.
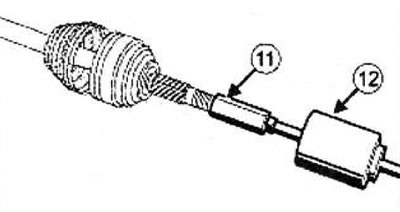
Clip-on clamps CAILLEAU

Tighten a small clamp (13) and a big collar (14) until it clicks with the tool.
Clamps OETlKER
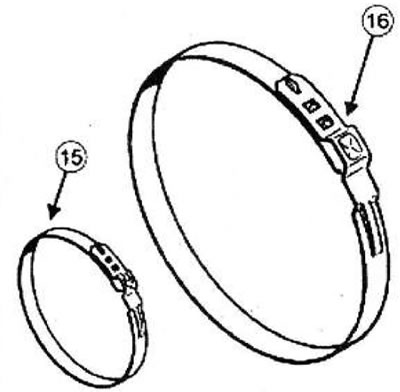
Tighten a small clamp (15) and a big collar (16) using the device.
Position 1 - Preswaging and Clamp Installation
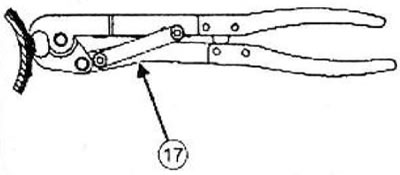
Place a spacer (17) into the bottom notch and squeeze the pliers until it stops. The pre-swaged collar can slide over the protective boot. Position it in the right place.
Position 2 - Compression
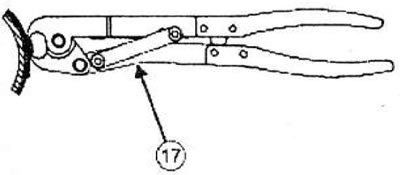
Place a spacer (17) into the top notch and squeeze the pliers until it stops.
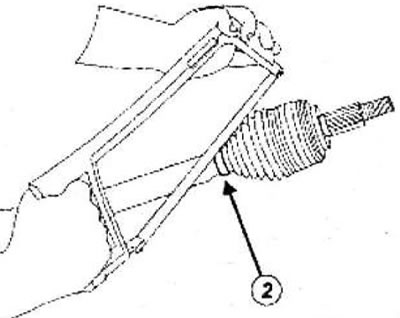
Install the appropriate wheel drive shaft.