English Русский
Български
Беларускі
Український
Српски
Hrvatski
Română
Polski
Slovenský
Magyar
Bookmark Contacts Articles Sitemap
Company vehicles Peugeot Company vehicles Opel Company vehicles Skoda Company vehicles Land Rover Company vehicles Mitsubishi Company vehicles Volkswagen Company vehicles Honda
RenaultBook.ru


Duster   Fluence   Kangoo   Laguna   Logan   Megane   Sandero   Scenic   Symbol   Clio   Other
Duster 1 (2009-2017)

Protective cover of the drive shaft of the right front wheel on the gearbox side (Renault Duster 1)

  • Main
  • Duster
  • Duster 1 (2009-2017)
  • Transmission
  • Drive shafts
  • Protective cover of the drive shaft of the right front wheel on the gearbox side
0
Contents: Removal 🠛 Installation 🠛
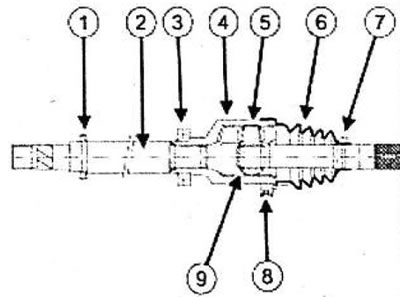
1 - Mud-deflecting ring

1 - Mud-deflecting ring
2 - Wheel drive shaft
3 - Intermediate shaft bearing
4 - Hinge housing
5 - Three-spined
6 - Protective cover
7 - Small tension clamp
8 - Large tension clamp
9 - Tightening clamp


Removal


Remove the right front wheel drive shaft.

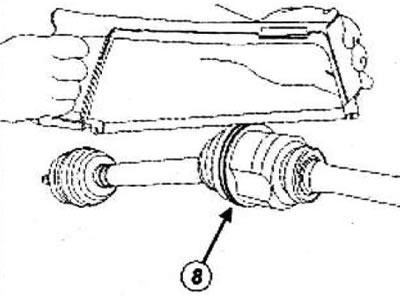
Cut the large (8) and small (7) tie rods using nippers or a metal saw, being careful not to damage the hinge housing and drive shaft.
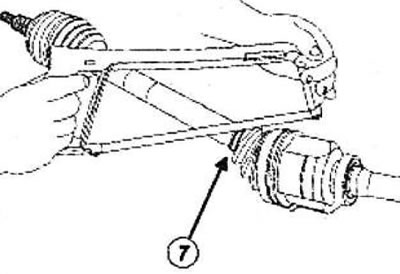
Cut the large (8) and small (7) tie rods using nippers or a metal saw, being careful not to damage…

Slide the cover to release the hinge housing.


Install the hinge housing (3).
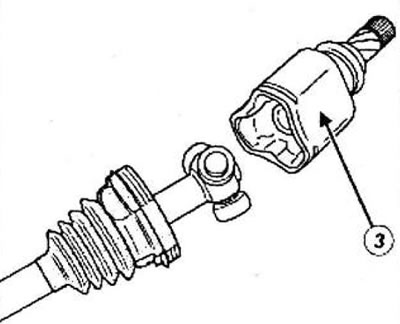
Install the hinge housing (3).


Note:
  • The hinge housing does not have a locking latch, so it can be removed without effort.
  • Do not remove the rollers from the journals, as the rollers and needles are worn to each other and should not be changed places.


Remove as much grease as possible from the hinge housing.

Note: Never use solvent to remove grease.


Remove the retaining ring (9) using special pliers (10).
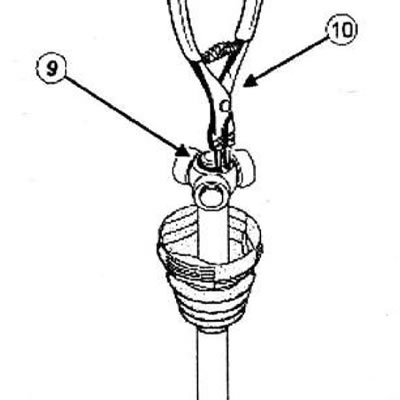
Remove the retaining ring (9) using special pliers (10).


Using a press (5), press the three-stud, using the puller as a stop.
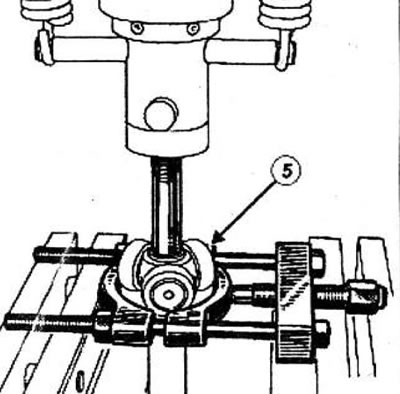
Using a press (5), press the three-stud, using the puller as a stop.


Note: Mark the position of the tri-spike before removing.


Remove the protective cover from the drive shaft.

Installation


Parts that must be replaced:
  • protective cover of the drive shaft of the right front wheel, on the gearbox side,
  • front drive shaft gasket retaining ring on gearbox side.

Be sure to replace:
  • large clamp,
  • small clamp.

Use a pressure cleaner to clean the drive shaft, tricycle and joint housing.

Place the small diameter clamp (7) onto the drive shaft.
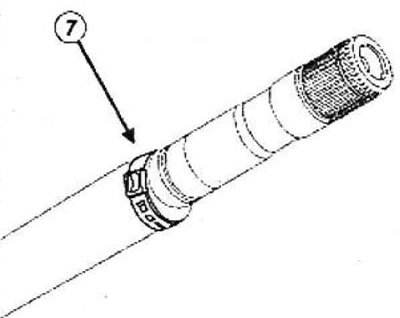
Place the small diameter clamp (7) onto the drive shaft.


To facilitate installation of the protective cover, lightly lubricate the drive shaft with the grease supplied with the cover.

Install the protective cover (6) on the drive shaft.
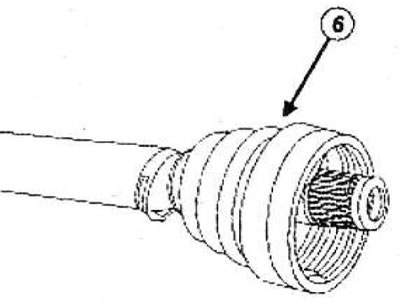
Install the protective cover (6) on the drive shaft.


Insert the sealing lip of the protective boot into the groove of the drive shaft.

Insert the three-spike (5), maintaining the position marked during removal.
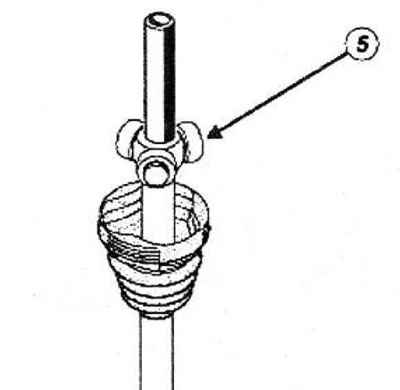


Insert the three-spike (5), maintaining the position marked during removal.


Install the new snap ring using snap ring pliers.

Fill the boot and the hinge housing equally with grease.

[Article reprinted from the website: www.RENAULTBOOK.ru]

Install the hinge housing onto the three-pin.

Insert the sealing lip of the protective boot into the groove of the hinge housing.

Note: Check that the sealing lip of the protective boot is correctly positioned in the groove of the drive shaft.


Install:
  • small clamping clamp for the protective cover of the inner joint of the drive shaft,
  • large clamp for the protective cover of the inner joint of the drive shaft.

CAILLEAU snap-on clamps
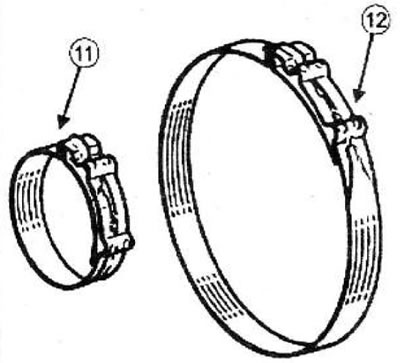


CAILLEAU snap-on clamps


Tighten the small clamp (11) and the large clamp (12) until they click using the tool.

OETiKER Clamps
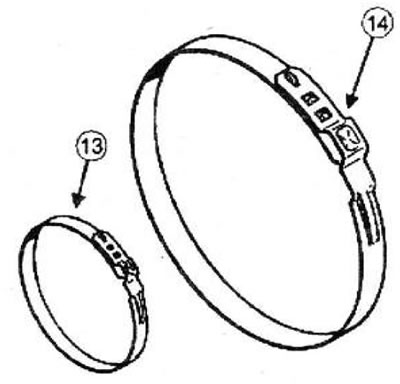


OETiKER Clamps


Tighten the small clamp (13) and the large clamp (14) using the tool.


Position 1 - Pre-compression and installation of the clamp
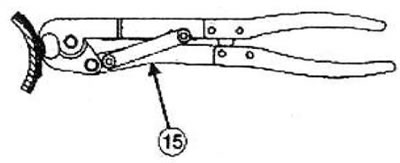


Position 1 - Pre-compression and installation of the clamp


Place the spacer (15) in the lower cutout and squeeze the pliers until they stop. The pre-crimped clamp can slide along the protective cover. Position it in the desired location.

Position 2 - Compression
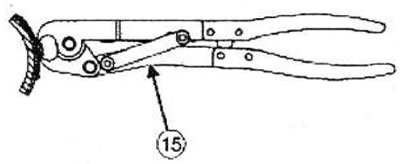


Position 2 - Compression


Place the spacer (15) into the upper notch and squeeze the pliers until they stop.

Install the right front wheel drive shaft.
This article is available on: russian, bulgarian, belarusian, ukrainian, serbian, croatian, romanian, polish, slovak, hungarian
Article has been reviewed by editor: Fedoseev Denis
Share with friends:
Previous
Duster 1: Drive shafts
Next

Front wheel drive shaft protective cover, wheel side
Intermediate shaft bearing
Right front wheel drive shaft
Left front wheel drive shaft
Protective cover for front wheel drive shaft on gearbox side
Other articles on other Renault models

➽ Protective cover for the outer joint of the front wheel drive… Renault Laguna 2 (2001-2007)
➽ Protective cover for outer joint of front wheel drive shaft… Renault Megan 2 (2002-2009, petrol)
➽ Front Wheel Drive Shaft Outer Joint Cover Renault Fluence 1 (2009-2020, petrol)
➽ Replacing the left front drive shaft boot on the gearbox side Renault Logan 2 (2012-2020)
➽ Checking the front wheel drive protective covers Renault Sandero 1 (2007-2012, petrol)
Link to this article in different formats
Reviews and comments of visitors
No comments yet


Add two numbers 41 + 16


Duster 1 (2009-2017) 
  • User manual
  • Governing bodies
  • Car driving
  • Devices for comfort
  • Car care
  • Practical Tips
  • Power unit
  • Petrol engine (K4M)
  • Diesel engine (K9K)
  • Power system (K4M)
  • Power system (K9K)
  • Fuel system
  • Petrol injection system (K4M)
  • Diesel injection system (K9K)
  • Starting and ignition system
  • Cooling system
  • Exhaust system
  • Transmission
  • Clutch
  • Manual gearbox
  • Drive shafts
  • Chassis, running gear
  • Front bearing elements
  • Rear load-bearing elements
  • Steering
  • Control devices
  • Body and interior
  • Exterior (external elements)
  • Interior (internal elements)
  • Interior trim
  • Interior heating
  • Air conditioning
  • Electrical equipment
  • Equipment and devices
  • Headlights and lighting
  • Governing bodies
  • Wipers/washers
  • Audio system
  • Electrical circuits
RenaultBook.ru © 2018–2026 | Mobile version | News and articles | Sitemap: EN BG BY UA RS HR RO PL SK HU | Administration | Site search | Bookmark
Duster 1 (2009-2017) | Fluence 1 (2009-2020, petrol) | Kangoo 1 (1997-2007) | Laguna 2 (2001-2007) | Logan 1 (2004-2012, petrol) | Logan 2 (2012-2020) | Megane 1 (1995-2002) | Megan 2 (2002-2009, petrol) | Sandero 1 (2007-2012, petrol) | Scenic 1 (1996-2003) | Symbol 1 (1999-2008, petrol) | Symbol 2 (2008-2013, petrol) | Renault 19 (1988-1996) | Espace I and II (1984-1996) | Espace III (1996-2002) | Clio 1 (1990-1998) |
We want your visit to be comfortable 😌 and use cookies 🍪 to do so.